Opening a [Gruen] Wristwatch Case and Removing the Movement [safely-ish]
By Mike Barnett
This is a tutorial on how to open a snap-back vintage watch.
While portions of the tutorial are Gruen specific, the majority of the tutorial is applicable to just about any vintage watch with a snap back style case.
There are many times that you may want to open your Gruen watch's case.
There are typically two things you are wishing to collect:
- All information stamped in interior of the back of the case
- All text that is stamped on the movement including the caliber which is often hidden
The goal for collecting this data is usually to identify the model name of your watch and collect information to date your watch. The date is the first piece of data to determine and from that you can deduce the model name.
See the page ID your Gruen! On the site www.GruenWristwatches.com to learn more about what to do with the data you collect after removing the movement from the case. That tutorial will tell you to use the Style Number to look up the date, and use the Serial Number on the movement also as a means to find the date.
Of course, when enlisting the help of experts in identifying your watch, one of the first things you’ll be asked for is all of this data contained inside of your watch.
Once you have it open and the movement removed, write down everything you see that was stamped onto the movement or info the case. The tiny little notes in the back of the case that are handwritten are not important for this exercise.
Those notes were left by previous watch repair people. There’s a tradition in watch repair that each repairer adds another word to the growing riddle the first repairer started by entering the first 3 words, so begin working on figuring out the right word to add and encrypt using the key as the those before you.
Of the data you will be collecting, the specific pieces of data you are after are:
- The Style Number, caliber number, and serial number written in the case back. All of these help in their own way determine the date and model name.
- The serial number written on the movement. This is used to determine the date that the specific movement you have in your hands was made.
- The caliber stamped on the movement. The caliber information is used for many different activities from determining the oldest the watch could be to what other Gruen movements have parts that fit.
So far you’ve learned what you are seeking but have
received no instructions.
Let’s pause for one moment…..
This is a good time for me to say something along
the lines of
I take no responsibility in any damage you may do to your watch.
The
techniques presented here are meant to be as conservative as possible. I am not
a certified watchmaker and may be giving you horrible advice. If you follow my
steps, very carefully, and your watch breaks, then, …. you’ve just broken your watch.
Hopefully
some horrible humor to what would not at all be a humorous situation if it were
Grandpa’s 90 year old watch that you
just broke will stop you from trying
if you think you may not have the hands it takes. Is there any humor in the
situation? No, so don’t contact me and
tell me you broke Grandpa’s watch because I will laugh at you.
If at any point you do not feel comfortable, STOP.
If at any point you are damaging your watch, STOP.
If at any point someone is there watching you and tells you that you're doing a shitty job, STOP. They are more than likely to be right than you are.
Are
we clear on this topic? Break it in half and you get to keep both halves.
You'll find that the steps become more
complex as you follow the tutorial so read it through before starting to make sure you can make it all the way.
The first thing I would like to say is that you are not trying to pry the back of the case off. The type of cases you are trying to open are called "snap back" cases which means the back snaps on and the back snaps off. These things pop open in many instances once you get them started.
Step 1 - Tools Required
The best case scenario is that you have these three tools
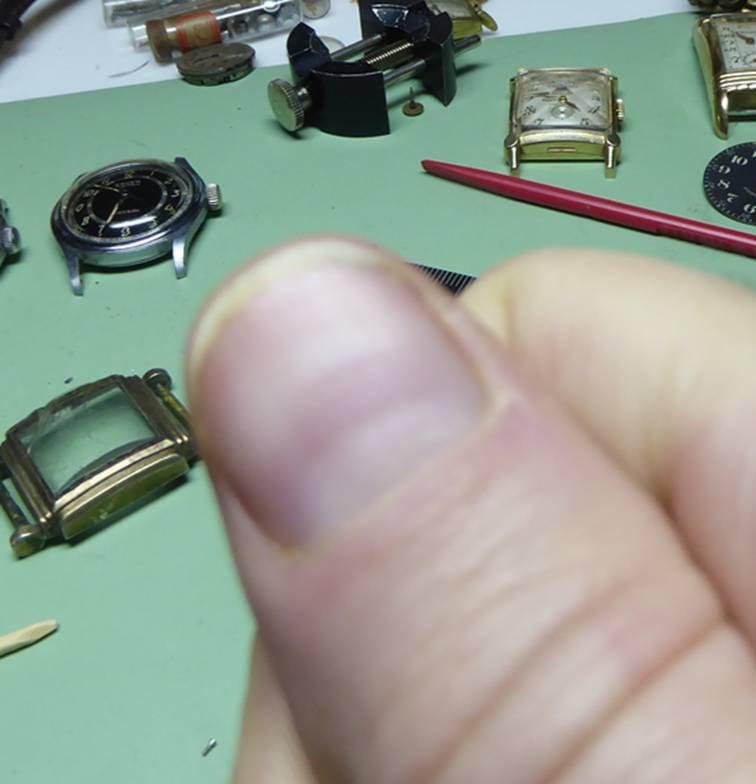
- A thumbnail
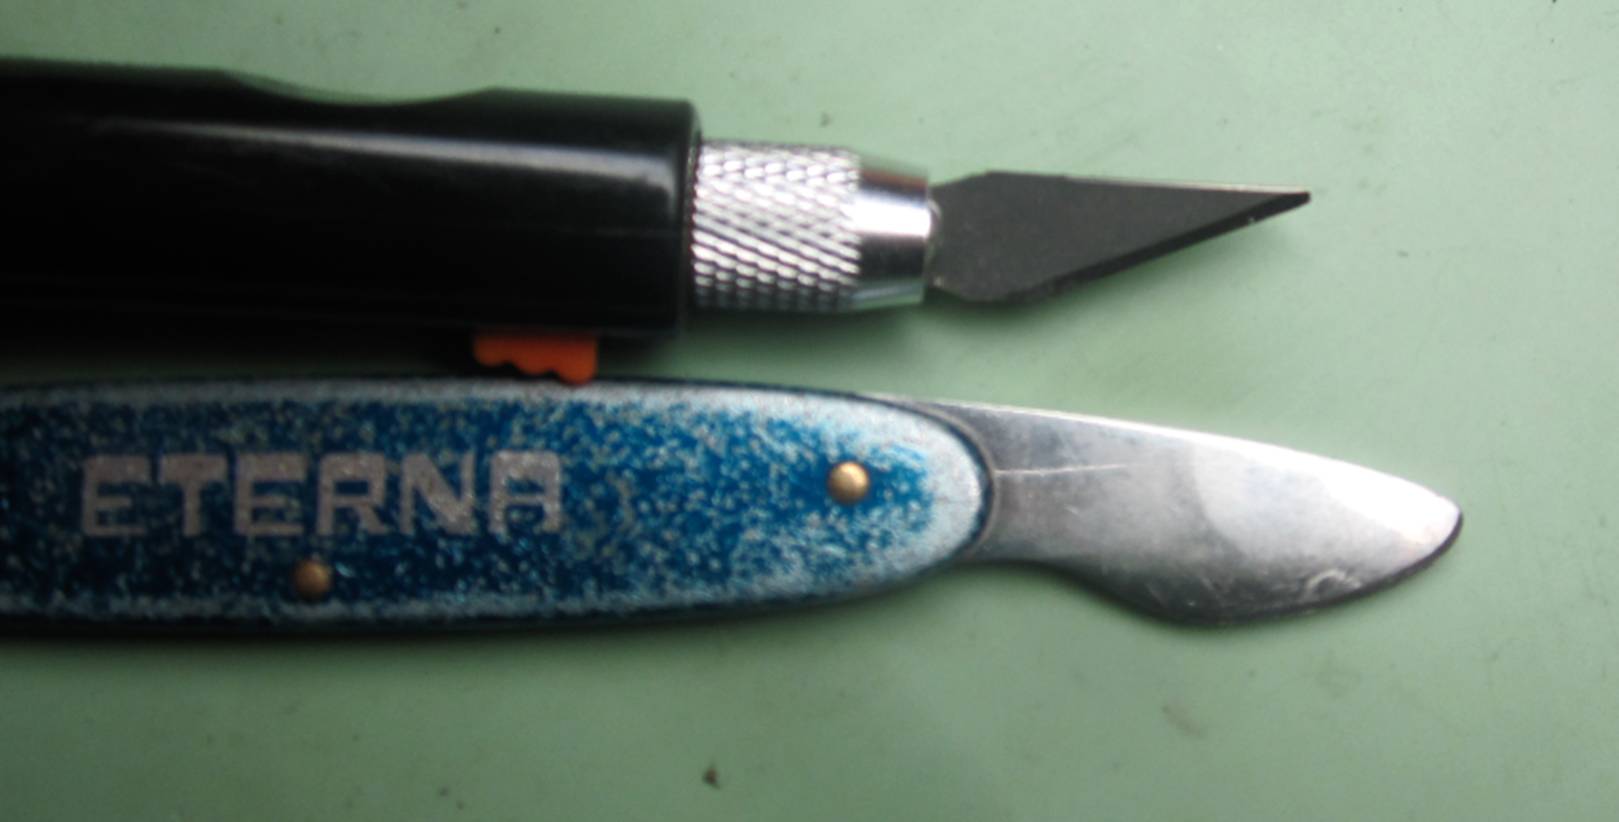
- A case opener or similar knife
- An Exacto® knife or another very thin blade like a razor blade
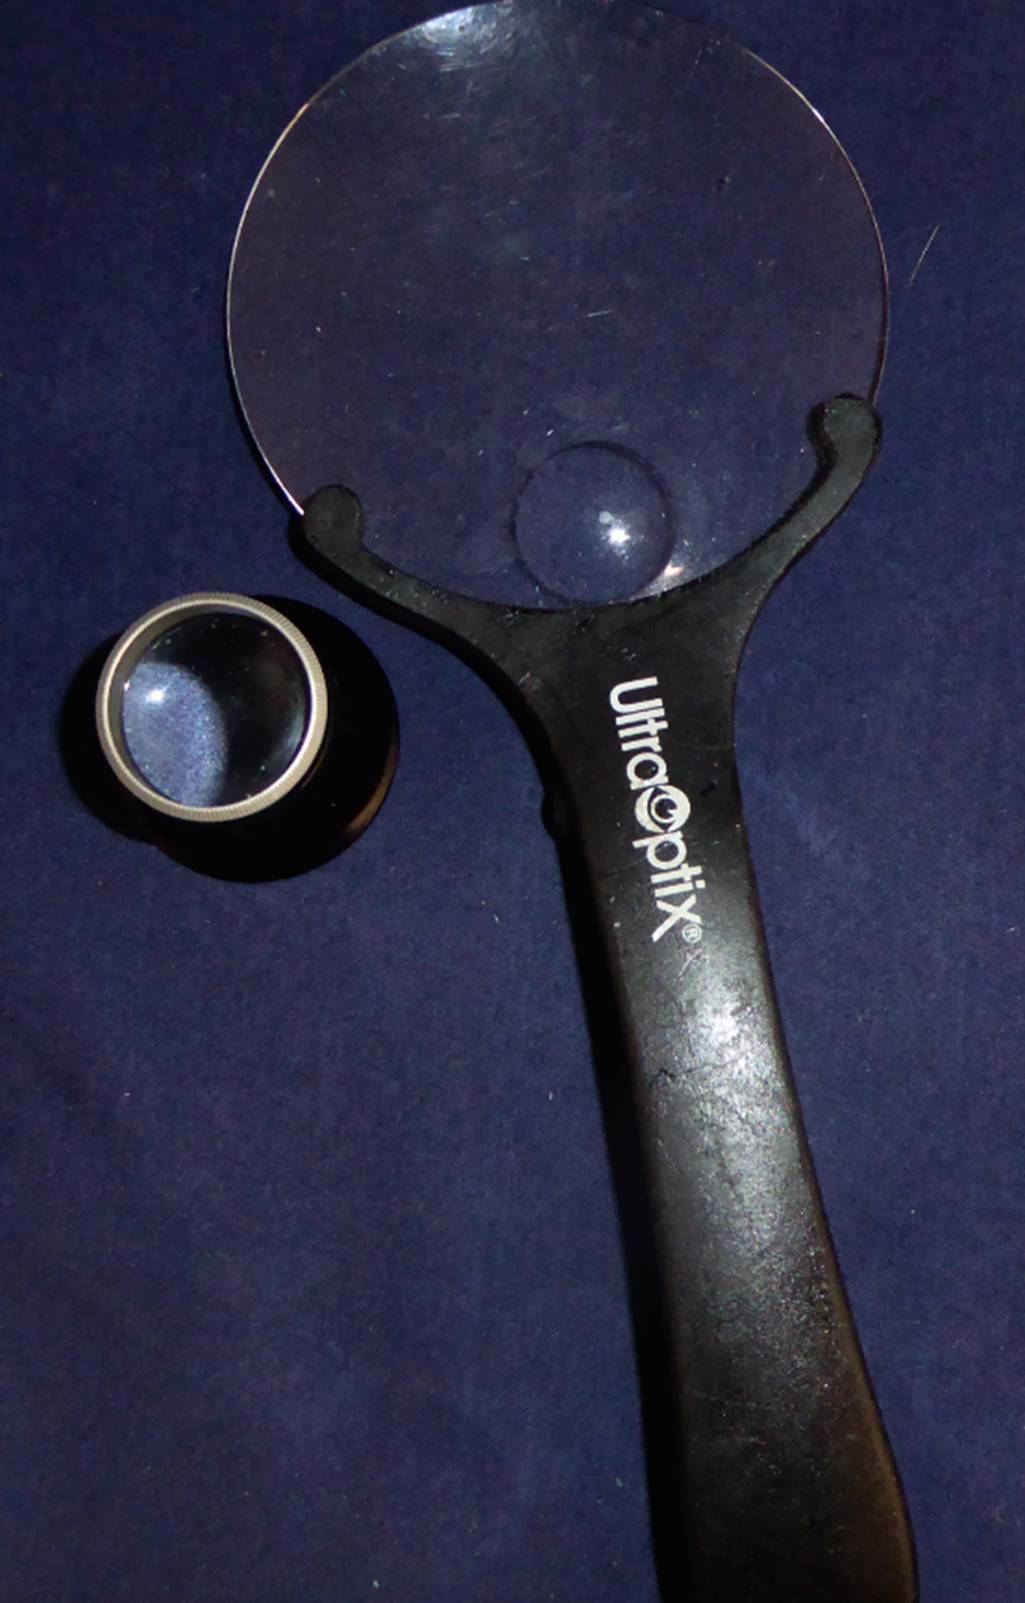
- A magnifying lass or loupe
- Good lighting
A thumbnail? The older cases in particular close well-enough, but not so tight that you can’t open them quite easily if you try. your thumbnail to open the case before a case knife

The
chances of you owning a case knife are low, but
if ya got one, use it! If not, see if you can find an old knife that
has a
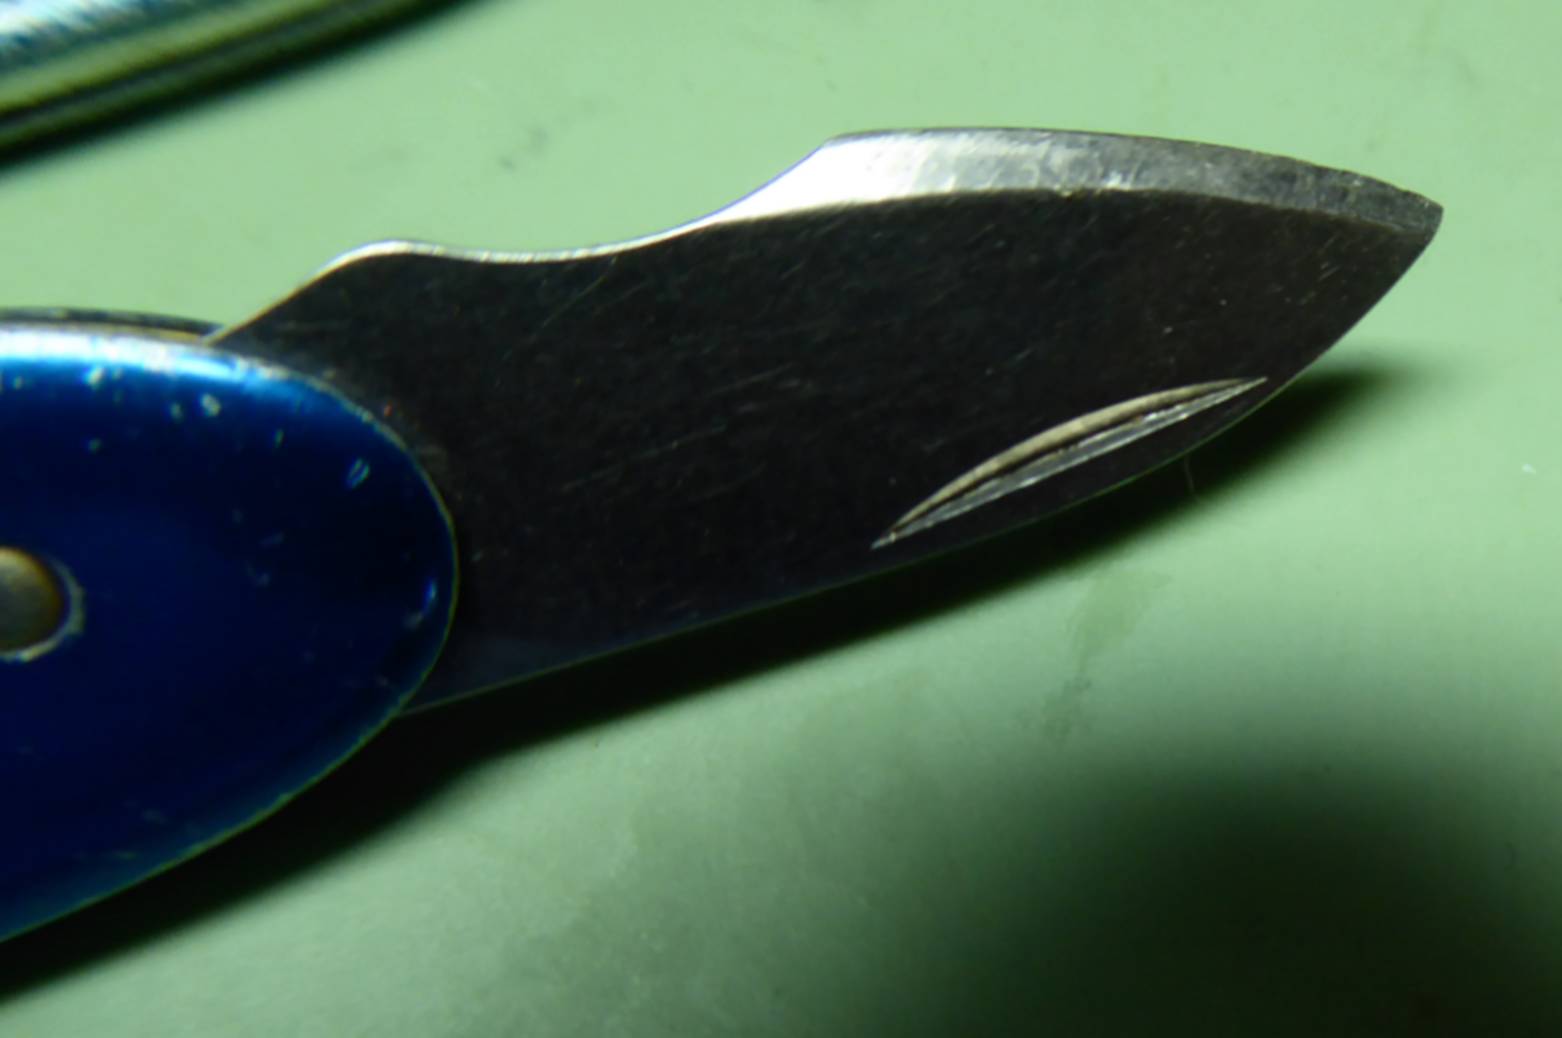
somewhat blunt edge and quickly tapers up to a thicker part of
the
blade. You don't want something that stays thin all the way through the
blade.
It should get fatter quickly as you get away from the edge. Check out
the picture of the case knife and you'll understand what kind of blade
to look for.
I'm sure you can come up with an Exacto® or razor blade. If not, don't do this. If you want to read on as to how it's used, go ahead so that you’ll understand why it’s important. Using a thin blade to remove the movement is something nearly all texts talk about but many people don't know it, don't remember it, or simply don't want to take the extra effort.
It would be nice to have your magnifying glass setup so that you can see what you are doing magnified at all times. You should at least have one so that you can stop, take a close-up look to see exactly what you are working on, and then move on. Stamp, coin, other tiny thing collectors sometimes have one on a stand so that you can look down and see the object being worked on. You may be able to rig up something like this with a little cleverness.
Step 2 - Go Very Slowly
You're not in a competition.
Move slowly and deliberately. Don't just screw around with stuff willy-nilly. If
it takes you 45 minutes of concentration, well then it takes you 45 minutes
which is probably faster than going to your watchmaker that will bail you out
if you get in trouble.
Go slowly, and be careful. Watchmakers
have patience, pretend you do if you don't.
If you get stuck despite trying the different
techniques and a few you made up, stop, set down your watch, come back when
you've given it some time to do that subconscious learning thing and also let
your patience return.
If you can't, you haven't failed, the watch won and was difficult beyond that of your skill level. Don't feel bad, it's common. Go get some help and see if you can watch how your watchmaker does it.
Step 3 - Closely examine your watch
Remove
the strap from the watch. If you utilize the
spring bars as a leverage point, you risk bending them. What happens if
you
bend them? I'll tell you from experience that it shortens the spring
bars and
I've had more than one watch go flying from my wrist straight to the
floor
because of a bent springbar. You won't see it coming. You can use a
knife to remove and
insert the spring bars. It is possible to continue without removing the
straps should they be too difficult to remove. I've at least warned you.
You need ideally a loupe. Minimum is a good magnifying glass. Don't have one? Then you're done trying to open your watch. Come back when you get one.
The higher magnifying power the better. You'll be looking for tiny little tell-tell signs.
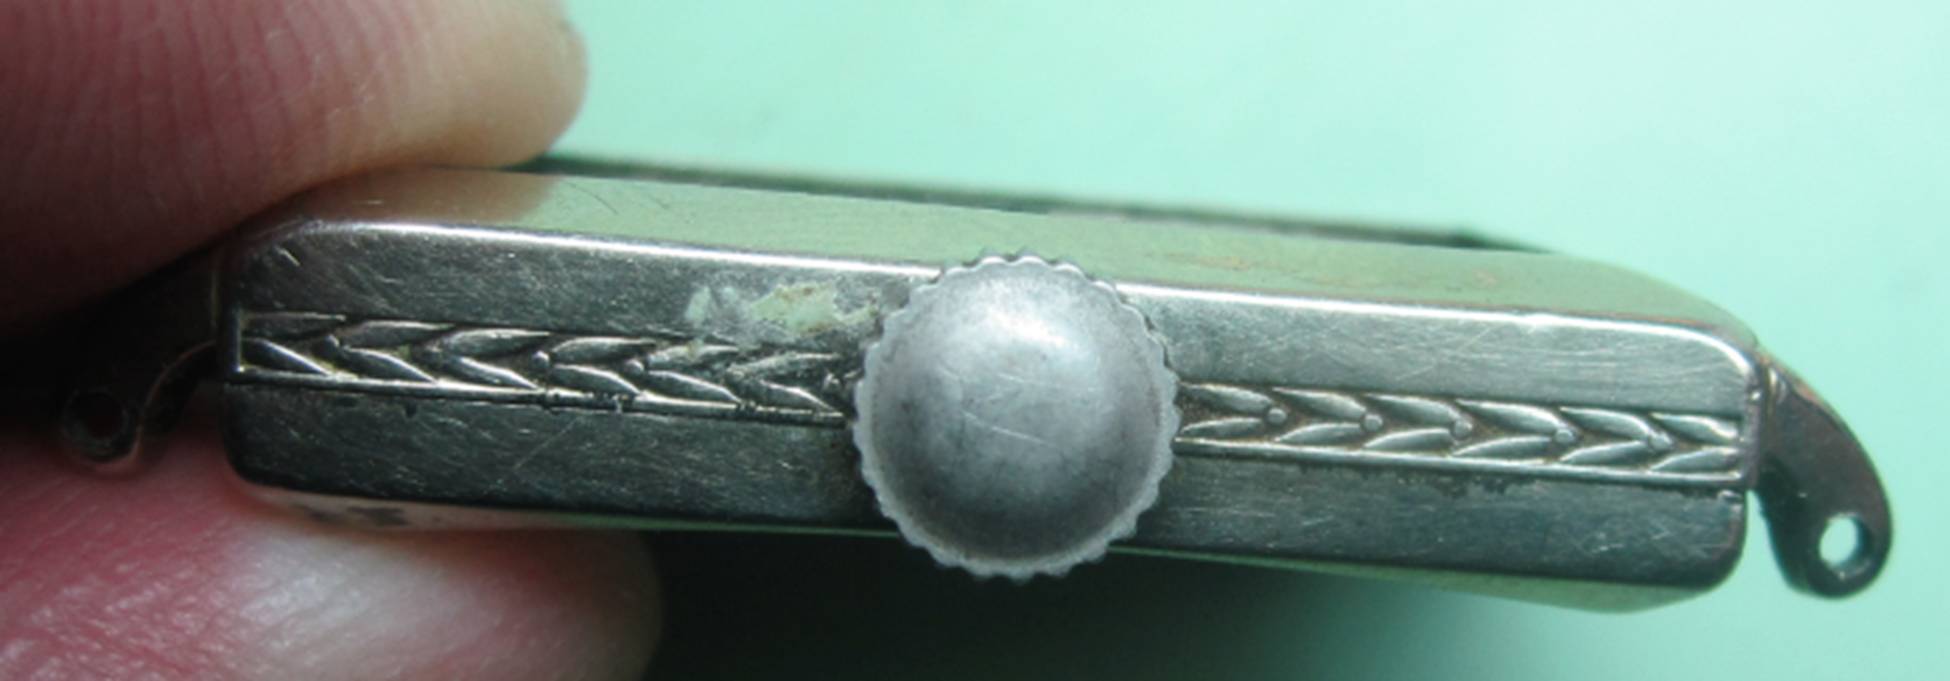
Oh, one term that’s important… bezel. It’s the top of the case.
Take a tour around your entire case. Start at one point and follow the seam where the back and the bezel meet all the way around. You'll notice that the bezel and back aren't perfectly together all the way around. In some places there are "cracks" between the two. Those are what you're looking for, even tiny ones.
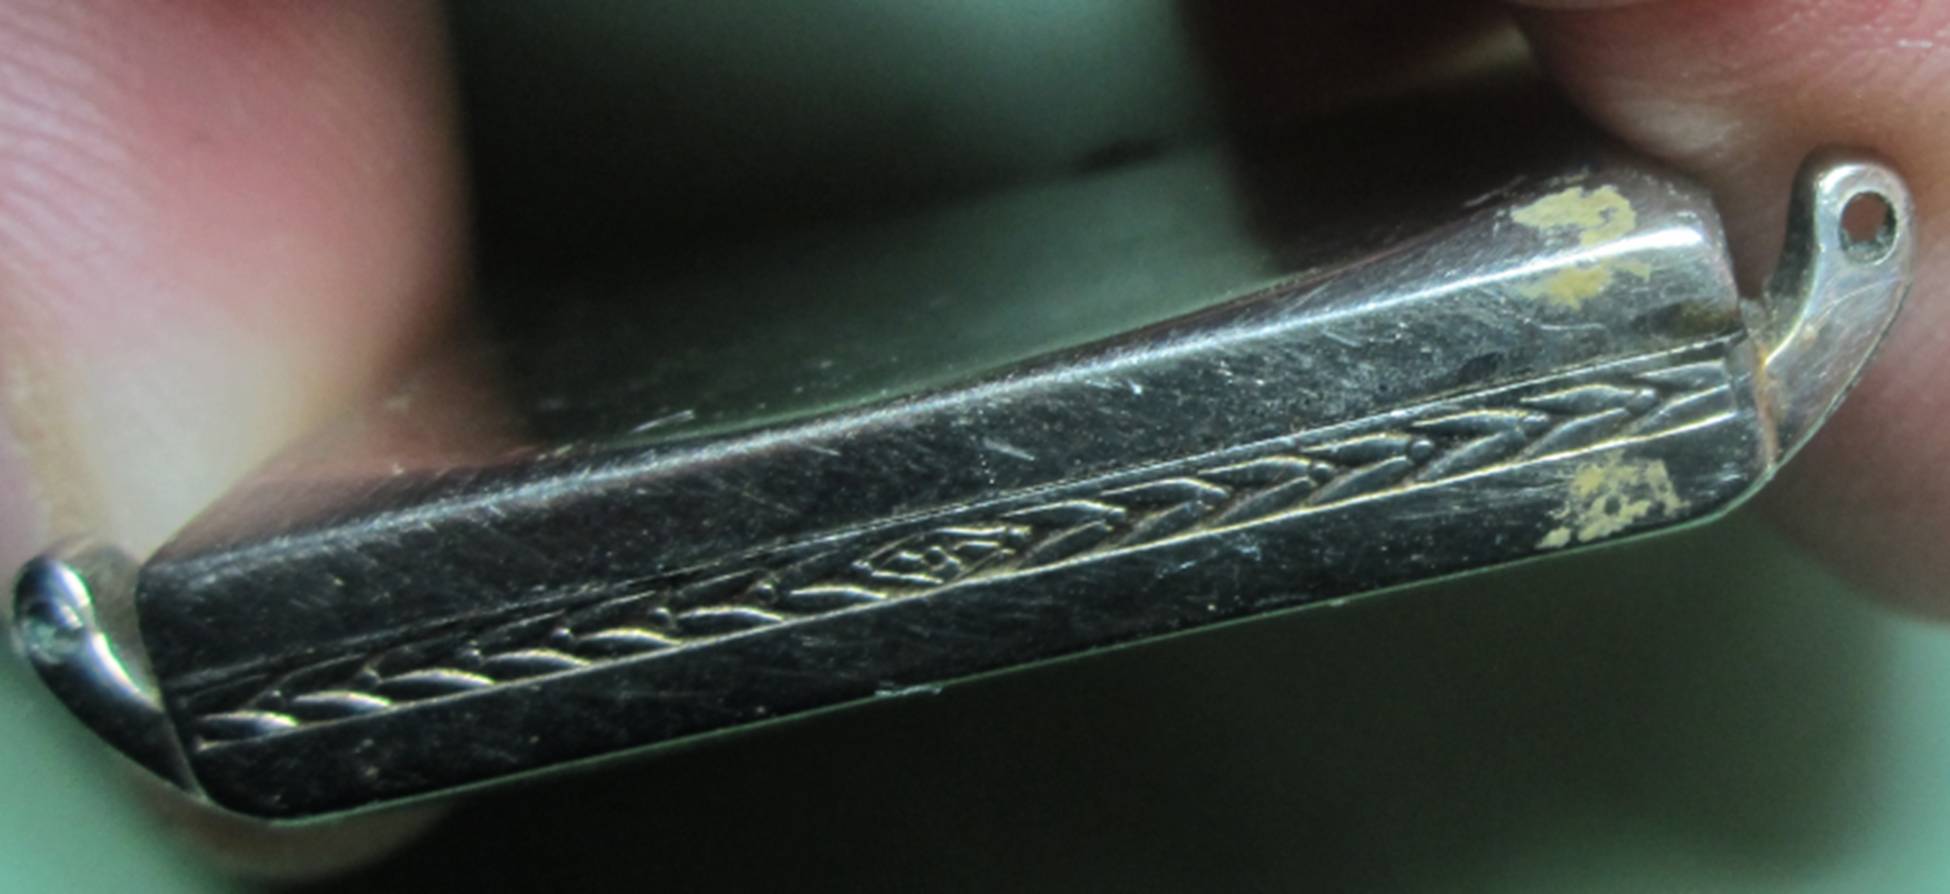
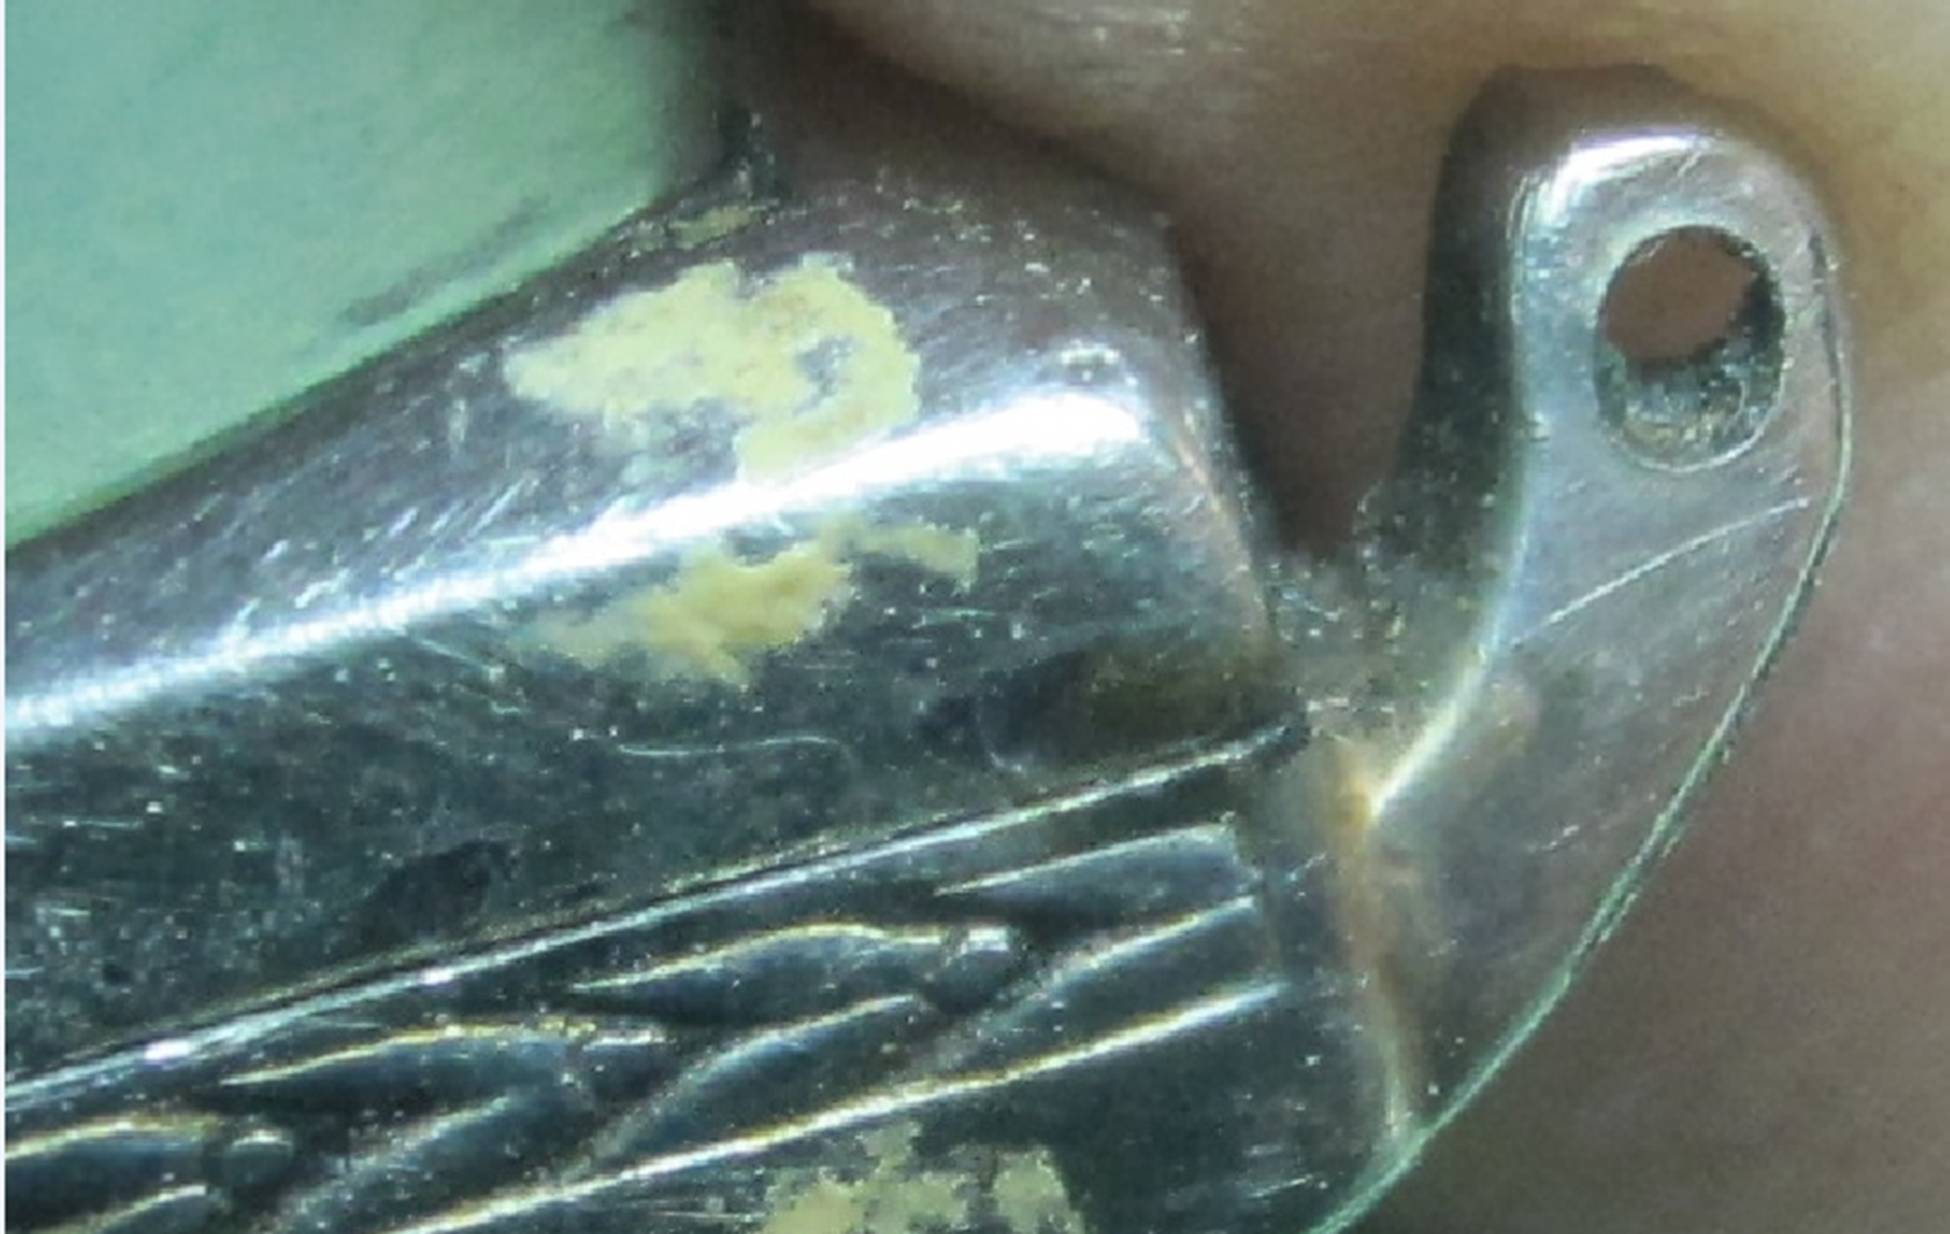
Look at the corners in particular. What you are looking for is what location other people have used to open the watch in the past. A corner is usually a good place that watchmakers head towards. Follow their previous path as it may be a well-worn path that is the easiest place on the watch to use. Sometimes the worn area is only 3 or 4 mm long. As long as you can begin to get your knife between the bezel and the back then you're good. If not a corner then perhaps between the lugs.
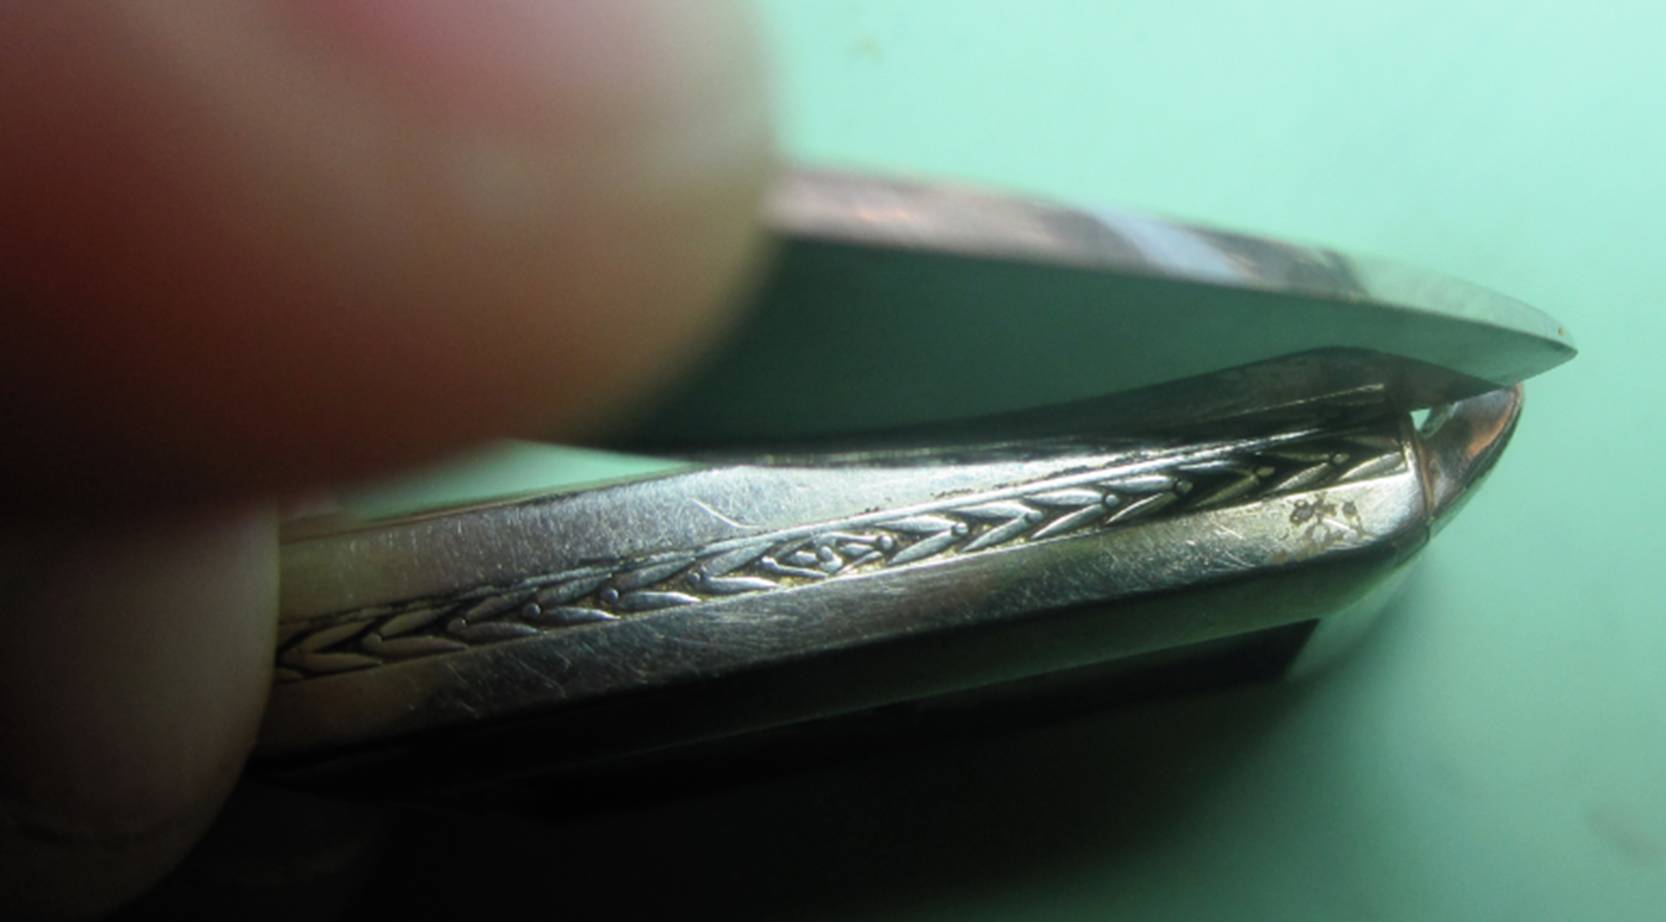
If you can't find a spot, then that's OK, we'll try to use the space between the lugs that is typically designed for using to open. You'll find a small lip between the lugs on one of both ends in almost all watches. These are often overused and worn. Consider using them second.
Step 4 - Choose your point of entry
On my example watch you'll see two places that are good candidates.
One is between the lugs as there is a gap there that is lengthy. The other is a corner that's a little bit worn. I tend to head towards the corners. The wear on the case using that location is minimal and I find I have to do less to open the case.
The other location is between the lugs where that lip is located. The case is ajar there, possibly from over or misuse, or could be just like any other gap in the case along the edge. I'm sticking to my corner....You are not prying the case apart like a soup can, you are "popping off the back". The rolling motion I mentioned is a smooth sort of motion. Of course, not all cases are just going to fly open, but try to pry the pry word from your head. It sounds destructive and the last thing you want to do is be destructive. Some books use the word, some don't.
Step 5 - Technique A (Push Down Method)- Open the case using a straight down force
Back to my corner.

First, try your thumbnail, fingernail. It’s a longshot, but they do work on occasion. If it’s too tight, let’s move on to using a knife.
These locations are great candidates for the "push down" method of using your knife. This technique works the best using a case knife that is somewhat fat close to the front and blunt edge of the blade.
Here the corner of the case has popped open and I can continue to work around the case to loosen the bezel.
You can use a “rolling” motion to open a crack in a case. This is the best way I can think of to describe it. It's like deceleration on a motorcycle. Your blade edge will be touching the half of the case nearest you. Hold onto the other half and try this rolling motion. For me it took quite some time to grasp what it feels like and how to do it.
If you’re not getting it with a rolling motion, try “pivoting” your knife in a clockwise / counterclockwise motion. Keep your knife blade perpendicular to the slot you are in and only move the knife handle so that you are pivoting at where the blade meets the knife handle. The result of this motion is you are “pushing” apart the bezel from the back.
I find moving a knife in this manner useful in all sorts of watch repair situations. It can be used in the “removing the movement from the case” step below too.
This pivoting will move the entire length of your blade in a way that it is at an angle in the growing crack.

I worked on the non-crown side of the case using the “pivot” action to completely loosen the bezel from the back.
What success looked like for me
- Place your watch down on your bench or table with a protected top that's a little springy. This provides a firm surface that won't mar your watch case and also keeps the watch from slipping while you work on it. A piece of corrugated board (cardboard) works.
- Place the center of your blade into the slot in the corner, with the blade extending down the side of the case. Don't use the tip of your blade for anything, it's the long blade itself we're using. Pointing he knife this way is actually opening the side of the watch rather than just the corner.
- With the watch placed on your surface on edge, hold tight, and press straight down on your knife blade. No wiggling around, just straight down. If you blade is fat enough and the case closes well with a snap, then the case will pop open. If not, there's always Technique B below. But give this one several tries as you are least likely to damage your case this way.
- If part of the case opened grasp the bezel and try to work it off, by hand, from the back of the case. If you don't get it off, keep reading.
- You likely have a crack that is growing down the side of the case. Try putting you blade the crack a rolling type motion with your knife as described above.
- Try to lift off the bezel every now and then
- Until you are able to easily lift off the bezel
- Go around the case following the lengthening crack that should be forming going around the case. Place your blade into a narrow crack and use the "rolling" or pivoting action with your knife to open the case more and more
- Doing this on alternating sides of the watch case usually has good result if the entire bezel is losing.
- Place the mid-point of your knife blade in the crack, holding it perpendicular to the case.
- Move your blade from the starting center position to approximately the 5:00 position for your knife handle (the 11:00 position will be the location of the end of your knife. Move the knife, remaining perpendicular to the case, back and forth from 5:00 position of the handle to the 7:00 position. This will push apart the 2 halves using the points nearest the end of the blade and nearest the case.
If your straight down force technique worked some but didn't get the job done, move on to Technique B below - using the area between the lugs.
If you fail after a few attempts at this, try technique B but don't keep trying to the point you damage your watch! Quitting isn't failing! It's potentially letting your watch live to see another day!
Step 5 - Technique B (Traditional Blade Method) - Open the case
using the ridges between the lugs
This technique is the more traditional one. The idea is to get as much of your
blade in contact the lip found between the lugs or in the crack between the
bezel and the back.
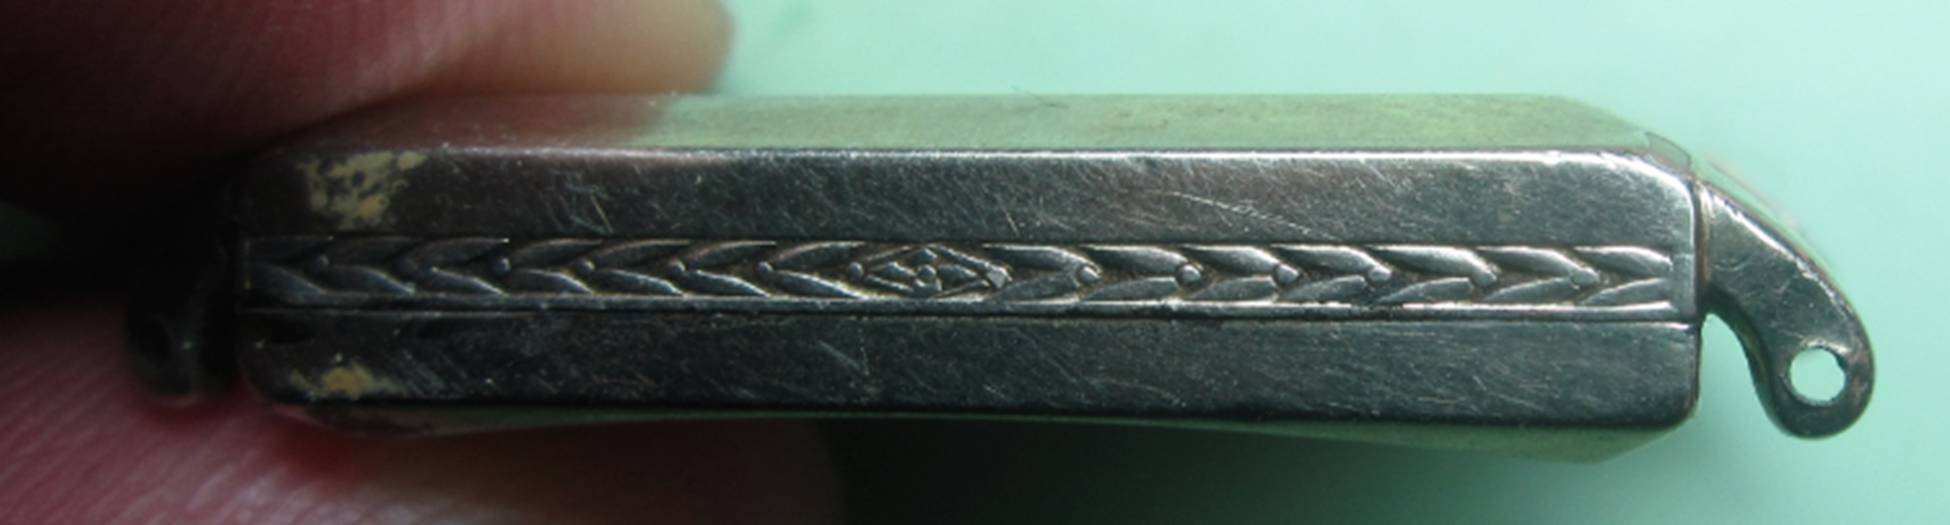
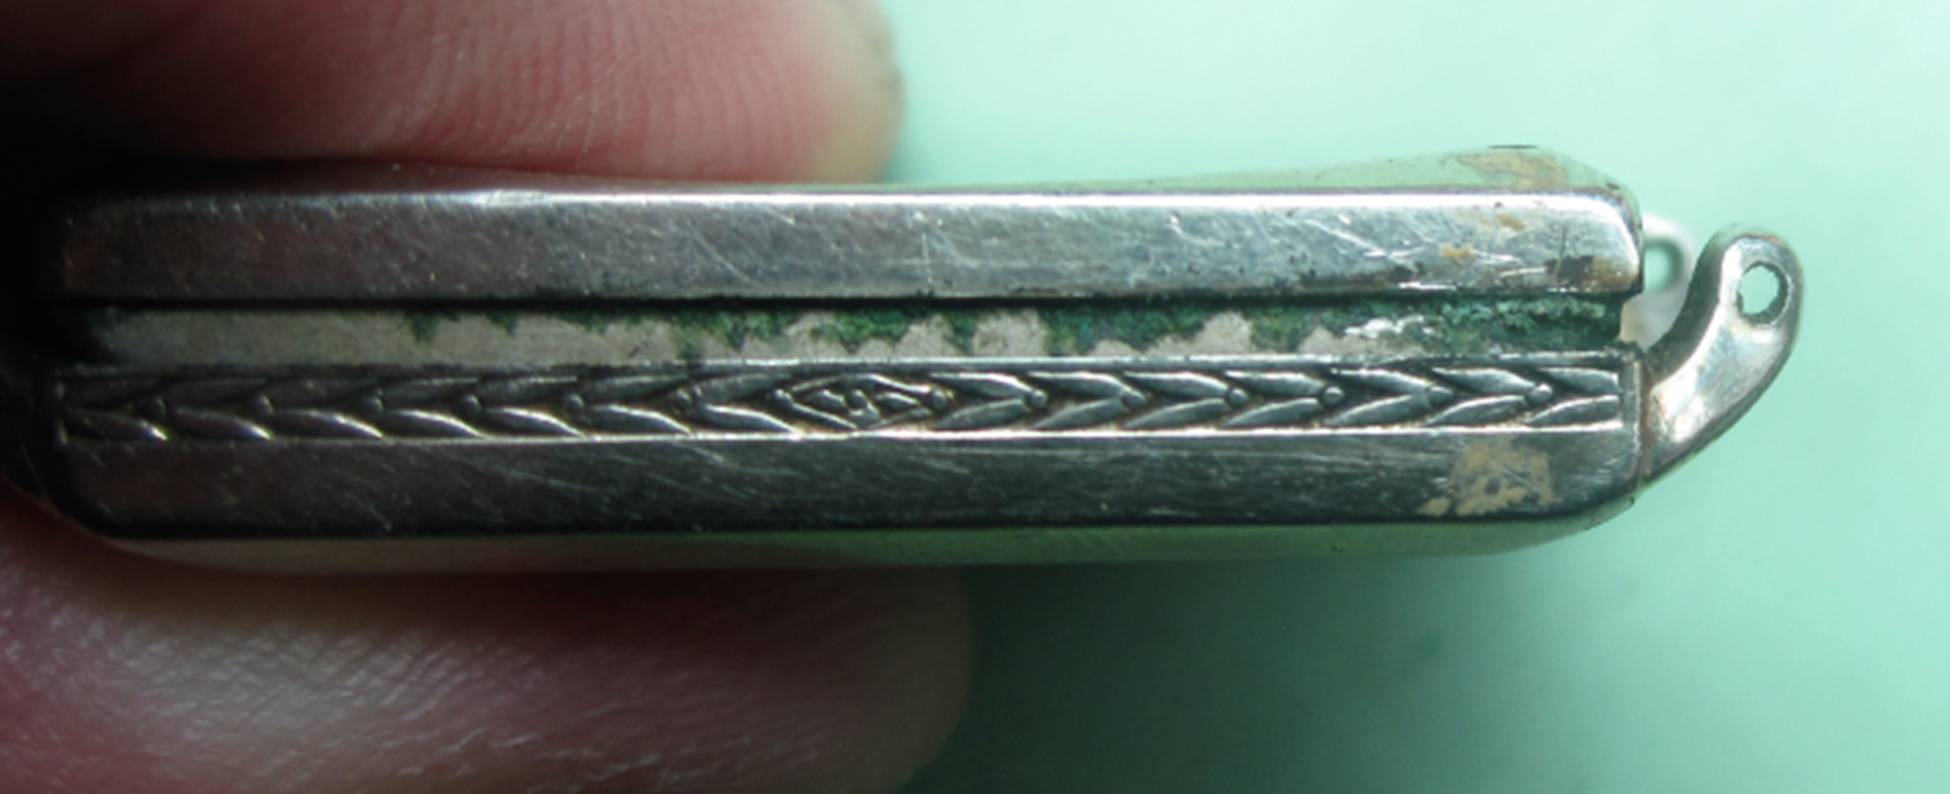
I'm switching watches as this watch has a better chance of opening using the area between the lugs. I see that there's a wide crack between the bezel and back at that location on this watch.
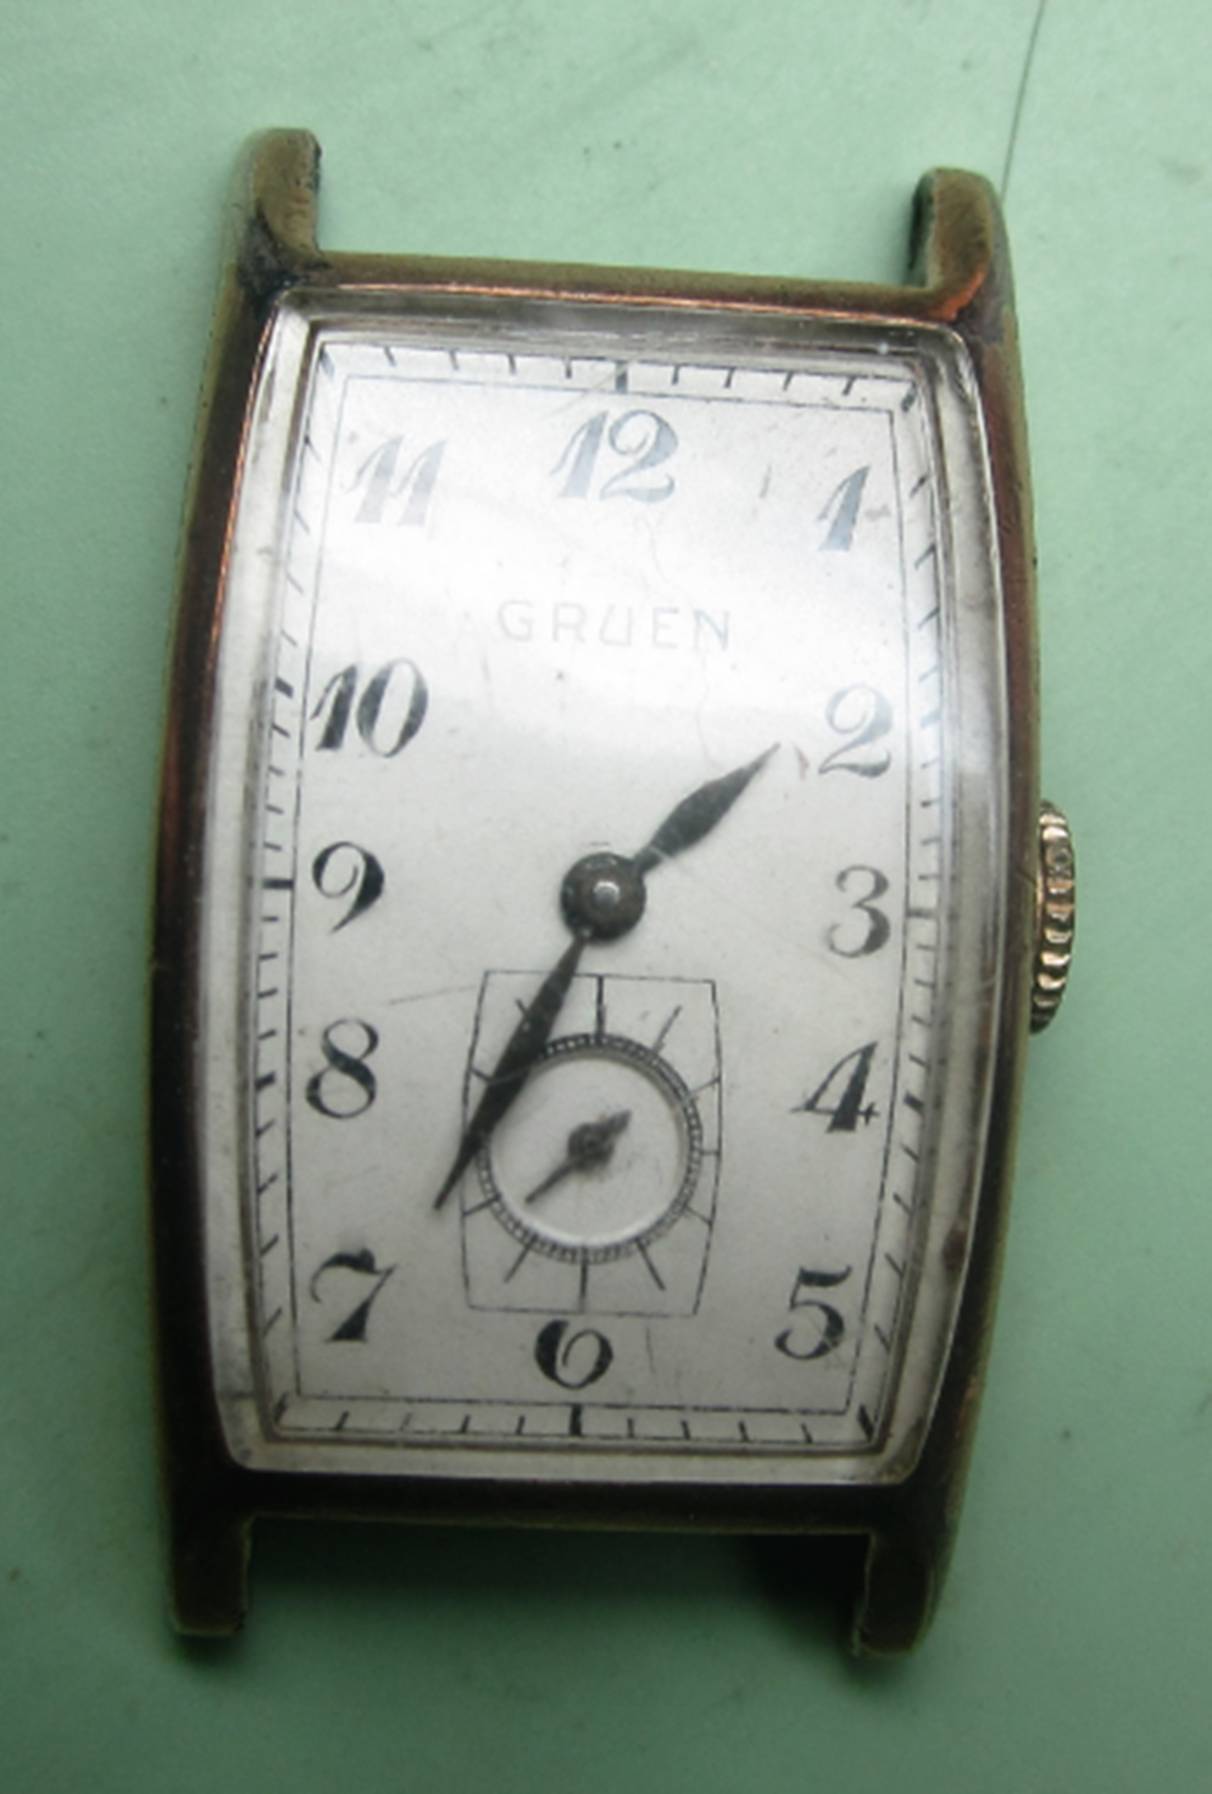
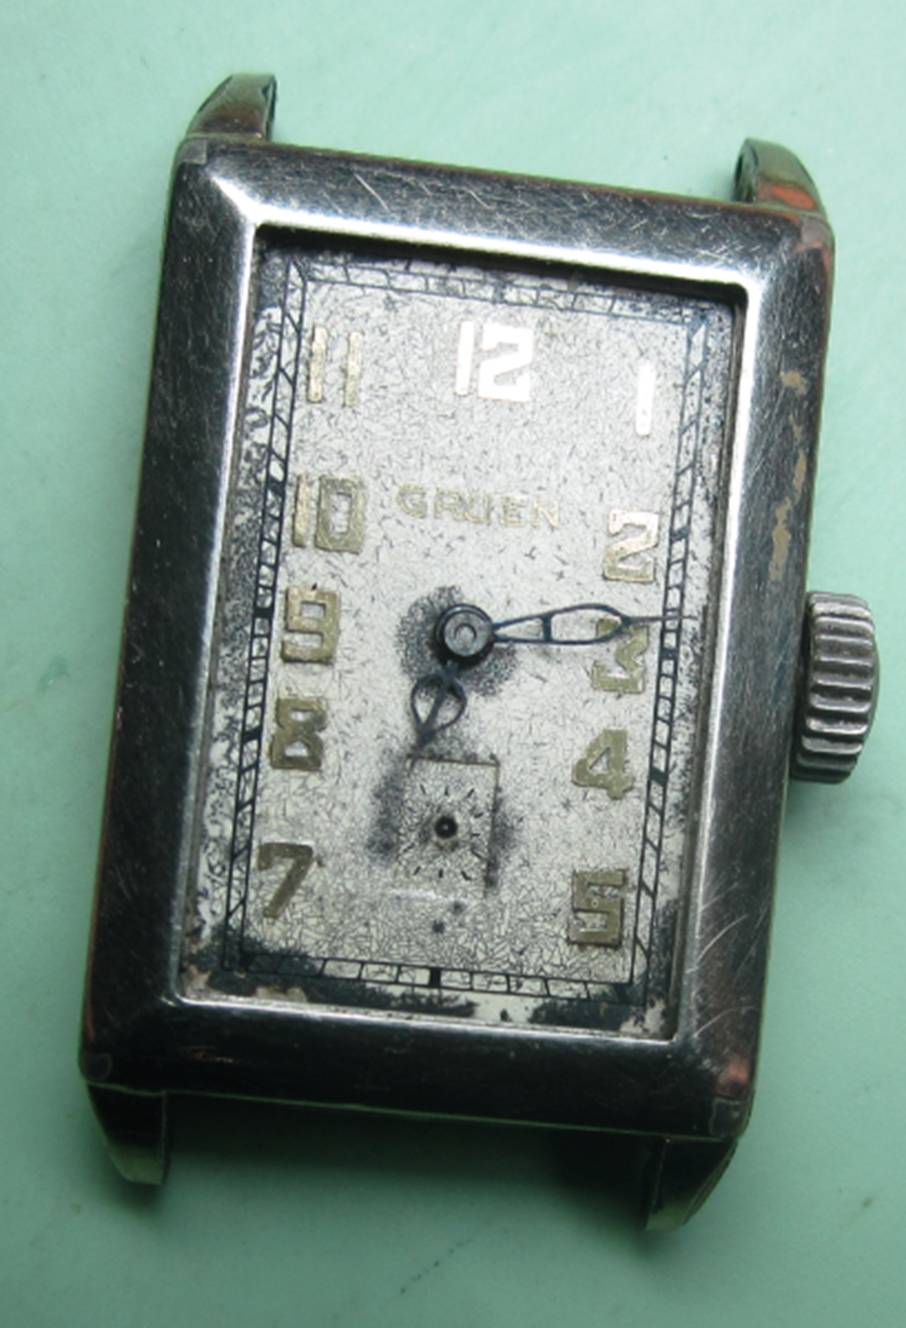
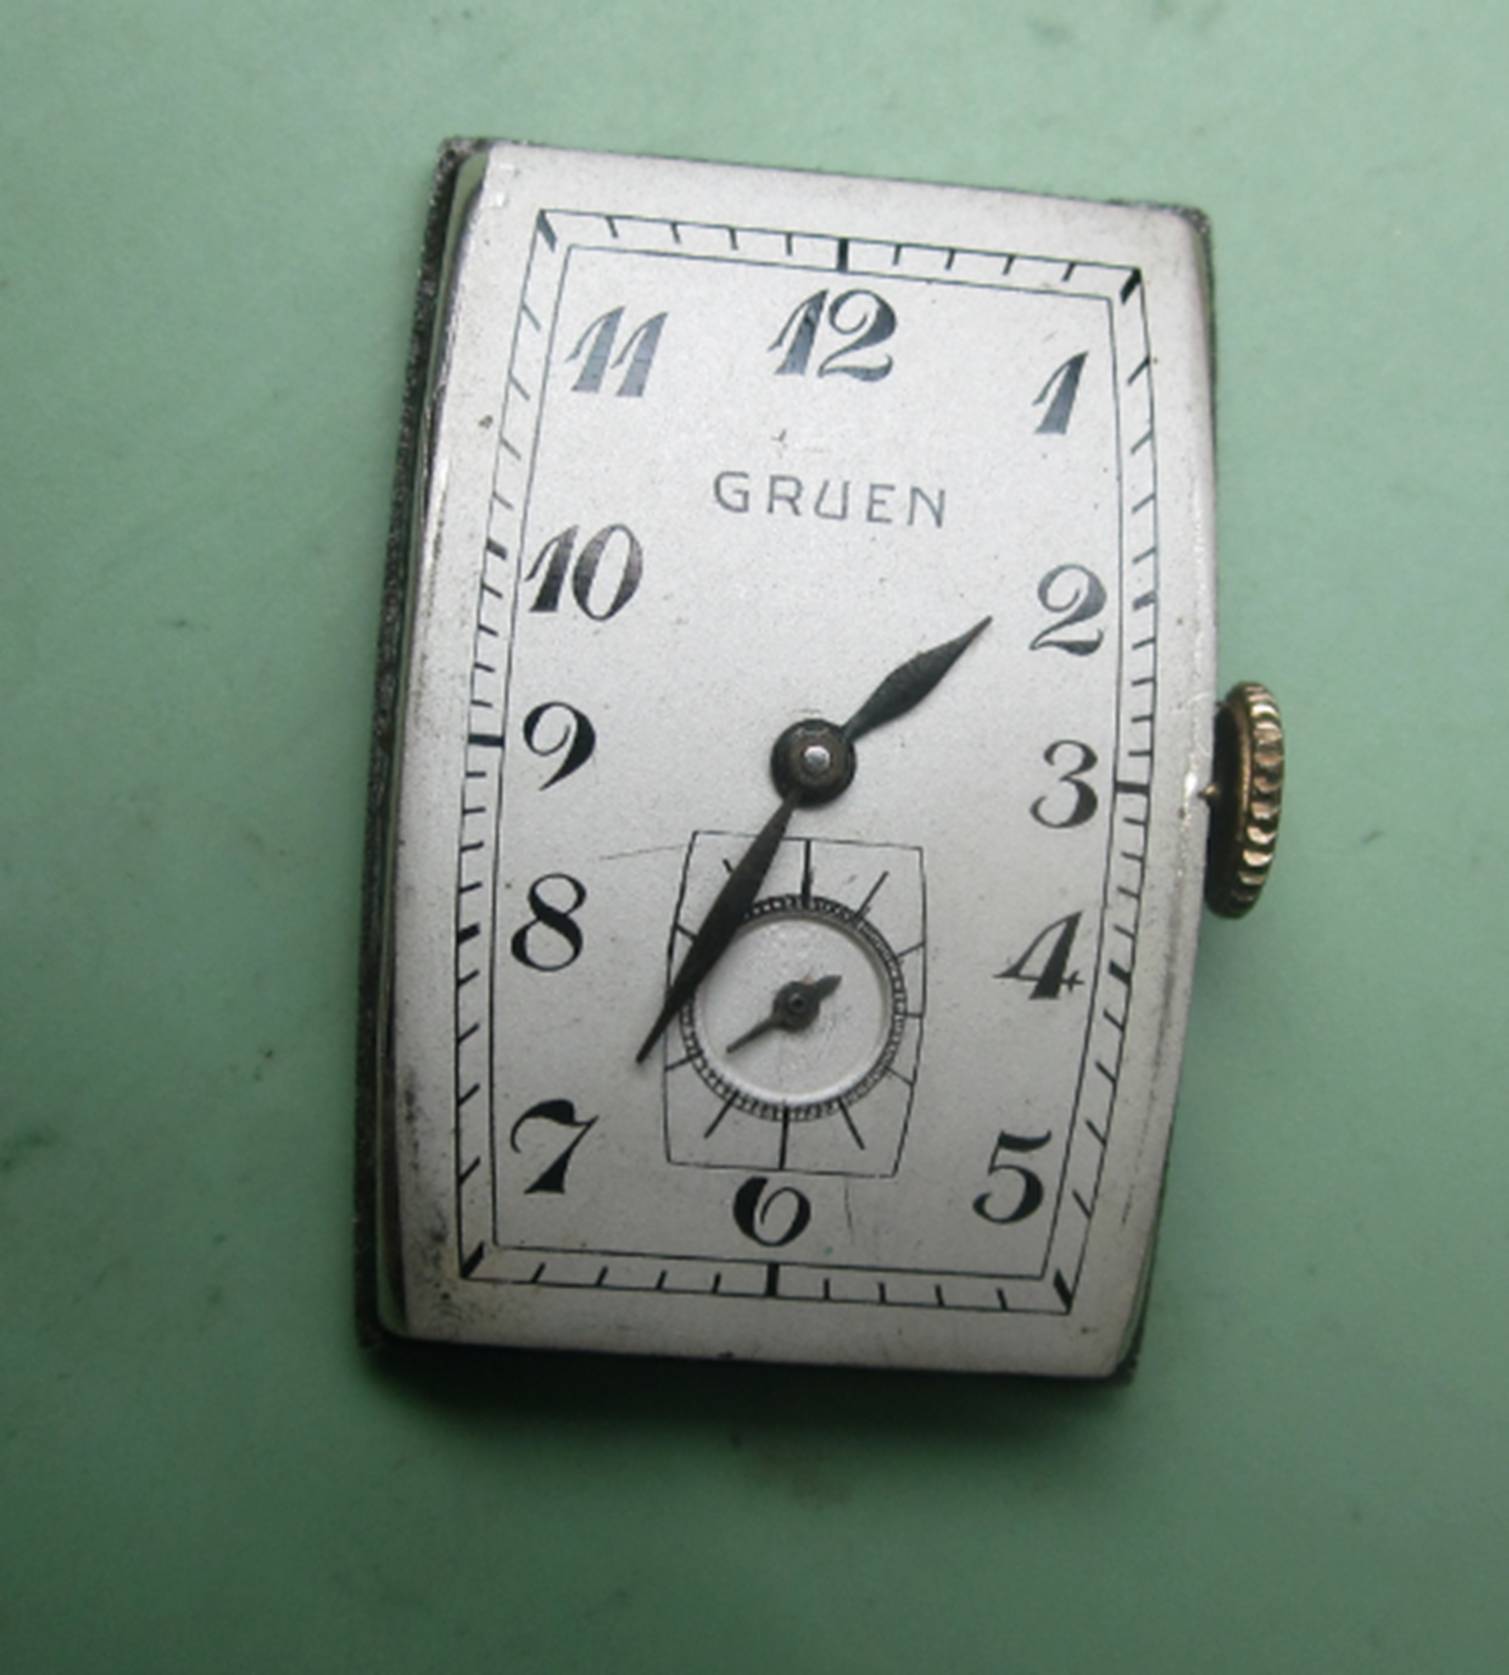
It’s a “Princeton” model
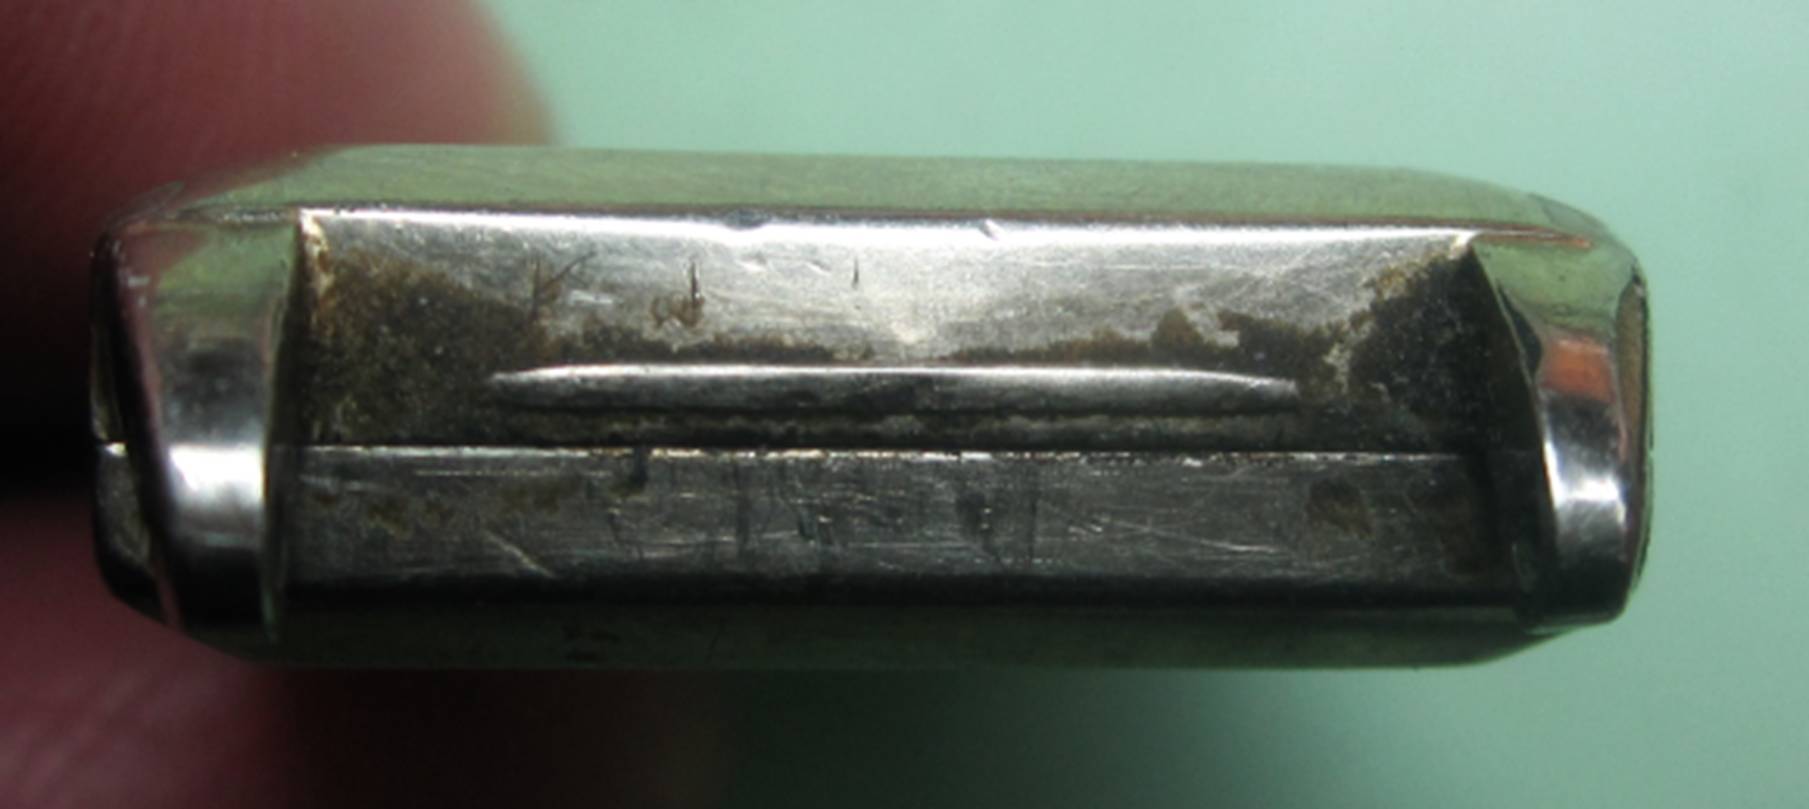
This slight gap between the back and the bezel indicates it’s a great place to open it.
As you can (barely) see, I've placed my knife blade between the lugs, and into the crack.
As I roll my knife, you can see the right edge of the bezel starting to separate. Note the position of the blade in relation to the lugs. The resting point is as close to where the lugs attach to the case as possible.
This is what it will look like if you manage to pop open this edge of the case
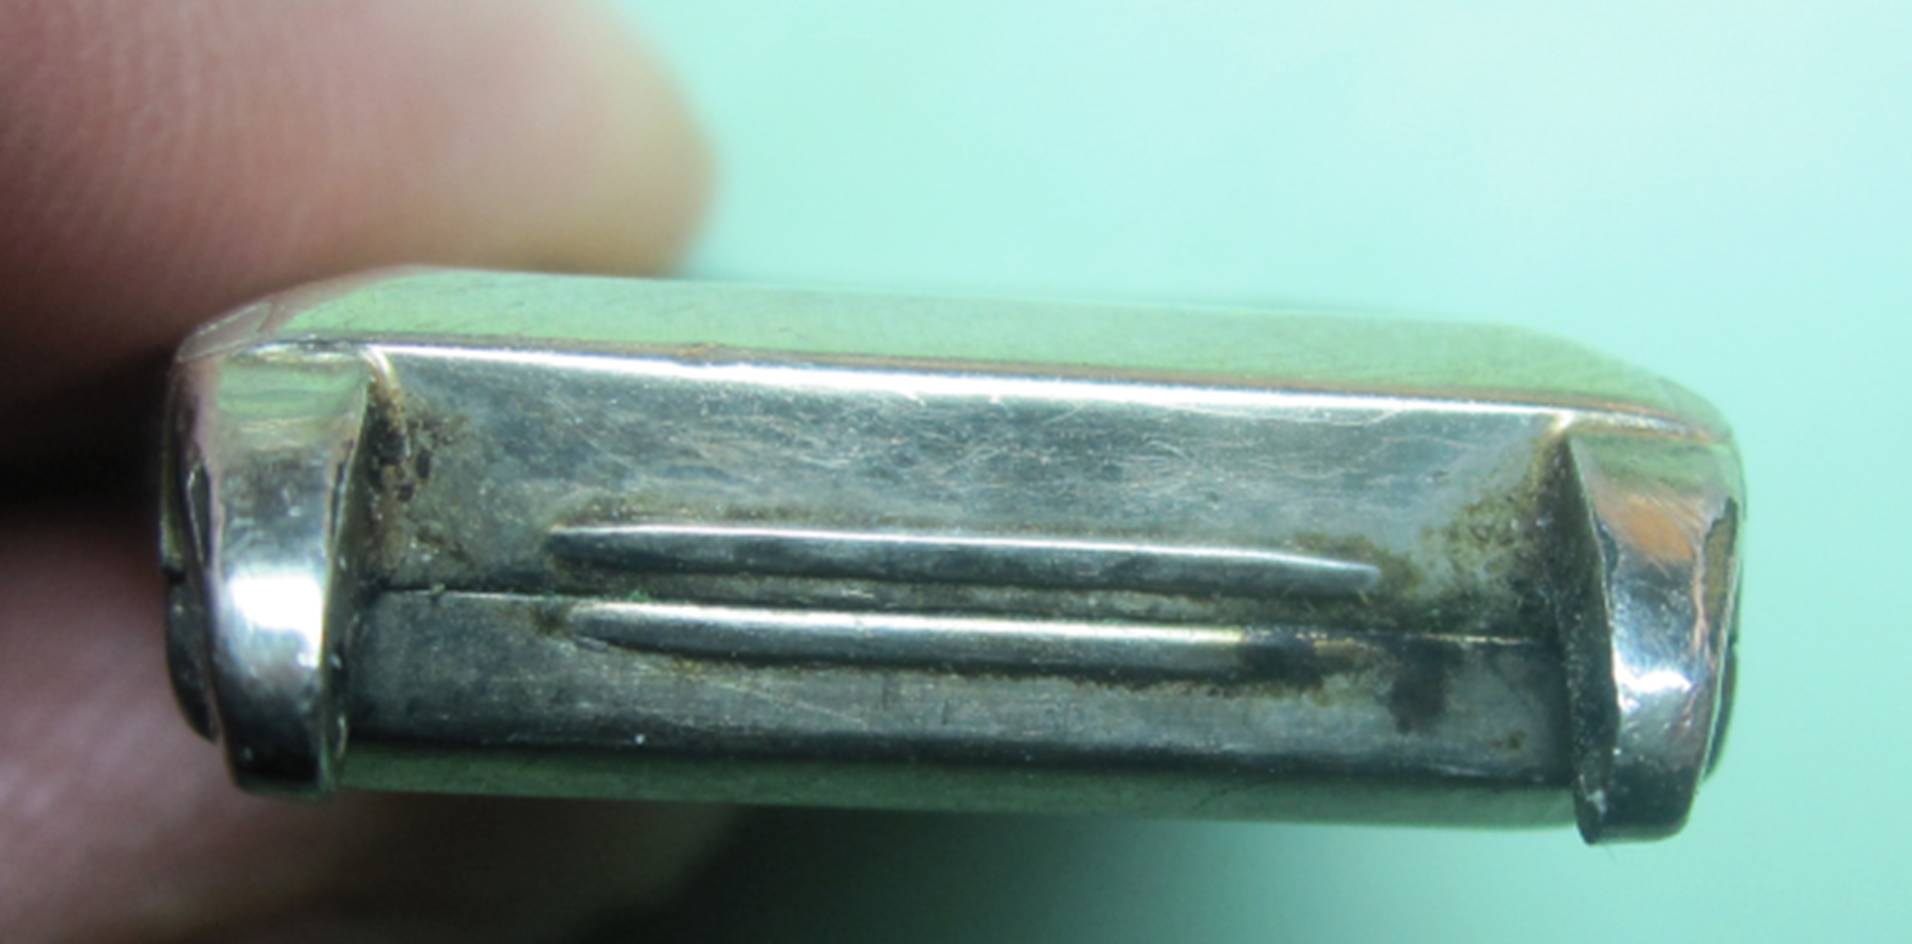
On some cases you will find one or a pair of protruding lines going across the case. You can use those rather than a crack between the case halves, but be warned they are often quite worn and your efforts may wear them further or damage your case. If you do this, be particularly careful to not let your blade slip.
- You can use the lugs as a stable leverage point. If you do, place your blade as low as possible on the lugs, preferably where they meet the case, so that you don't bend a lug. AND use both lugs.
- Begin with your blade in the crack or firmly against the protruding bar on the case.
- The movement is definitely a rolling one in this instance. You'll feel like you're rolling the blade. Use your wrist to roll your knife like you are on a motorcycle and are decelerating as described previously.
- The action of the blade will be to grab the back and push it away from the bezel
- Once you pop the back off from the bezel, try to remove the bezel from the back by hand.
- If you are unable to lift the bezel from the back, use the technique to work your way around the case, opening the case further, presented in Technique A above
Steps 6 - You're in!
Just kidding…. you’re ½ way in. But, congratulations on getting the bezel from
the back of the case, not easy in many watches and is the most difficult step.
Now you're ready for part II, removing the movement from the back of the case. It’s one of the more tedious steps and calls need for extreme care. After all, you have the protection of the dial and the hands now removed (the bezel).
Take a break. Be fresh and not worn out as you do want to move forward with great caution.
Step 7 – Remove the movement from the back of the case
This is the point that you can begin to do some serious damage to your watch.
Let me renew my disclaimer I stated at the start of the tutorial
I take no responsibility in any damage you may do to your watch.
If you are starting to feel even the slightest bit unsure, stop. Snap the case shut, and enjoy the success you had in opening the case.
Here’s a short list of things you can do that will certainly create foul language in your house. You can easily scratch your dial, bend your hands, cause the hands to touch each other so that your watch stops, get fingerprints on the inside of your crystal, get fingerprints on your dial, get dirt on your dial, pull the entire dial and hands off your watch, break the step and crown, break the balance staff, bend the balance wheel, bend the hairspring, and finally, launch World War III. All of these things are a possibility.
Still reading? OK, brave soul, let’s keep going… I like the adventurousness you’re demonstrating!
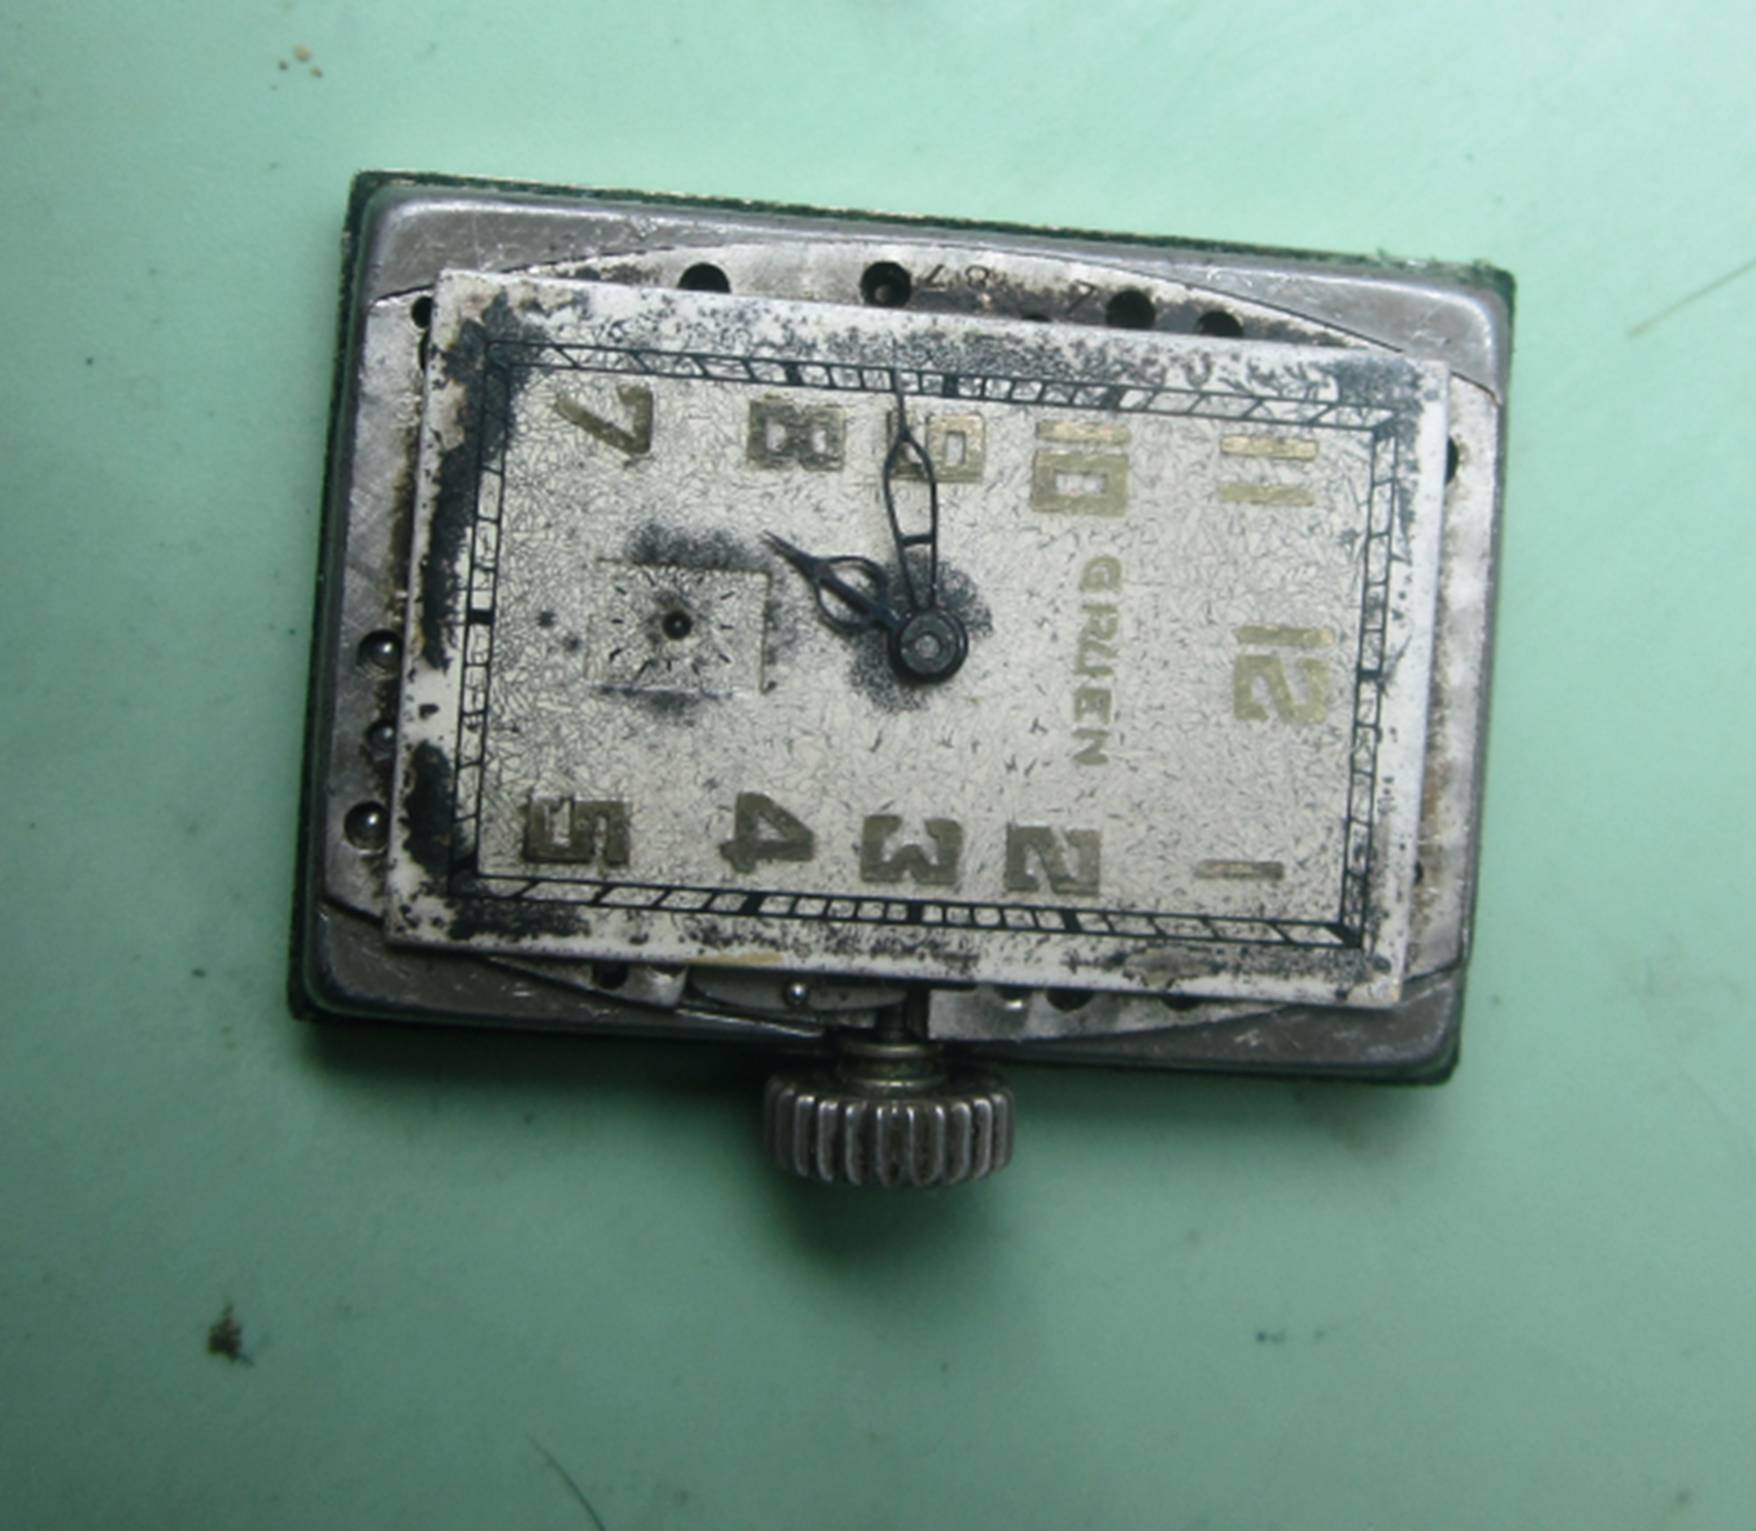
Now that the bezel is off, the delicate task of removing the movement from the back of the case begins.
Don’t even think of grabbing the crown and lifting.
The movement may be loose enough for you to lift it from the case using the crown, but don’t do it. You can bend the stem this way. Sure, you may be able to get away with it, most of the time, but what about the remainder of the time, when the movement is firmly held into place in the case back? If you start pulling on it, it won’t take long to get into an escalating tug of war that results in a bent or broken stem or the movement flying from your hands when it finally pops out of the back.
Let’s go about it the safe way that works every time.
OK, let me back up just in case you DO decide you are going to lift up on the crown. If you do, oh, never mind, I’m not going encourage you.
You need your Exacto® knife or razor blade for this step.
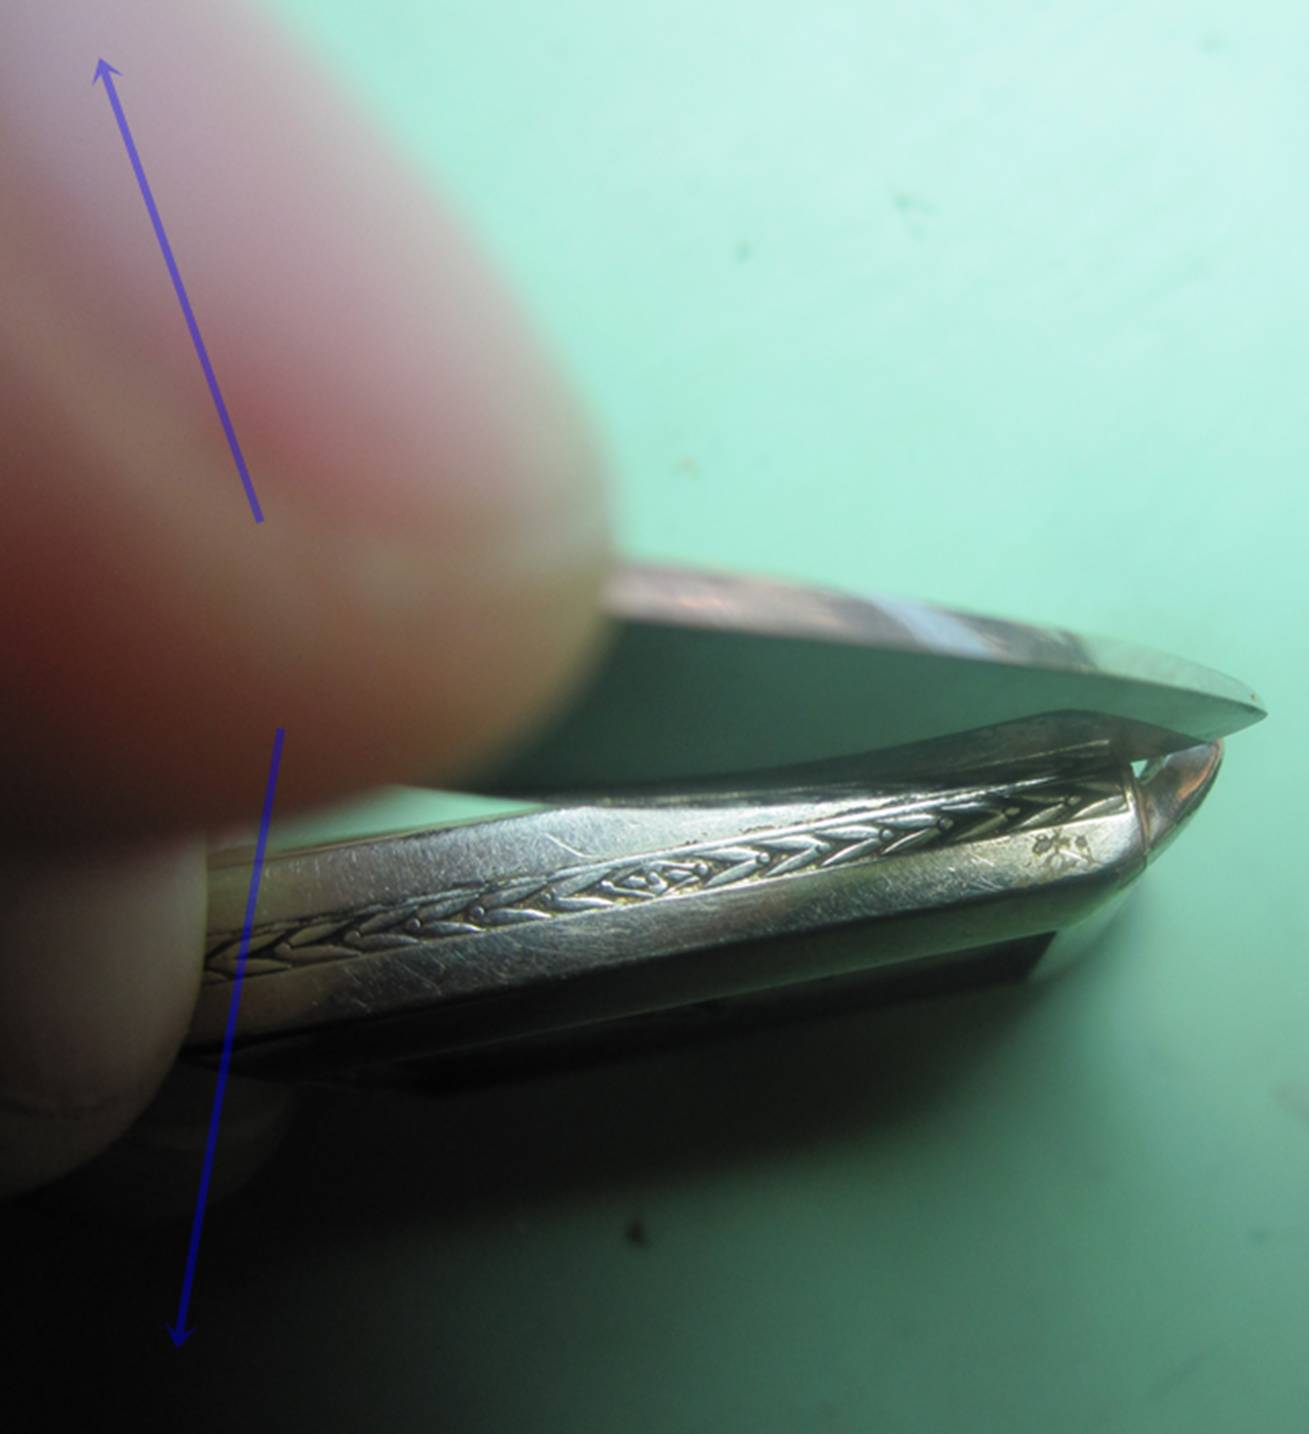
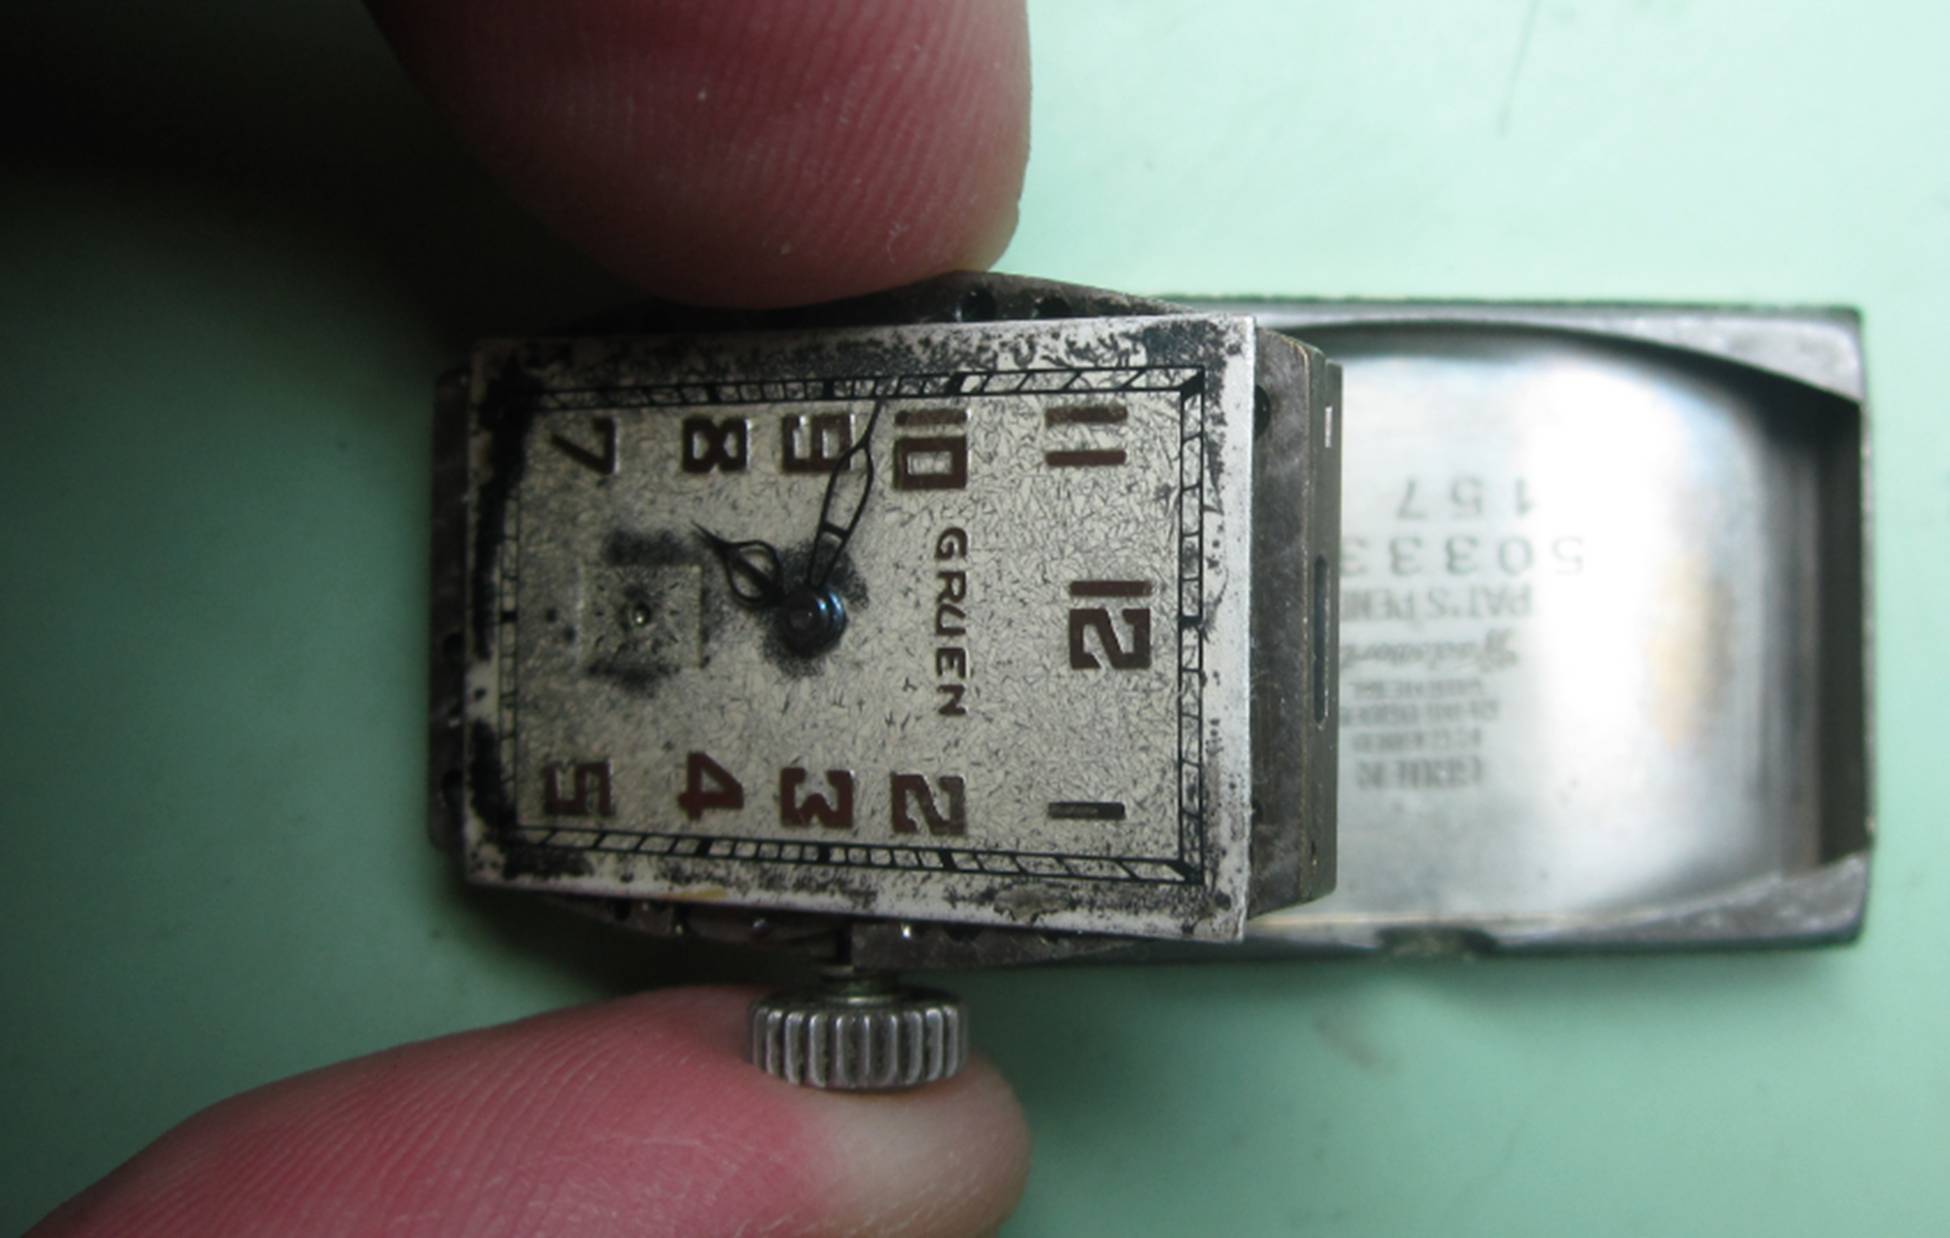
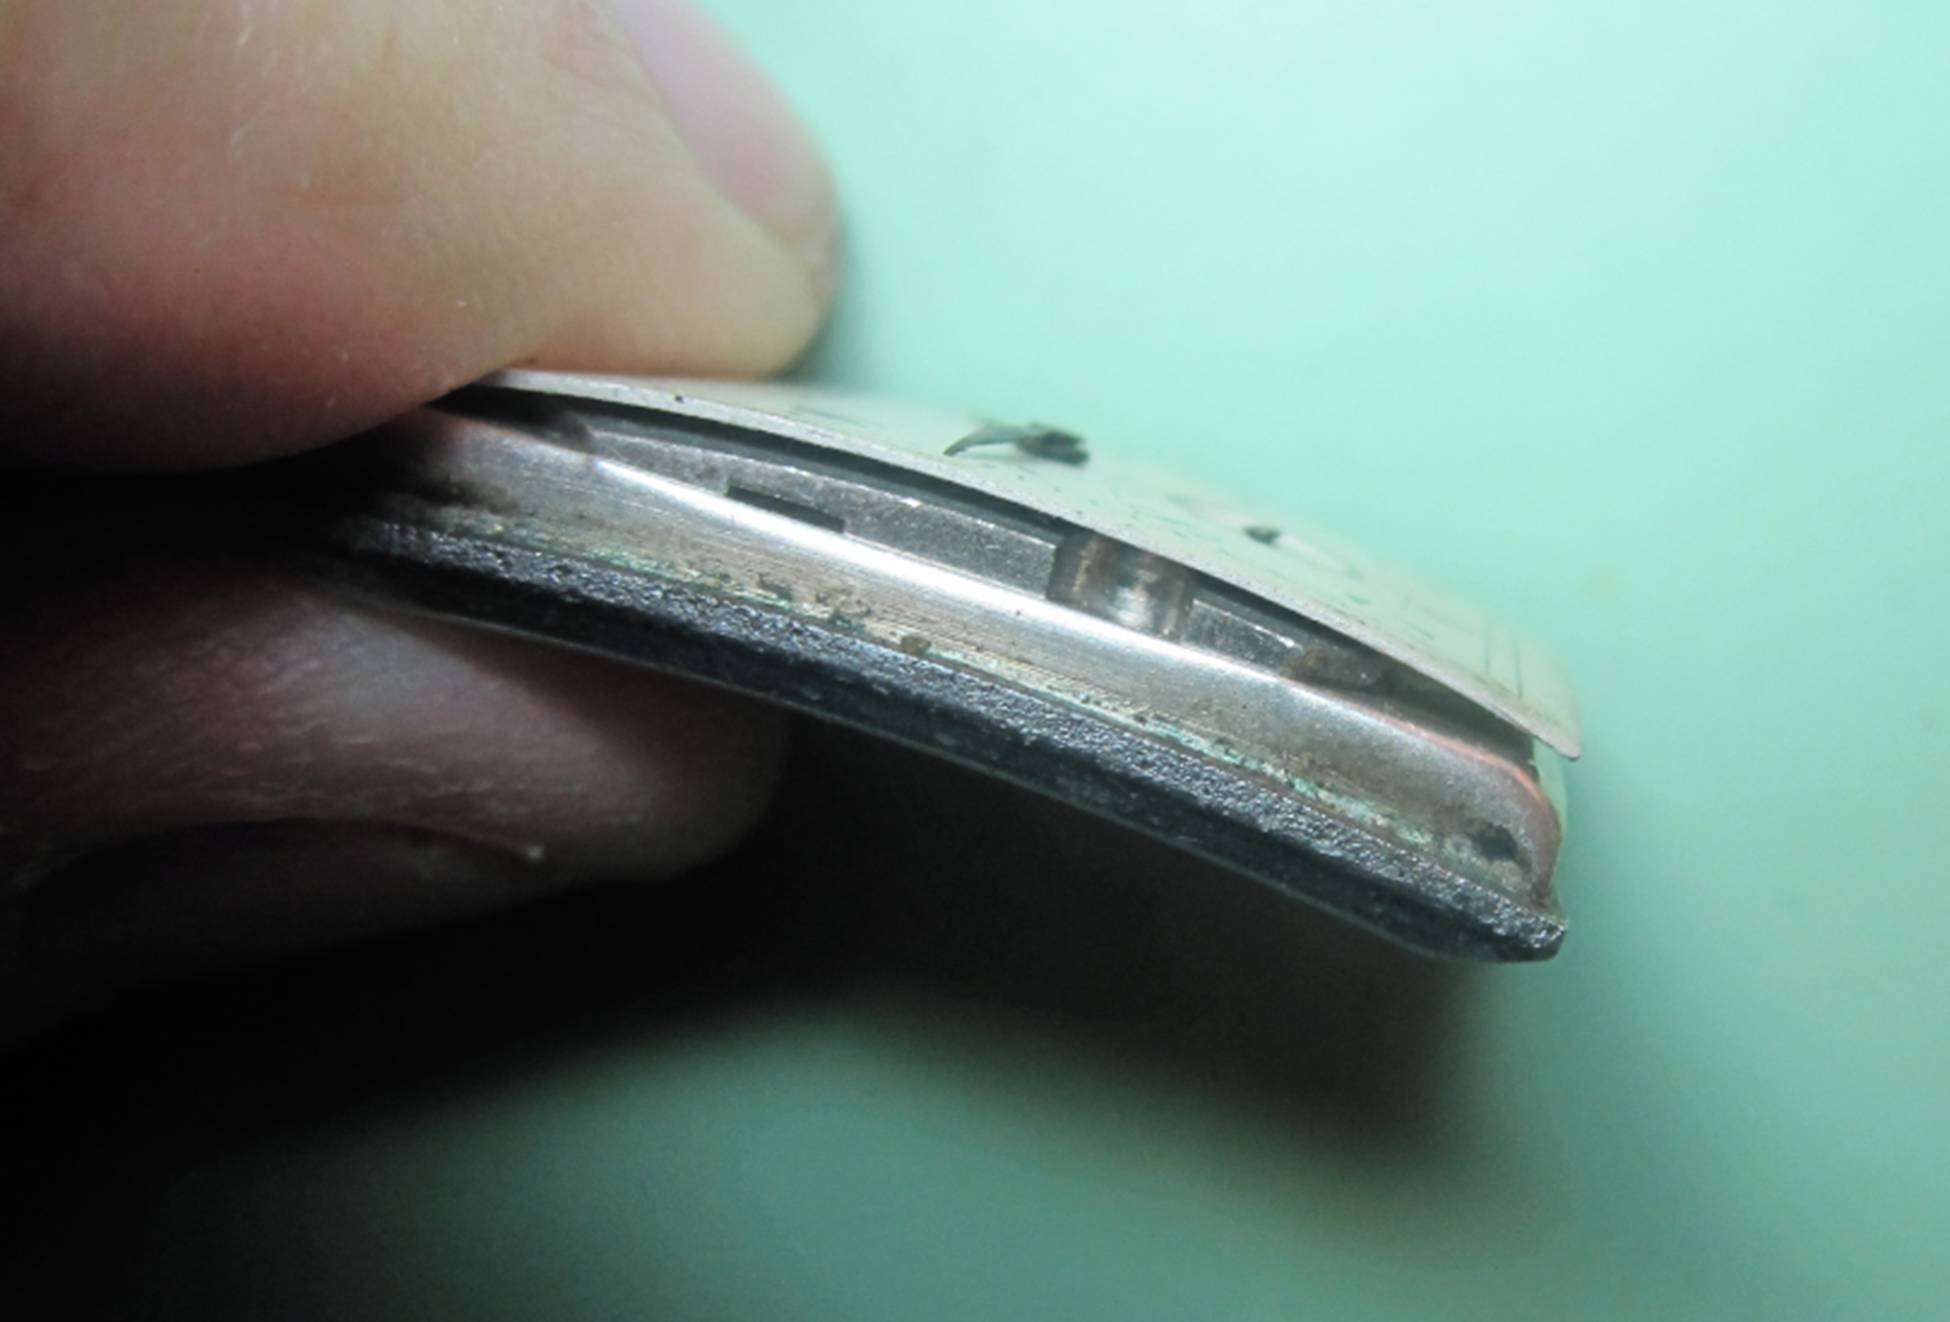
First let’s examine the lugs ends of the dial.
Note where the movement meets the case back. It’s critical you locate where the movement meets the case, not where the dial meets the movement.
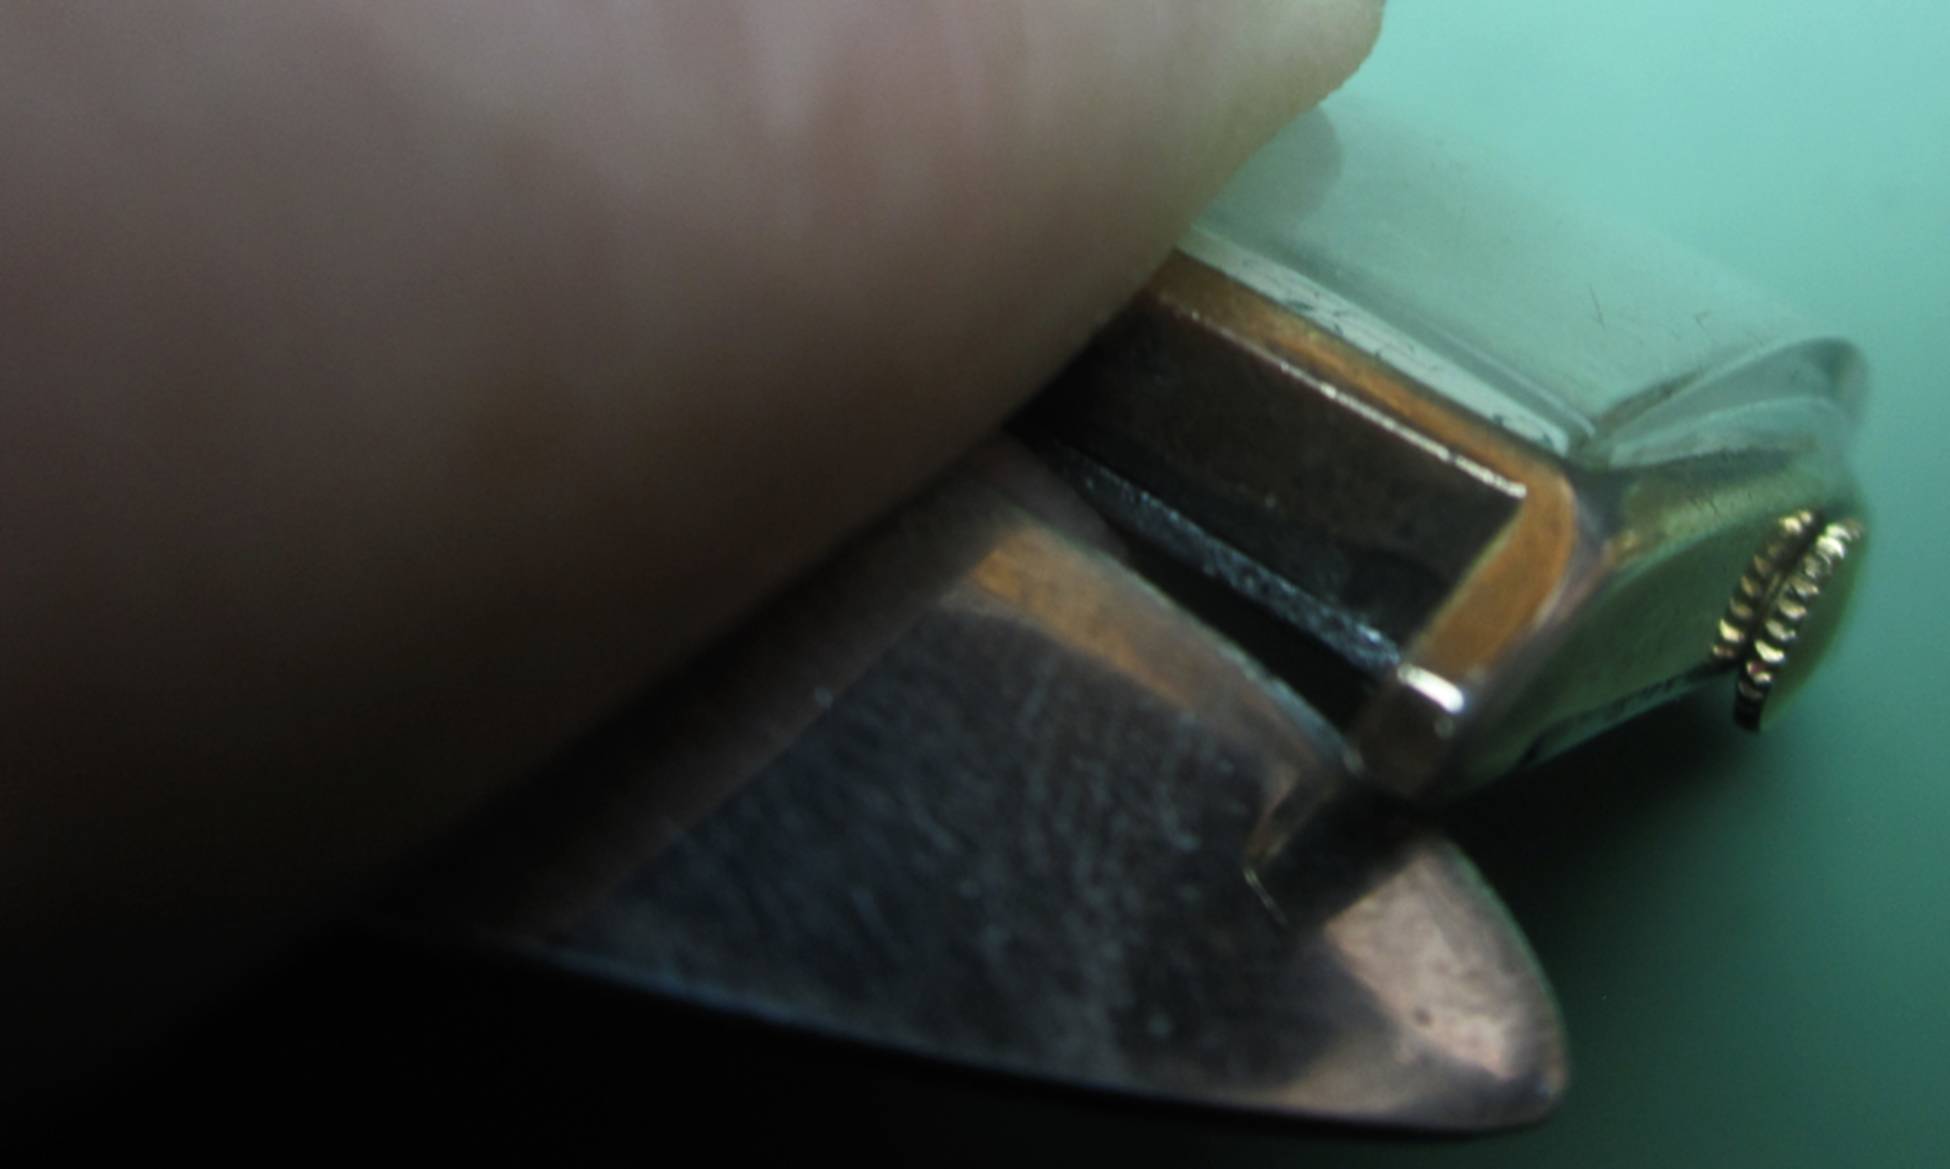
What you will be doing is sliding your Exacto® knife blade into the crack between the movement and the case. If you don’t have an Exacto® knife, then a razor blade will work. The blade needs to be thin enough to fit between the movement and the case back.
You will then pry the movement from the case. Once your blade is in place, I recommend using the pivot technique of moving your knife that I outlined above. This will gently raise the movement up on that end.

Here the movement has been lifted from the case back.
You will then do the same for the other end of the movement.
When both ends have been loosened, you should be able to grasp the movement by the crown and opposite the side of the movement from the crown. Use your thumb and first or middle finger to do this.
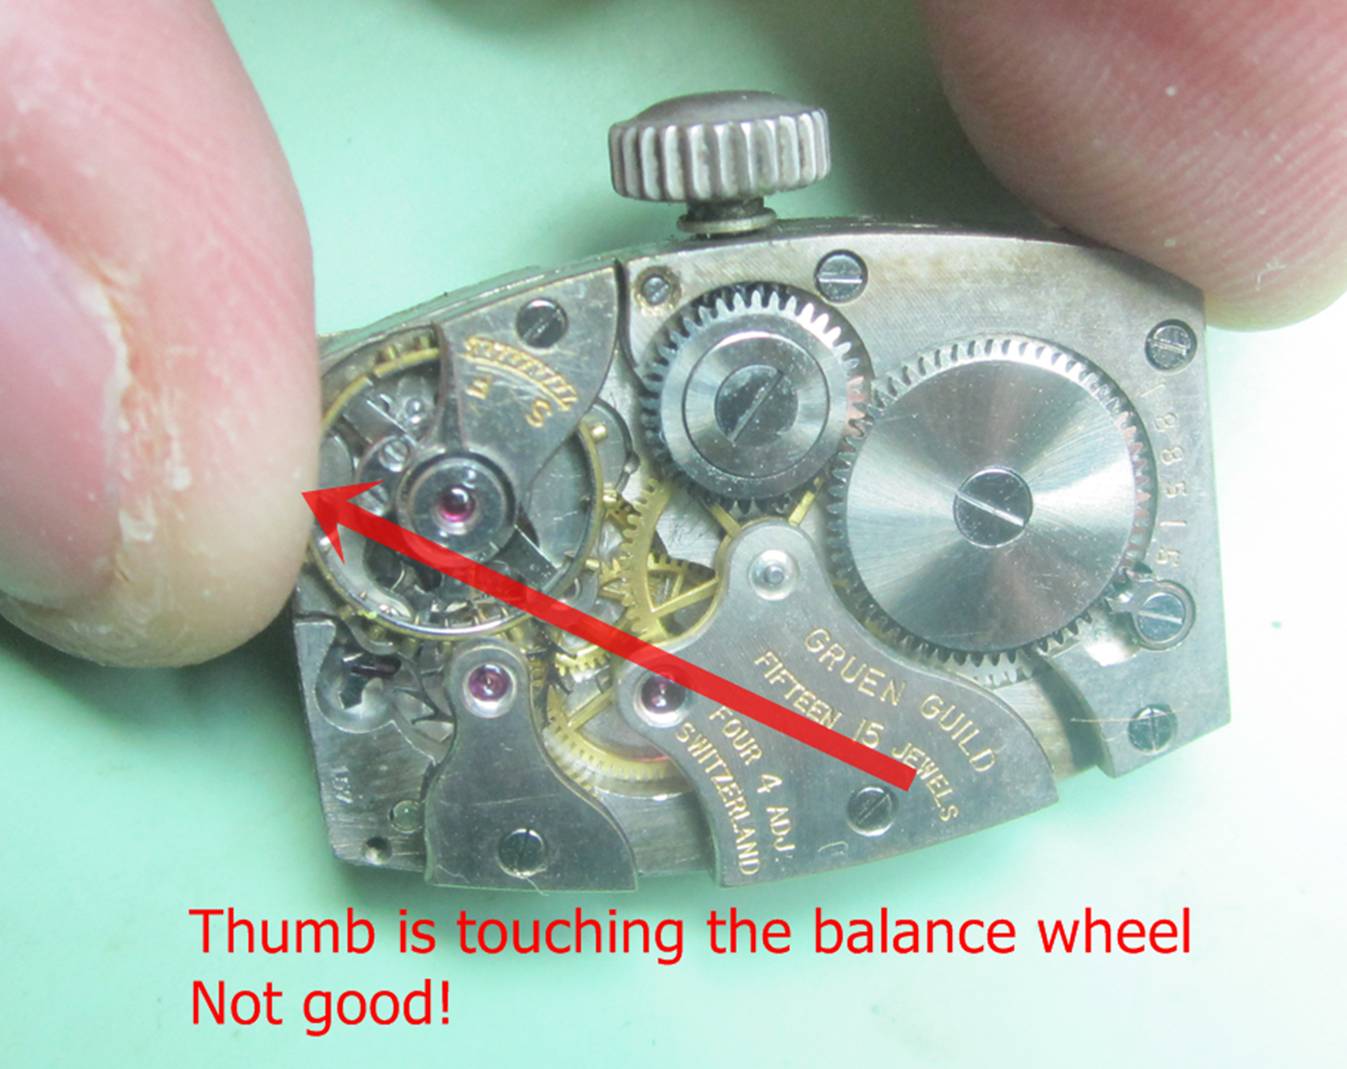
Be careful as you grasp the side opposite the crown as this is often where the balance wheel is located and you do not want to touch that balance wheel…. Ever…. Even a little
The other hand should be holding onto the case back, again using your thumb and first finger.
If the movement does not easily come out, go back to using your Exacto® knife to loosen the ends.
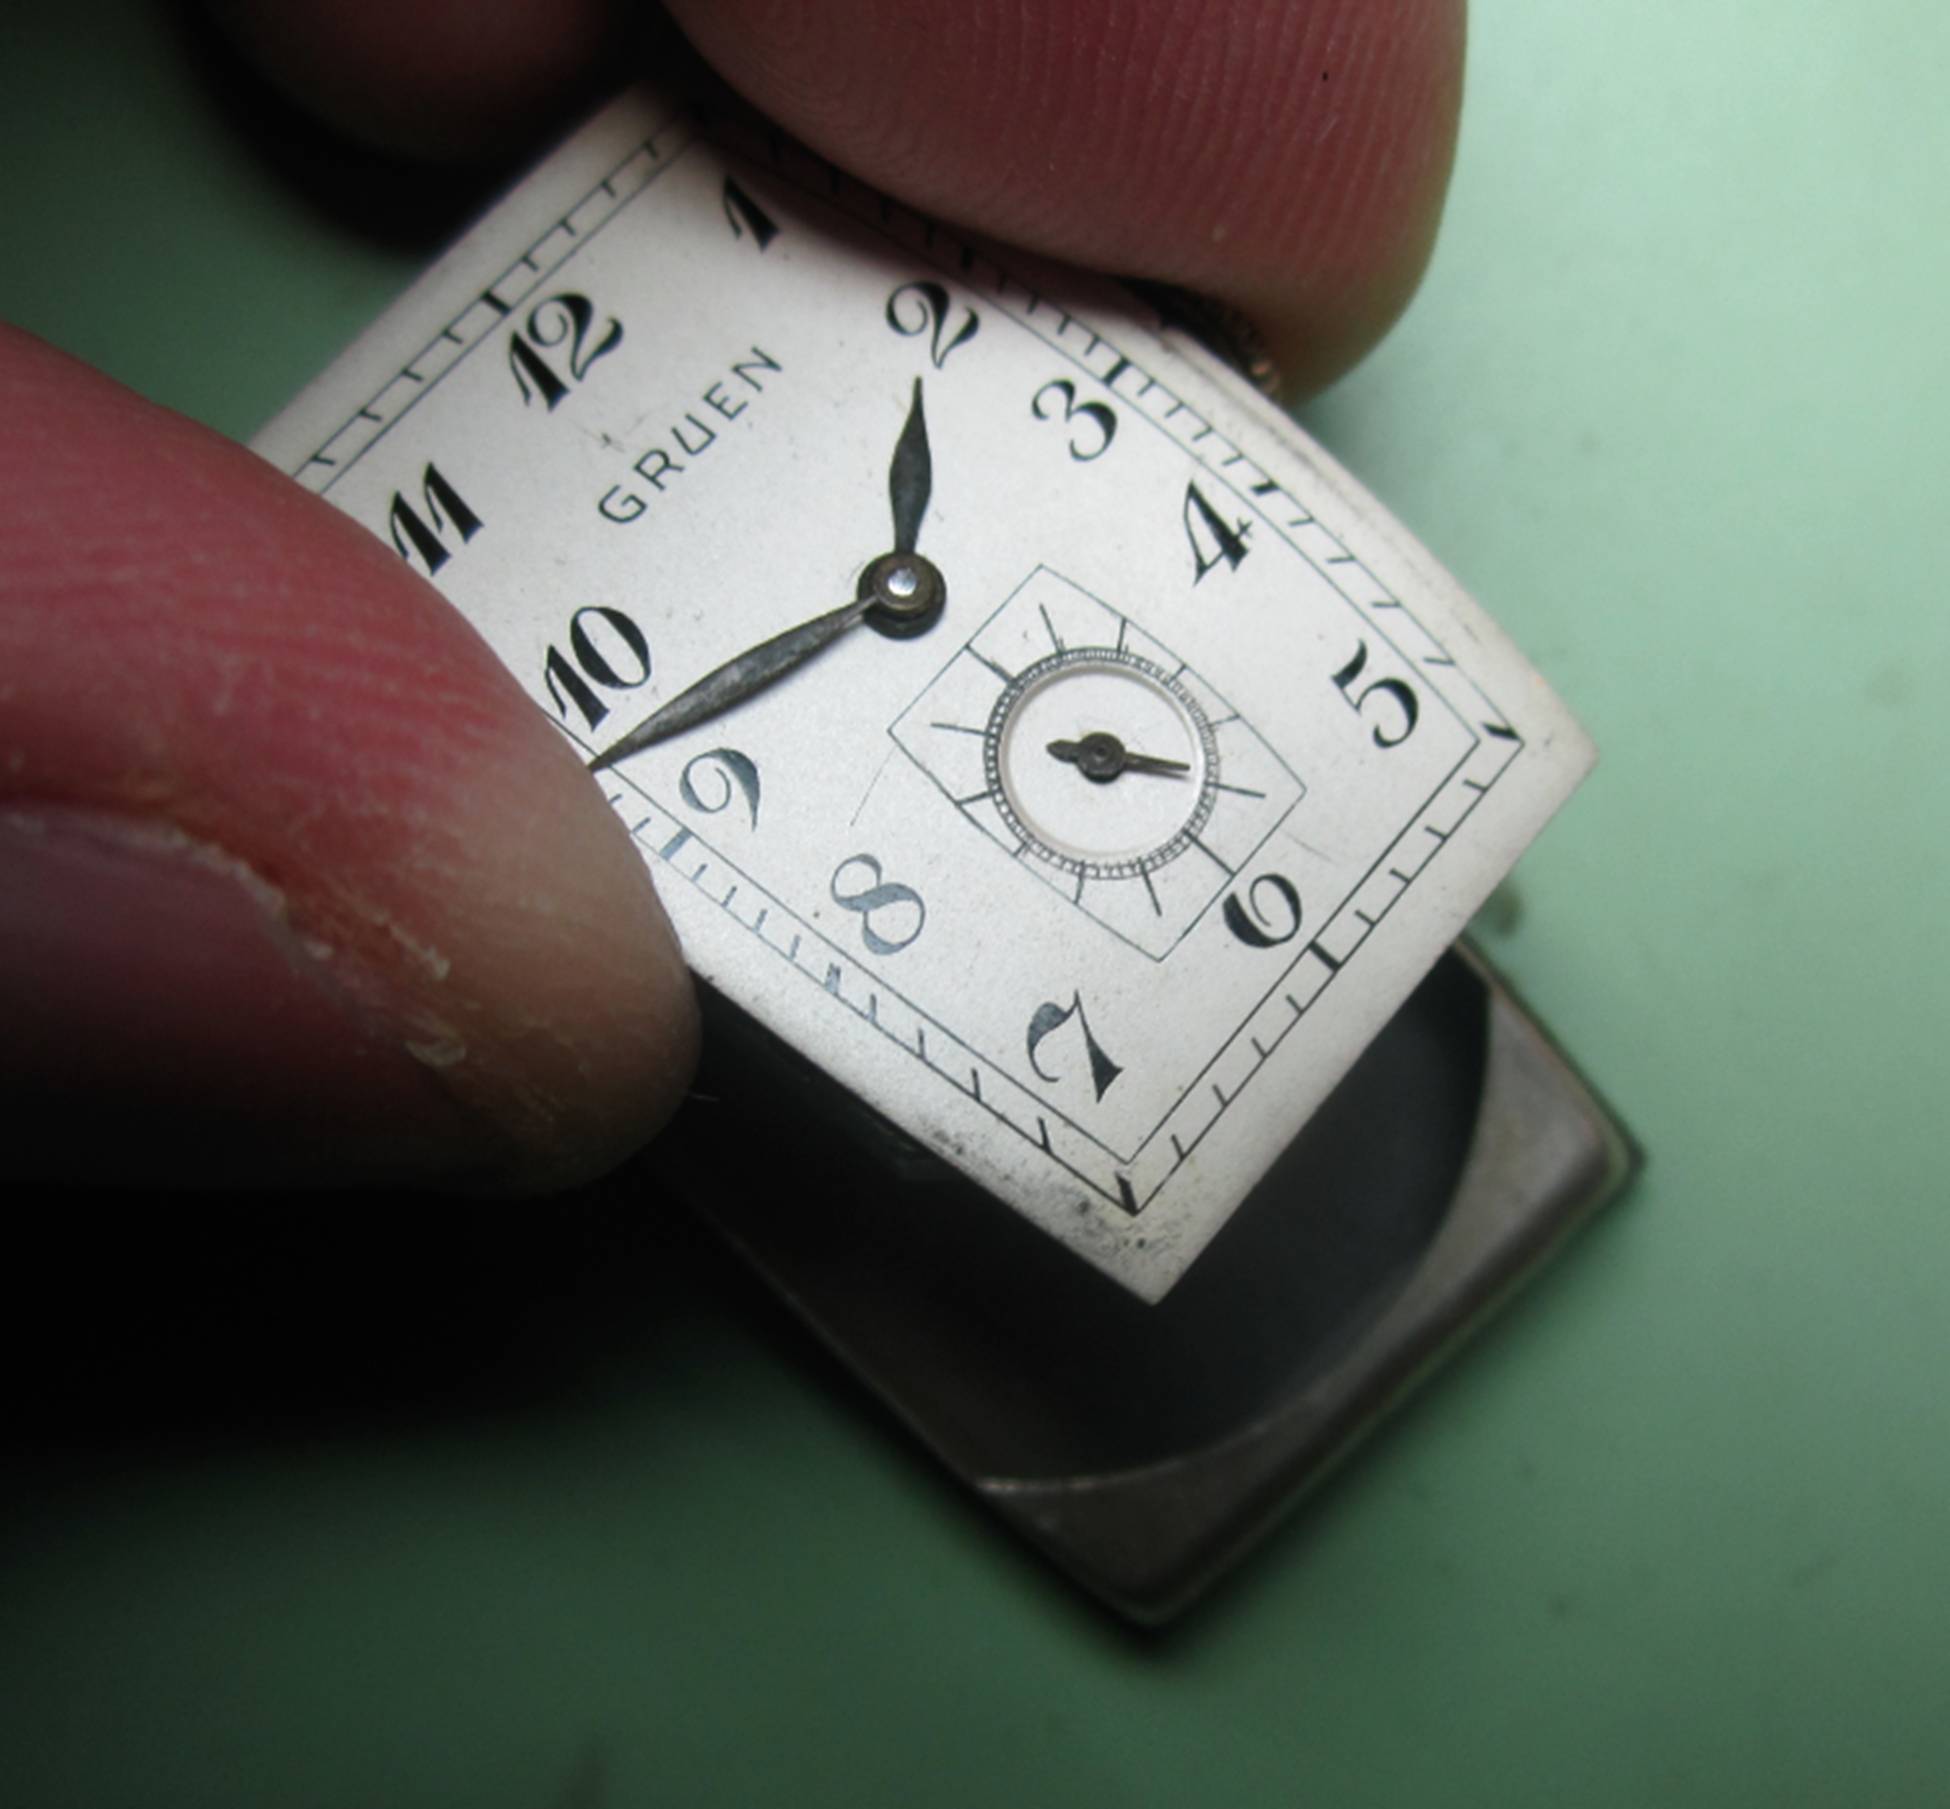
Once the movement is out, feel free to take a look at the magical little machine that is the heart of your watch. It’s a pretty amazing sight.
Just make sure you are holding onto the movement correctly. Here I am not holding onto it in a safe manner. Notice how my thumb is almost resting on the balance wheel. I could easily bend the wheel that way. However, even with my fingers in the position shown, it’s OK as I’m only touching the main plate of the movement, not the balance wheel. So don’t panic if when you pull the movement from the case your thumb or finger is near the balance. Simply adjust your grip to holding using the opposite sides.
When you’re done examining the movement, set it down on your work surface, flat, with nothing under it but the mat you’ve been working on. Just make sure it’s flat and you’ll be fine. Be especially careful with sweep second movements as they have a springy piece of metal that is the point of contact. As long as there is nothing applying pressure down onto the movement you’ll be fine.
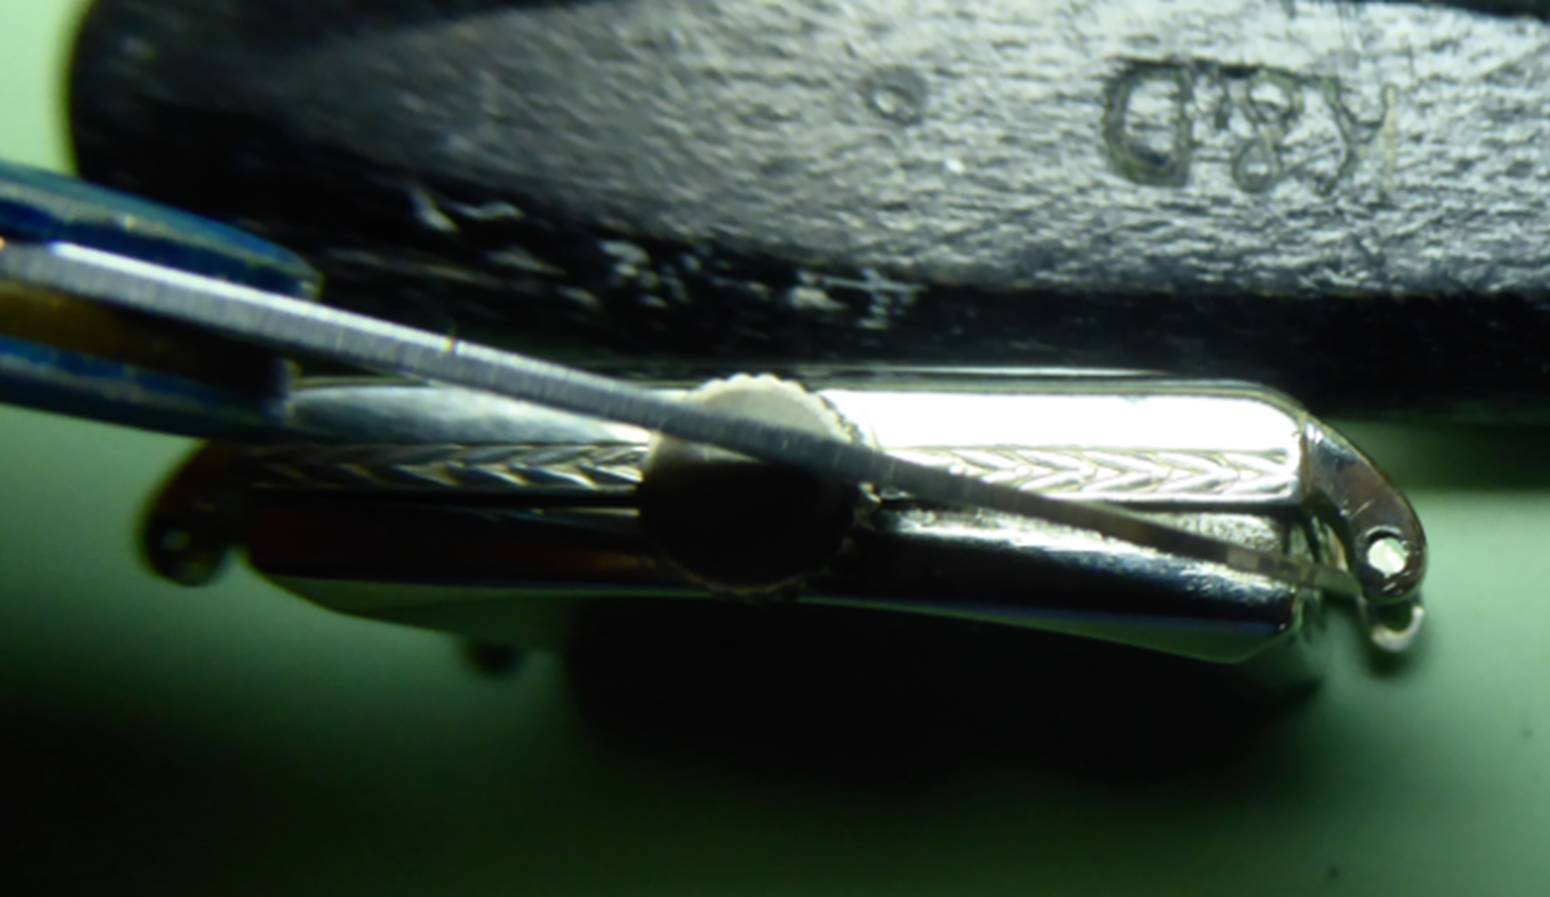
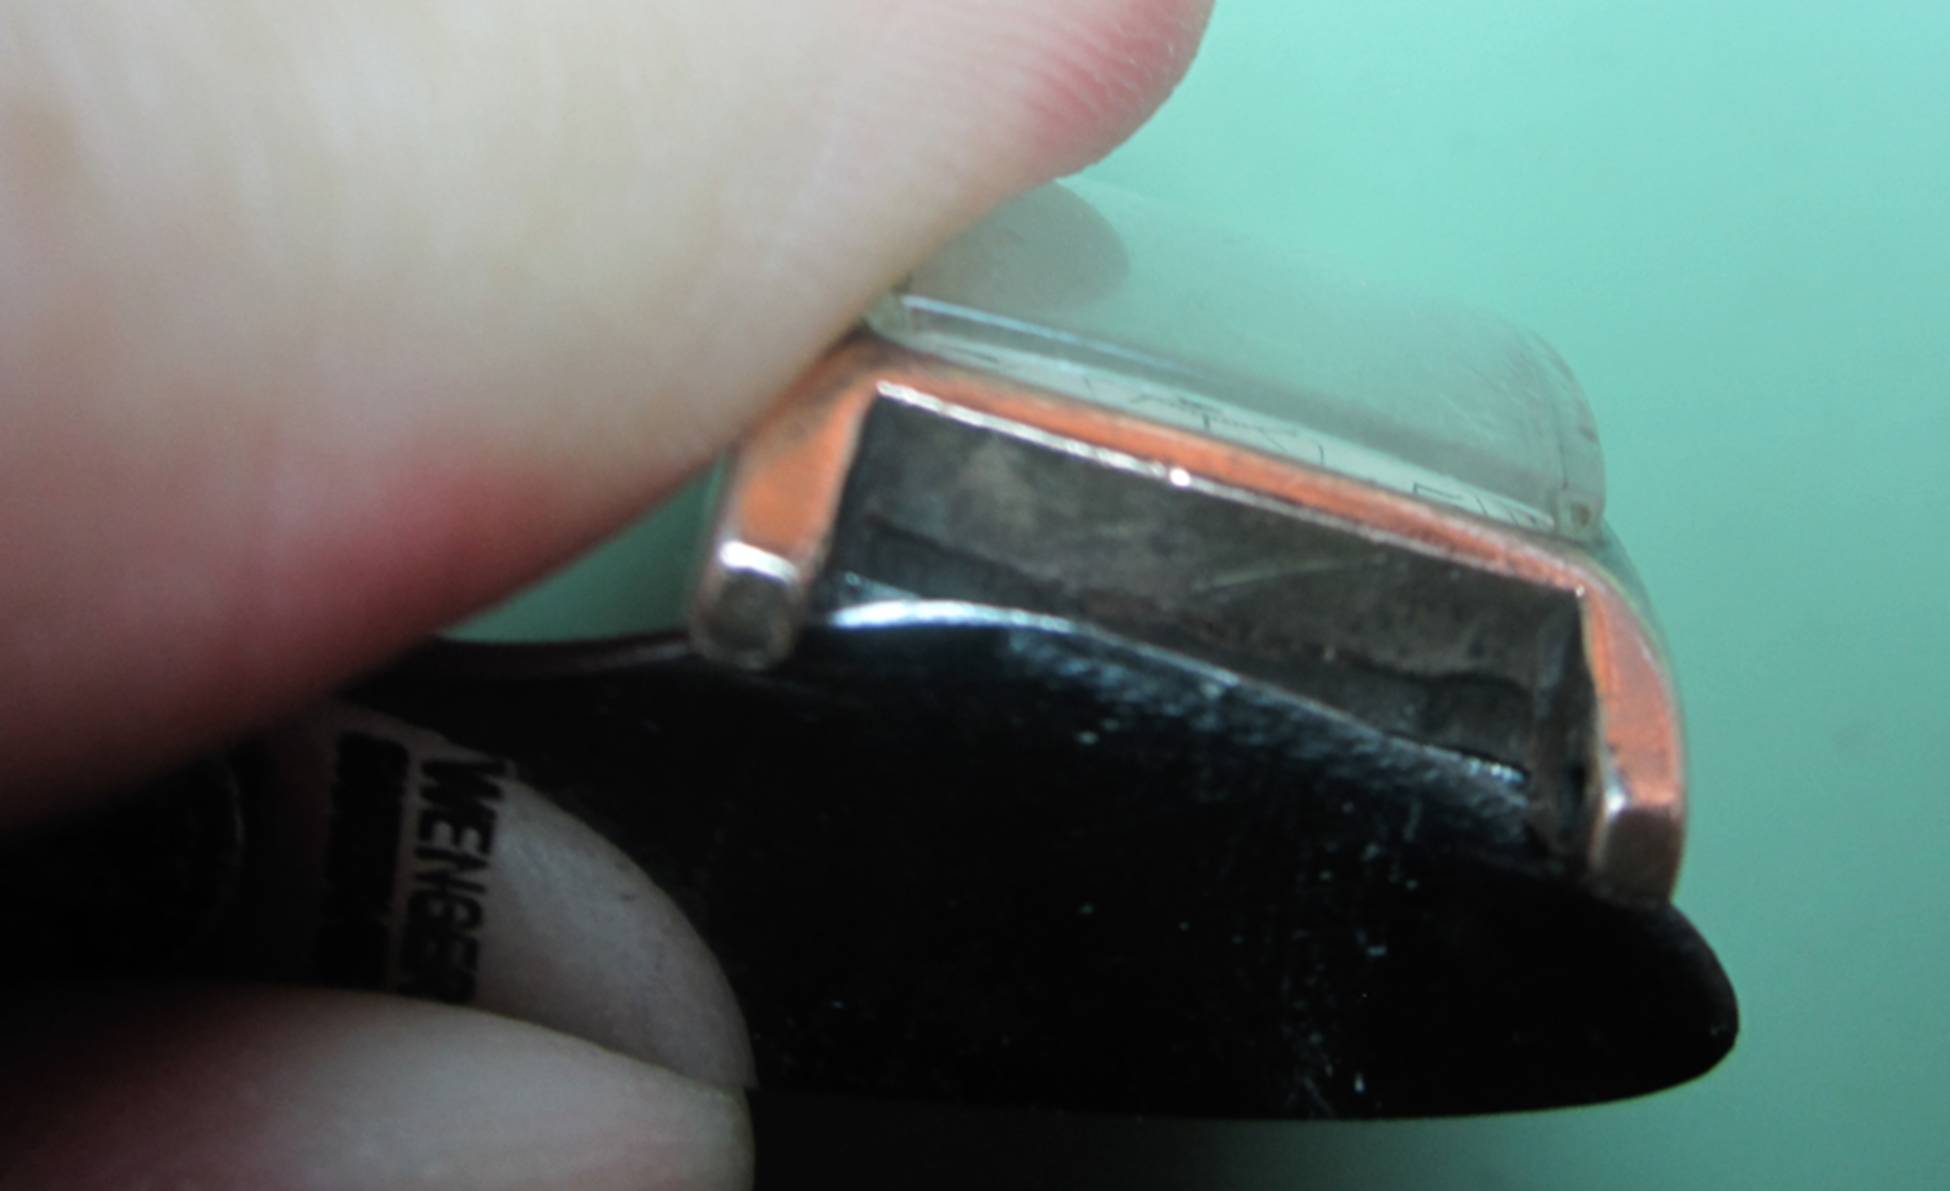
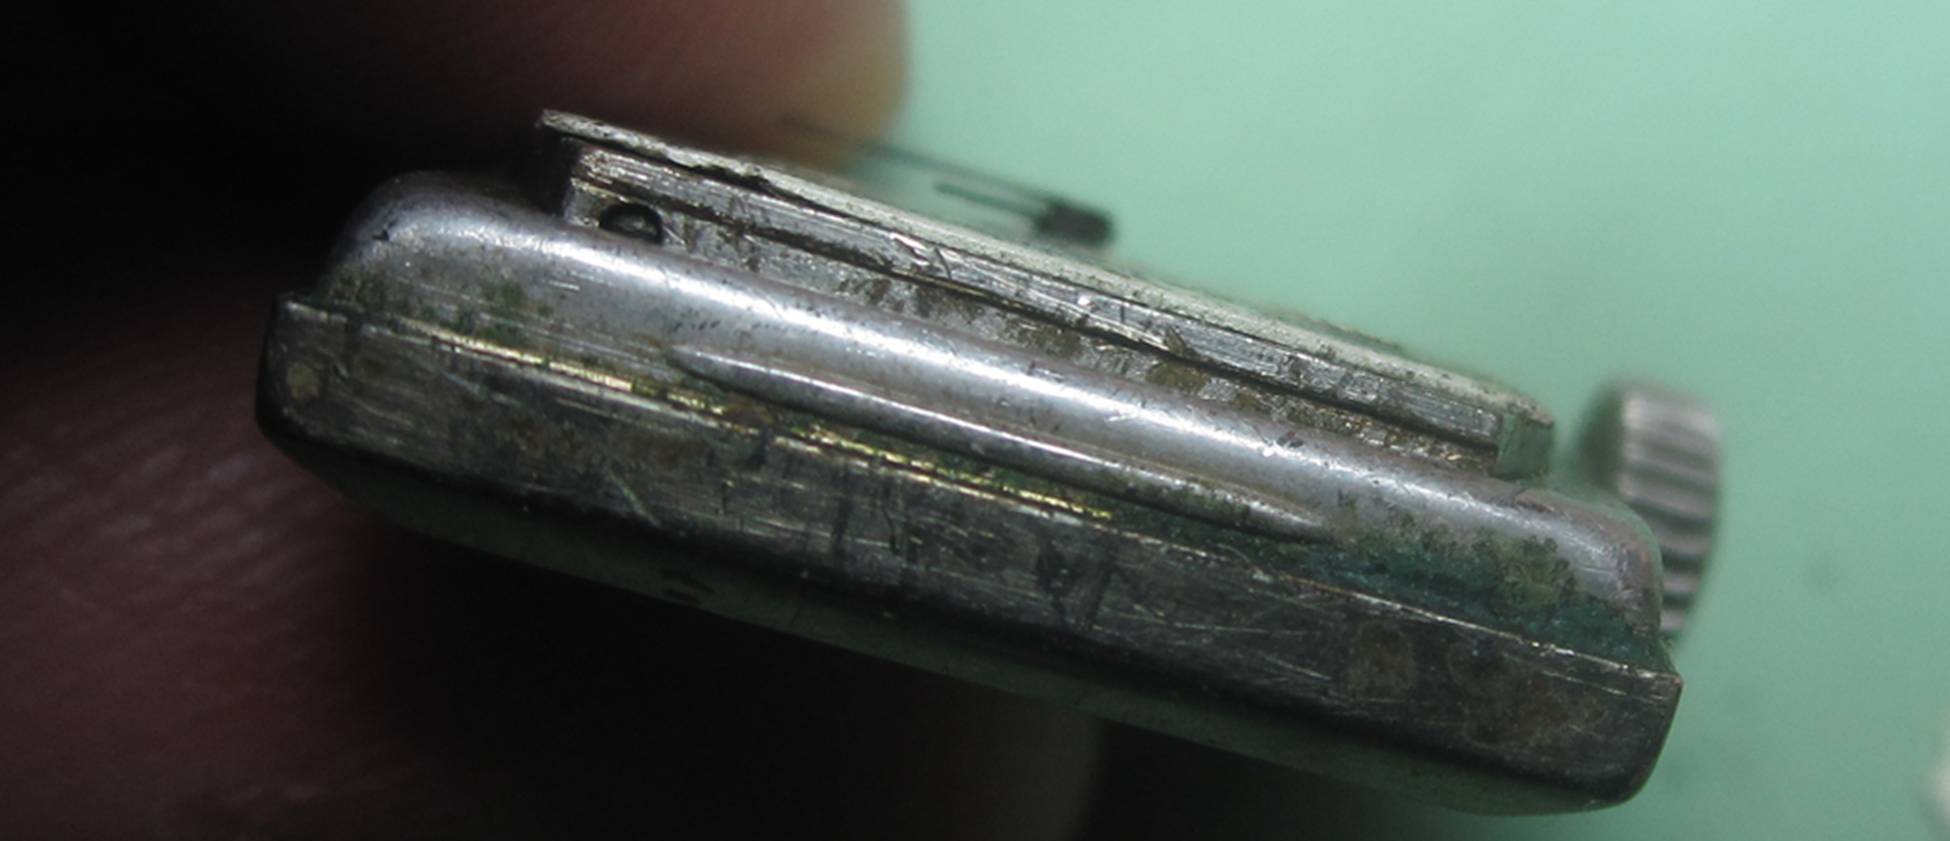
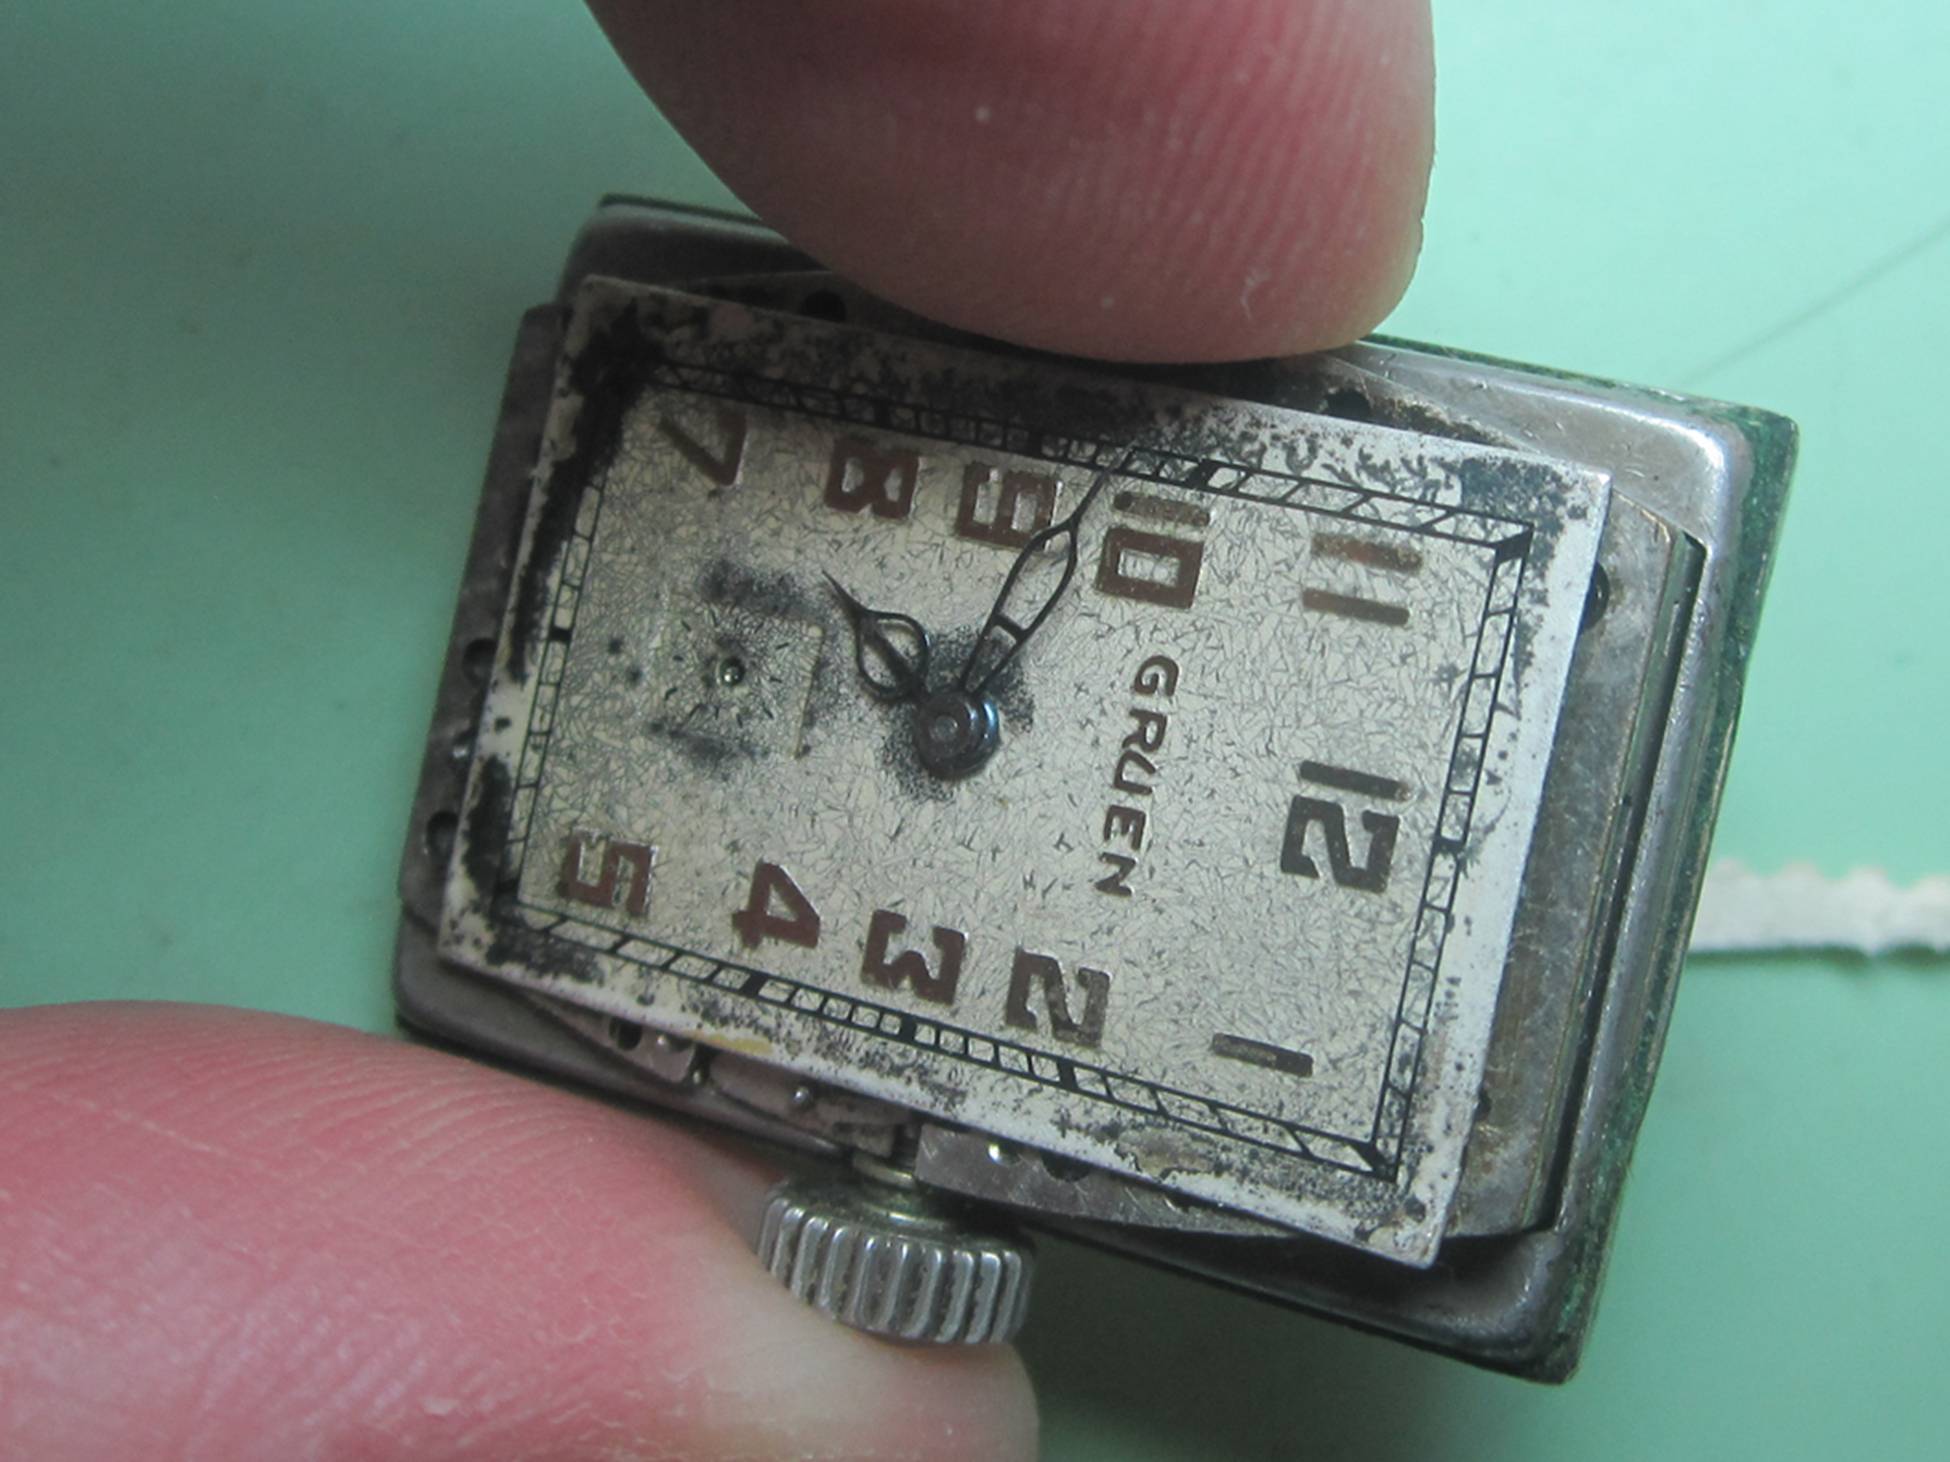
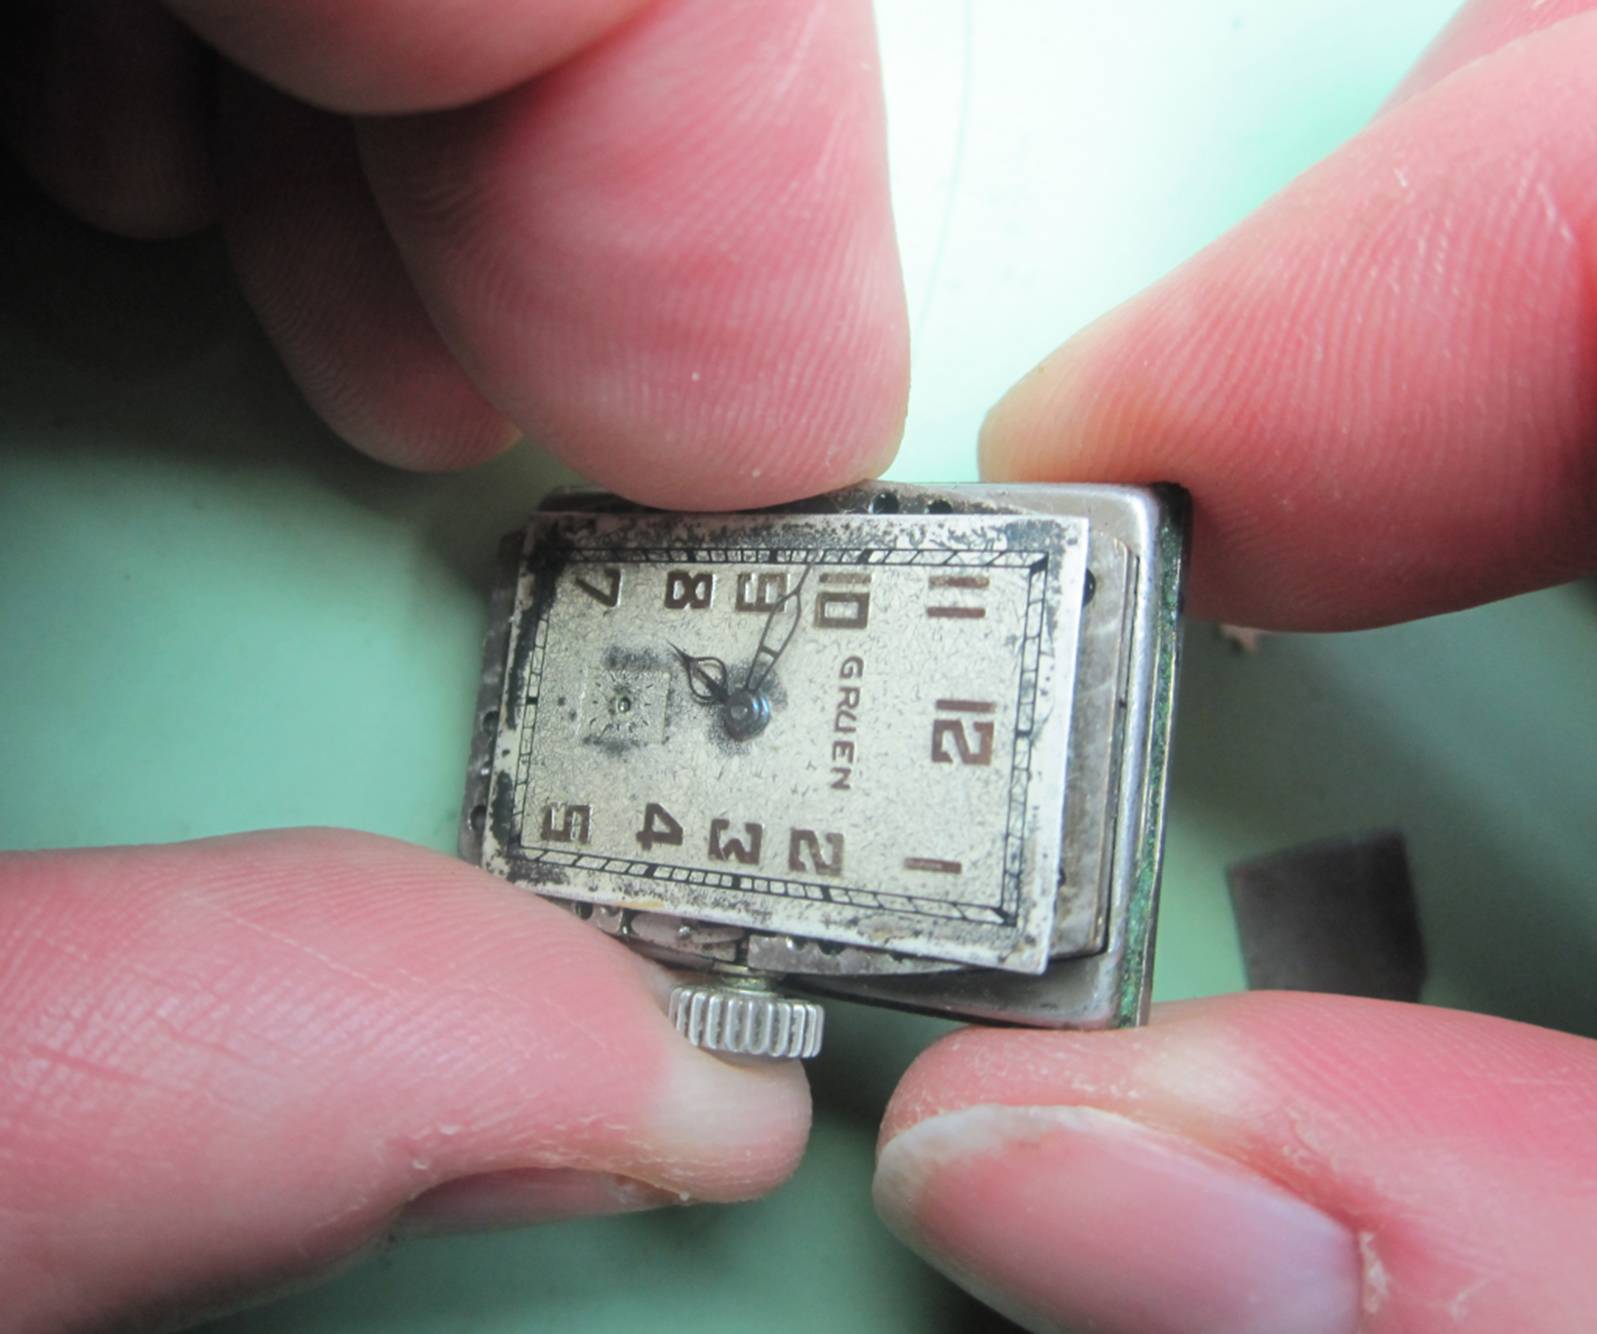
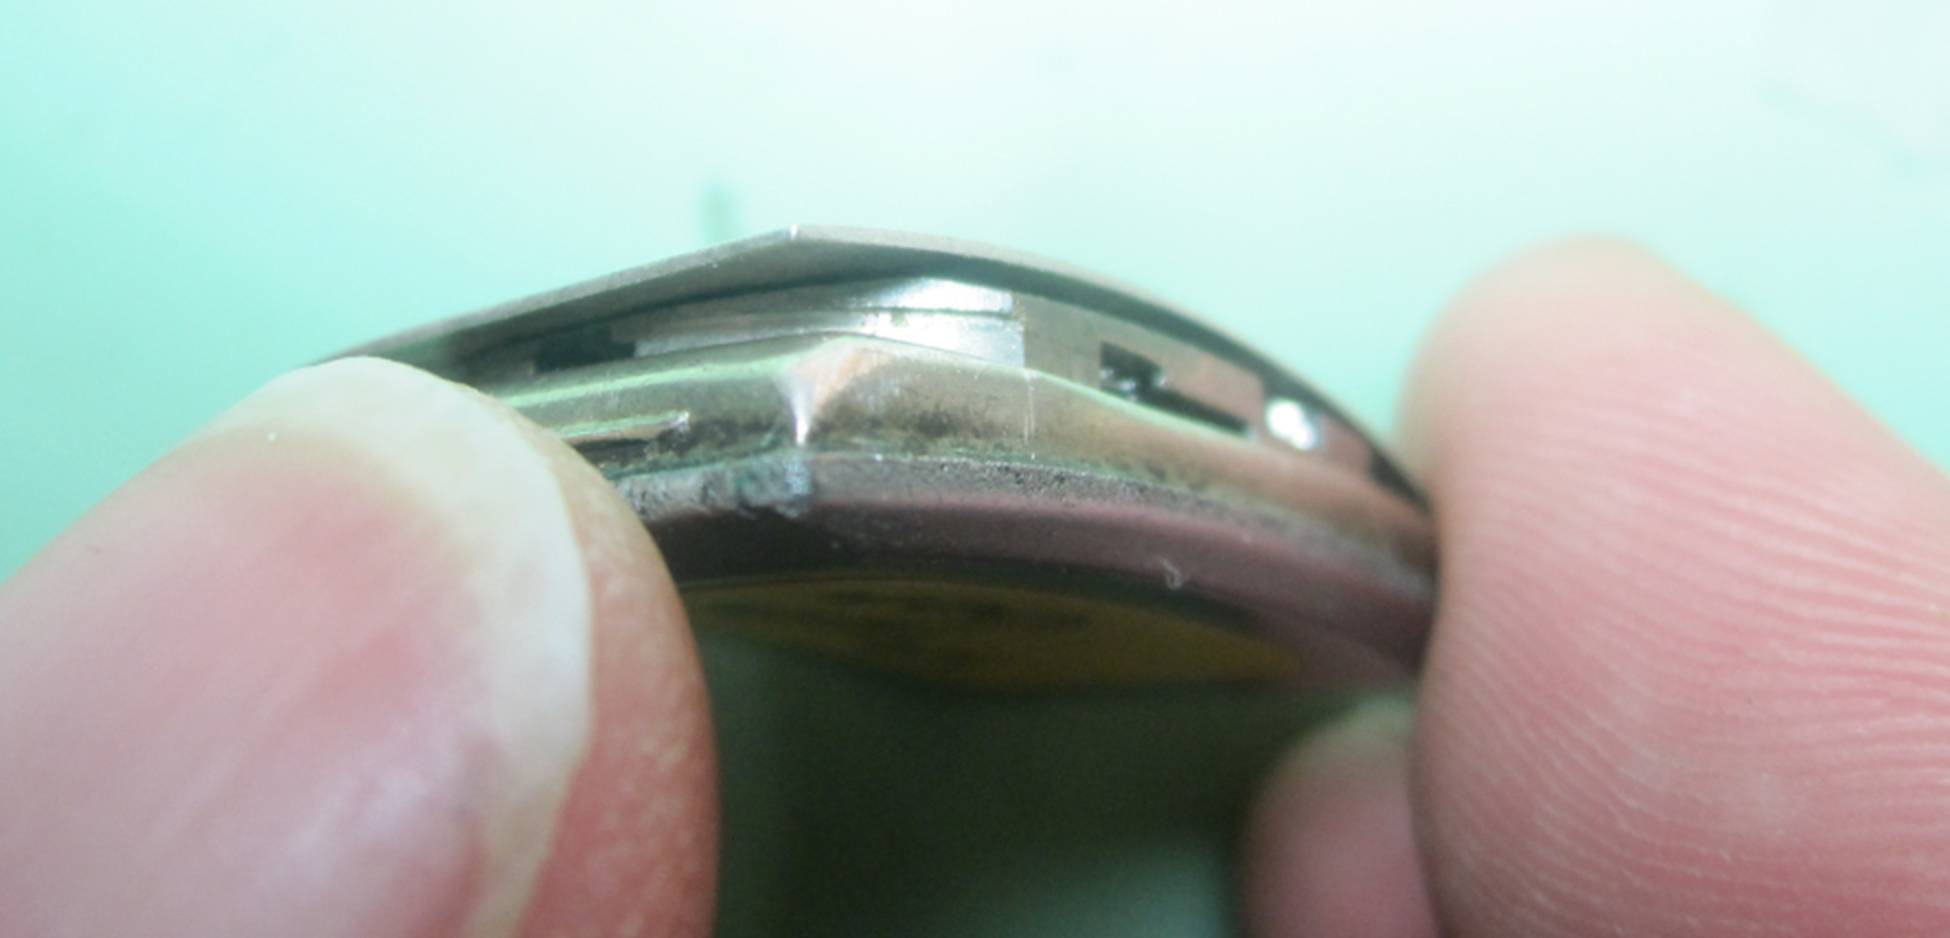
Now let’s take a look at that Princeton model that was my second example. It’s a little more difficult. When I examined the ends of the movement, I only see the dial, not the movement’s contact point with the case.
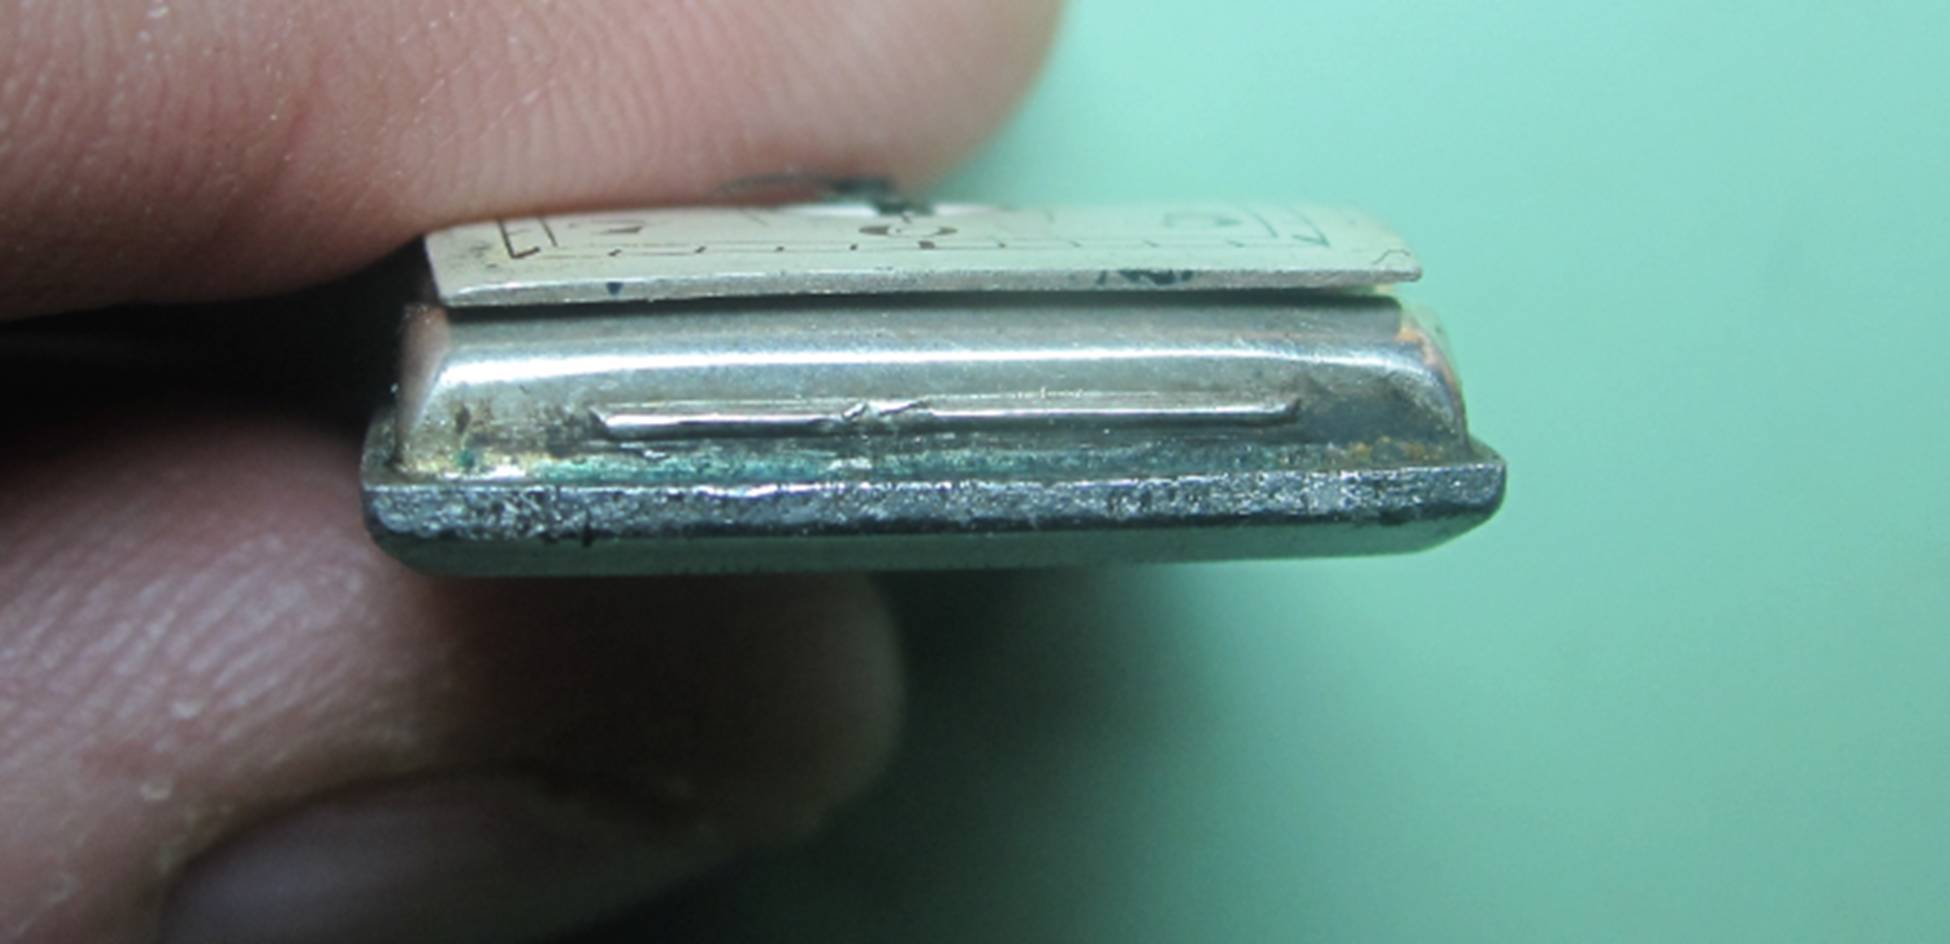
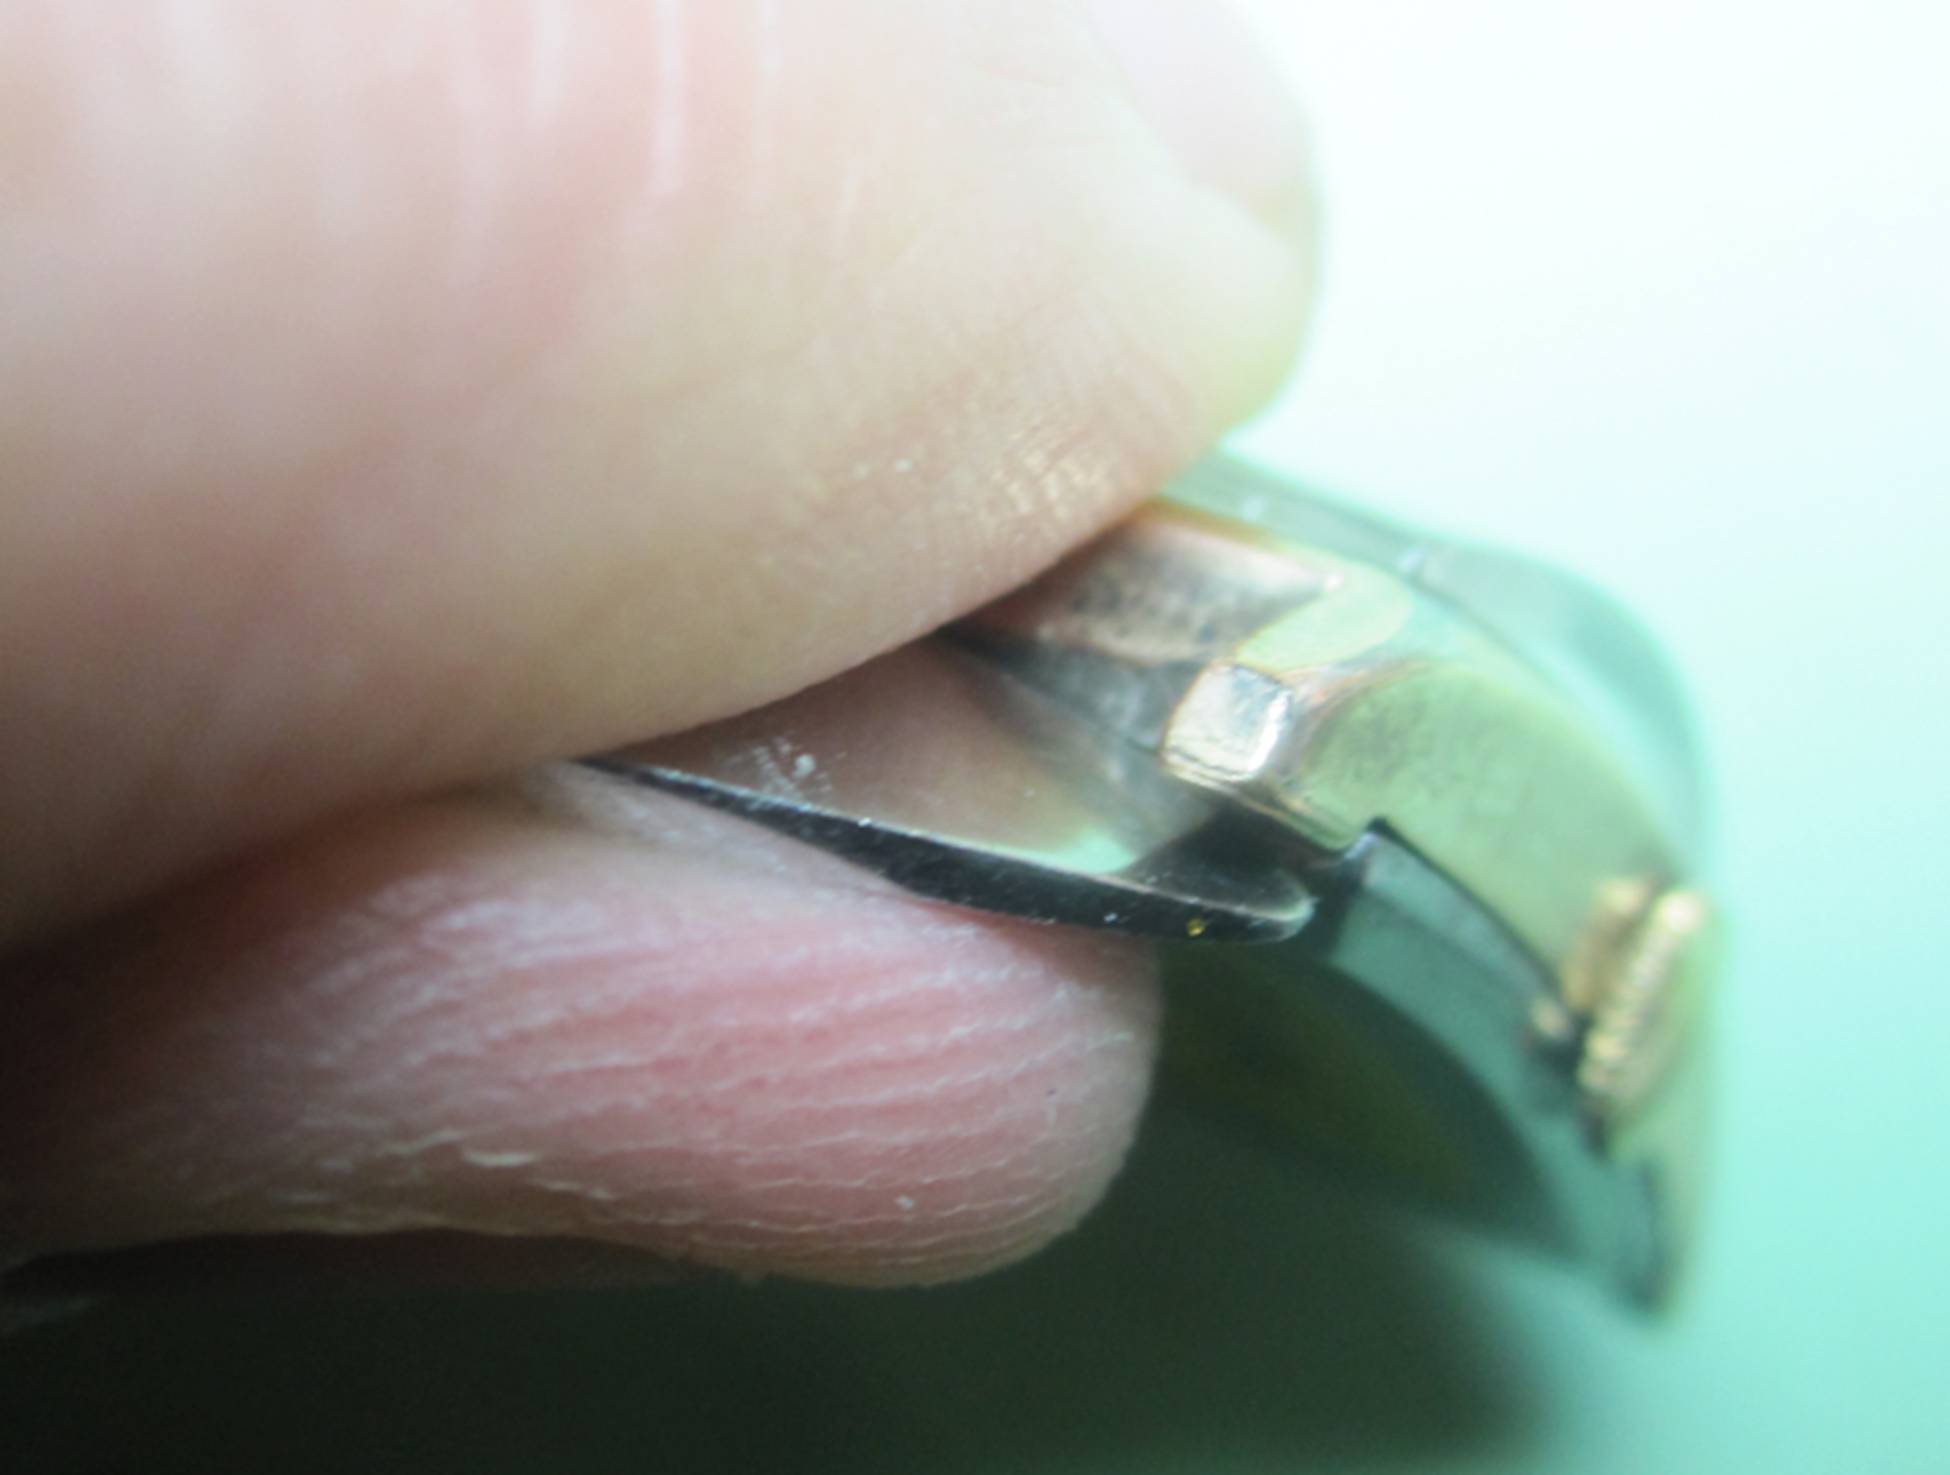
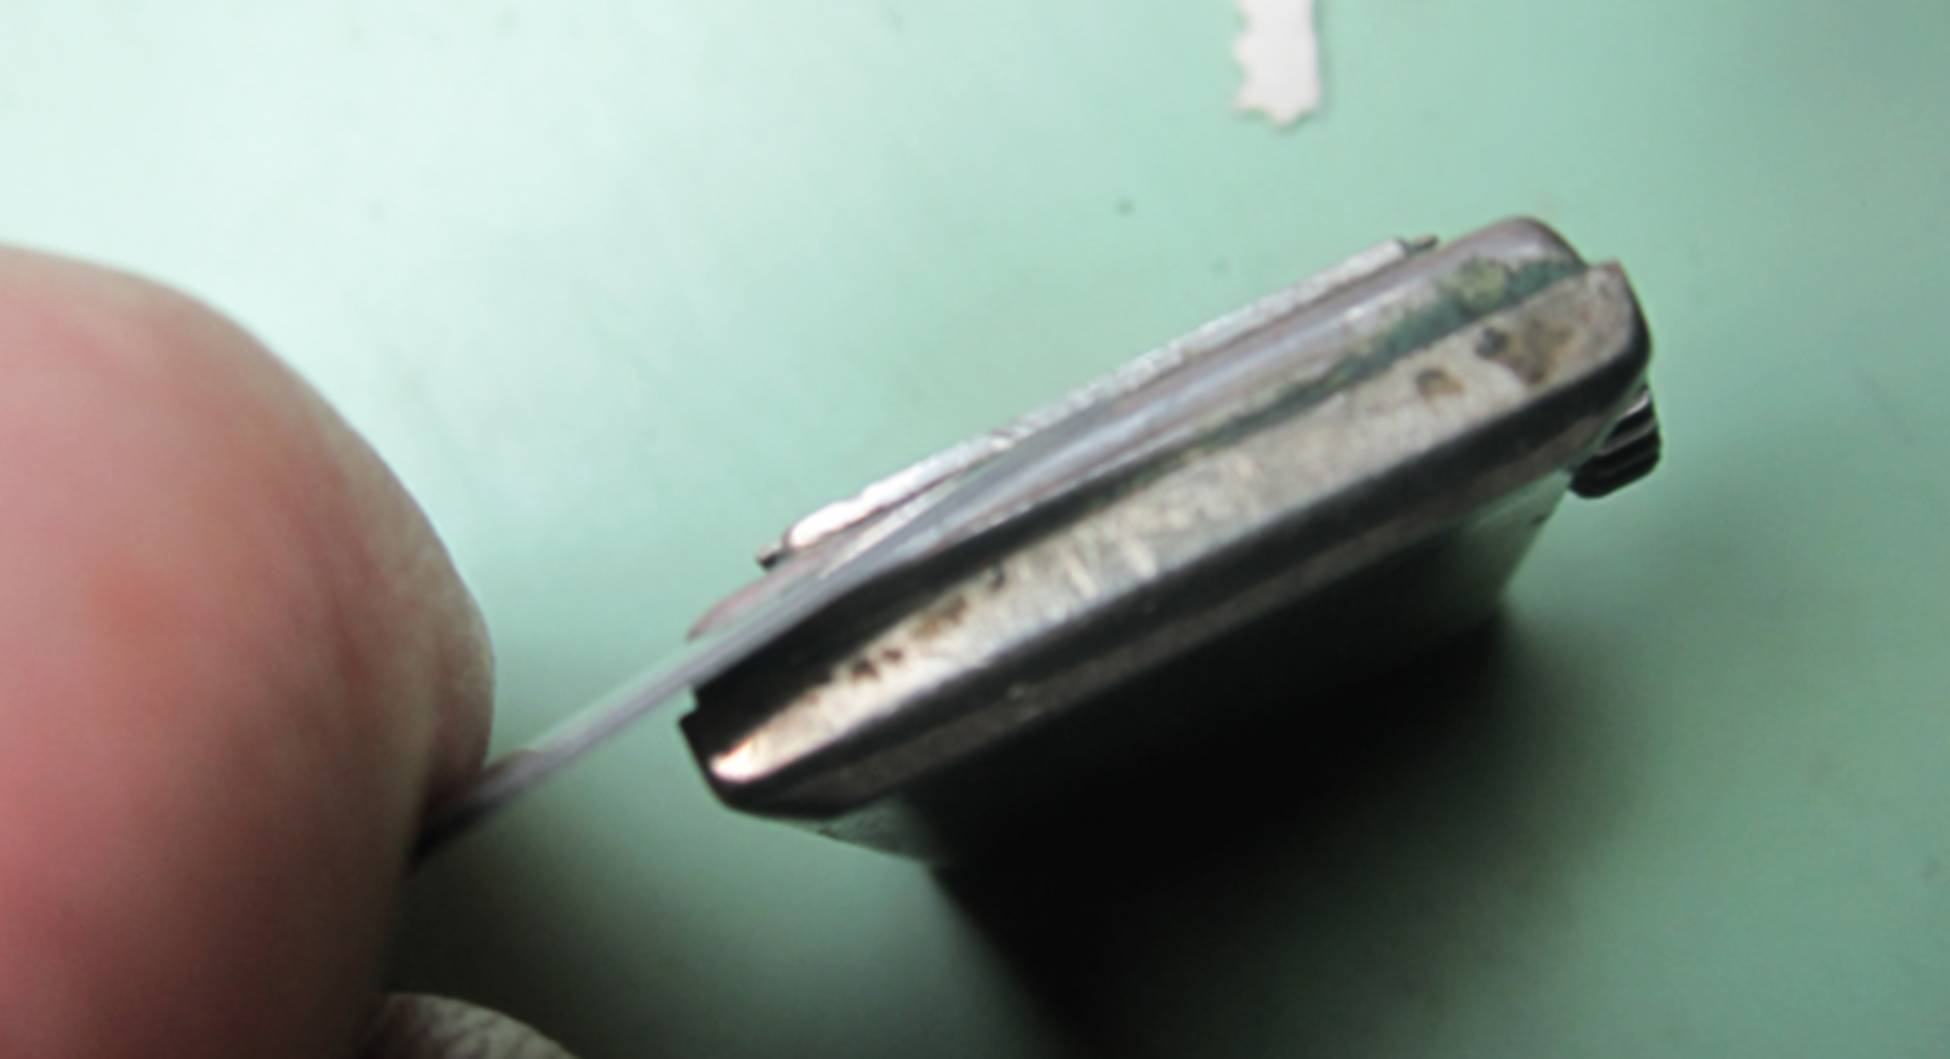
In these watches, look at the watch from the side rather than the ends. Then you can see where the movement is in contact with the case back. Removing these movements is the trickiest because of the potential for disaster. What you must avoid is placing your Exacto® blade between the dial and the movement. If you do place your blade in the wrong position and begin to pry up, you will pry the dial, and possibly the hands, right off the watch!
Here is the side view.
Use the side view to make sure you have the blade positioned correctly. Most movements have a lip on the ends of the movement. This is what the movement sits on when it is in the case back. It is the gap between the lip and the case back itself that you must get your blade into.
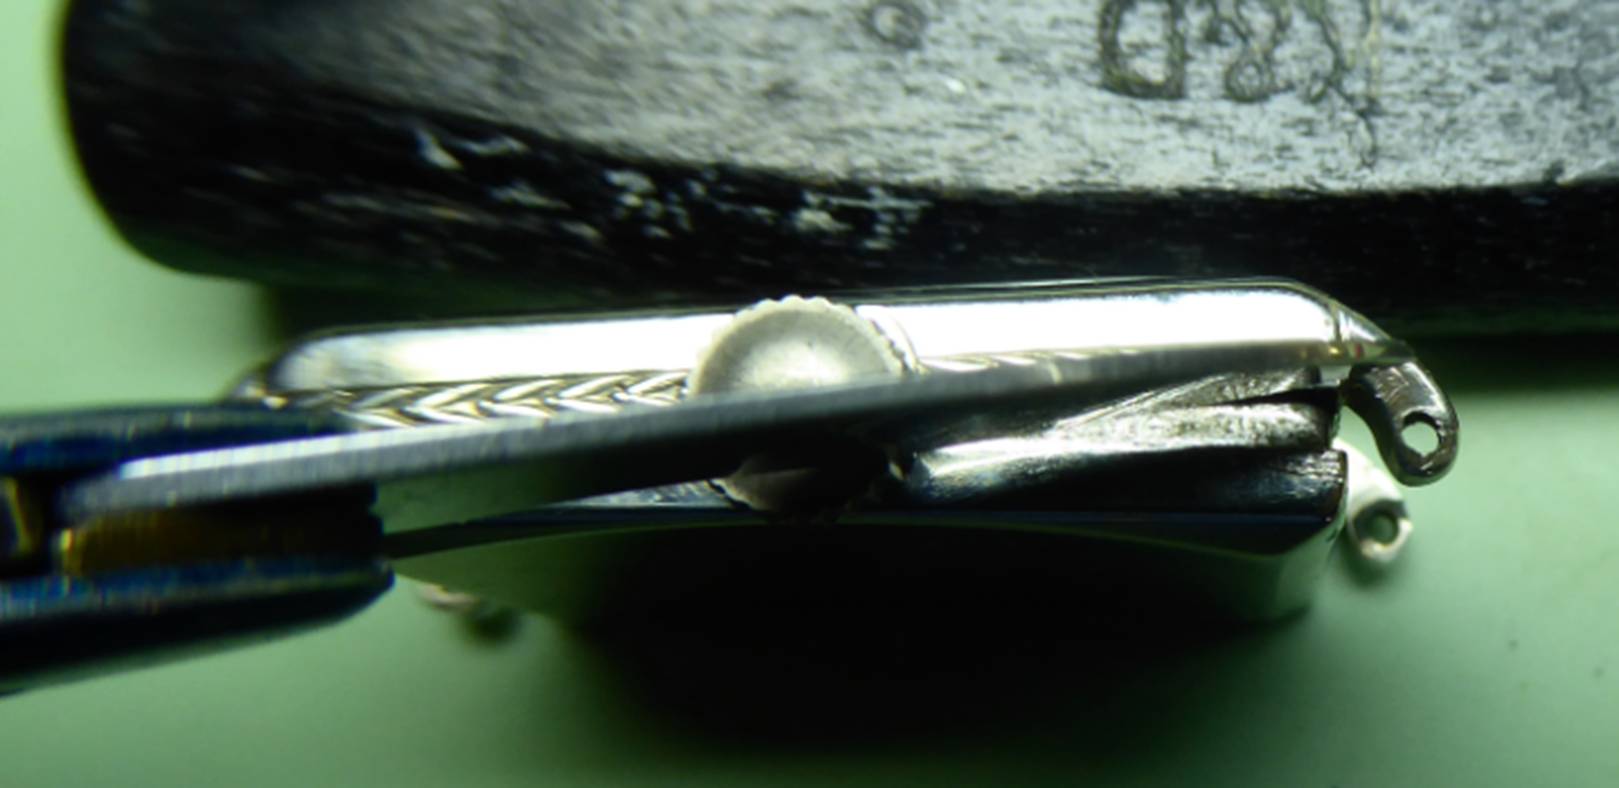
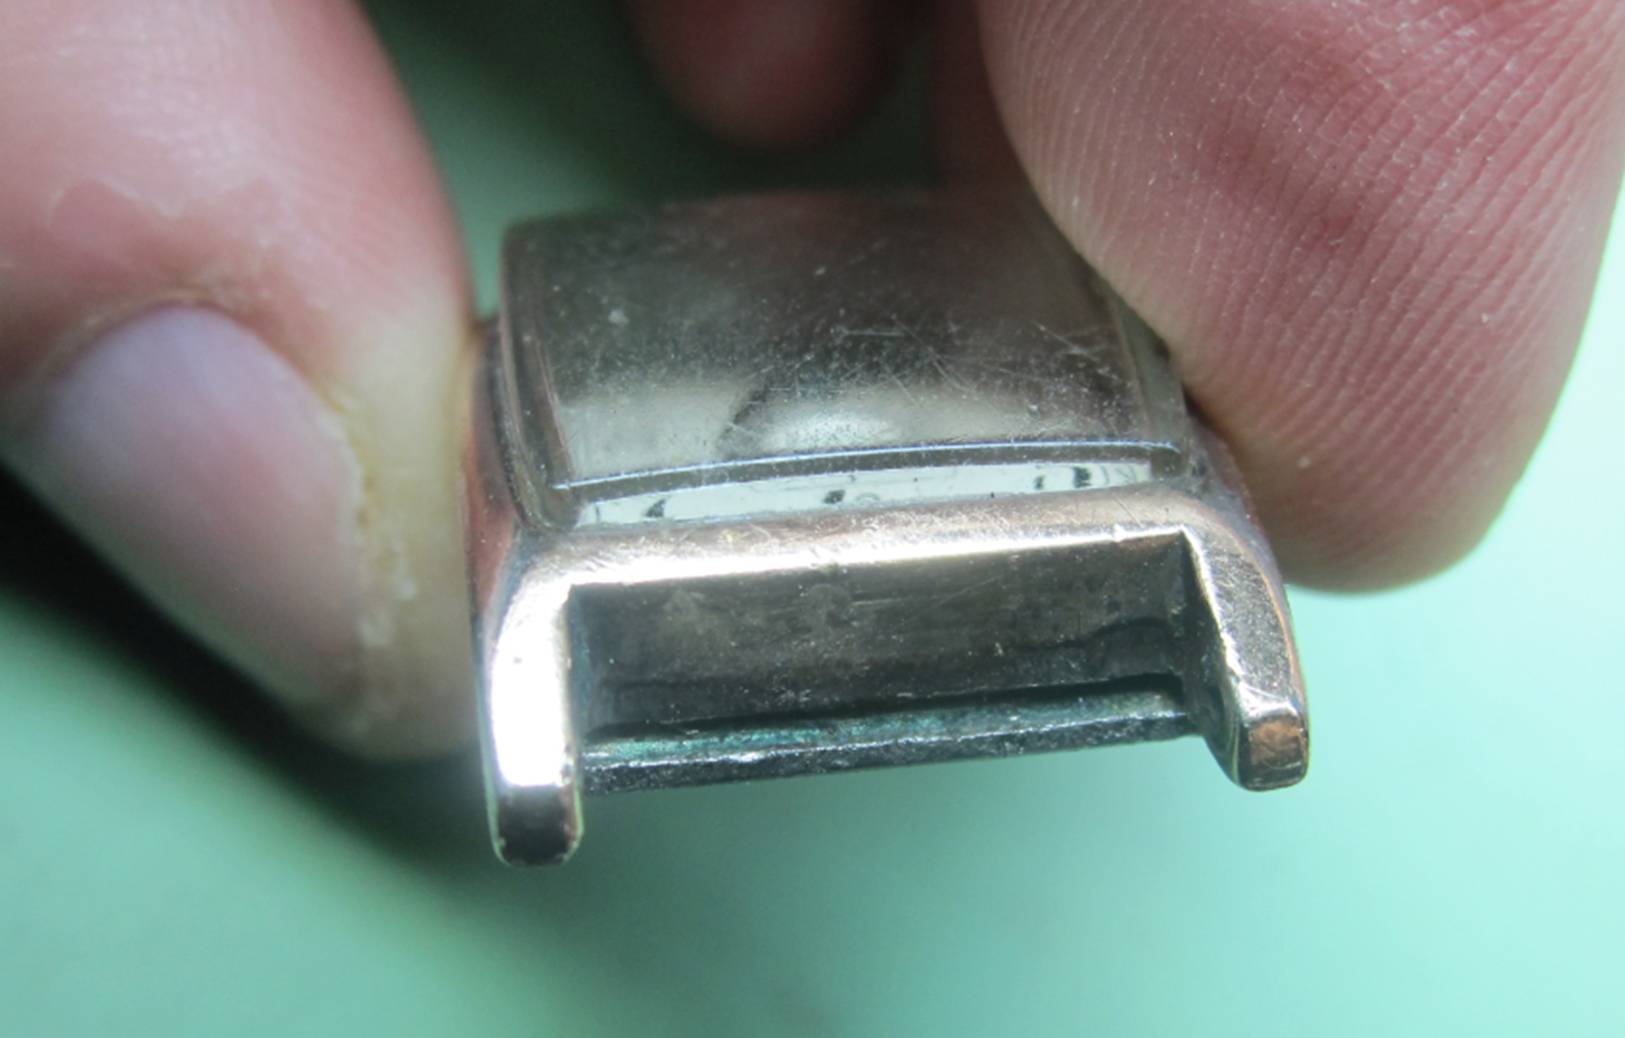
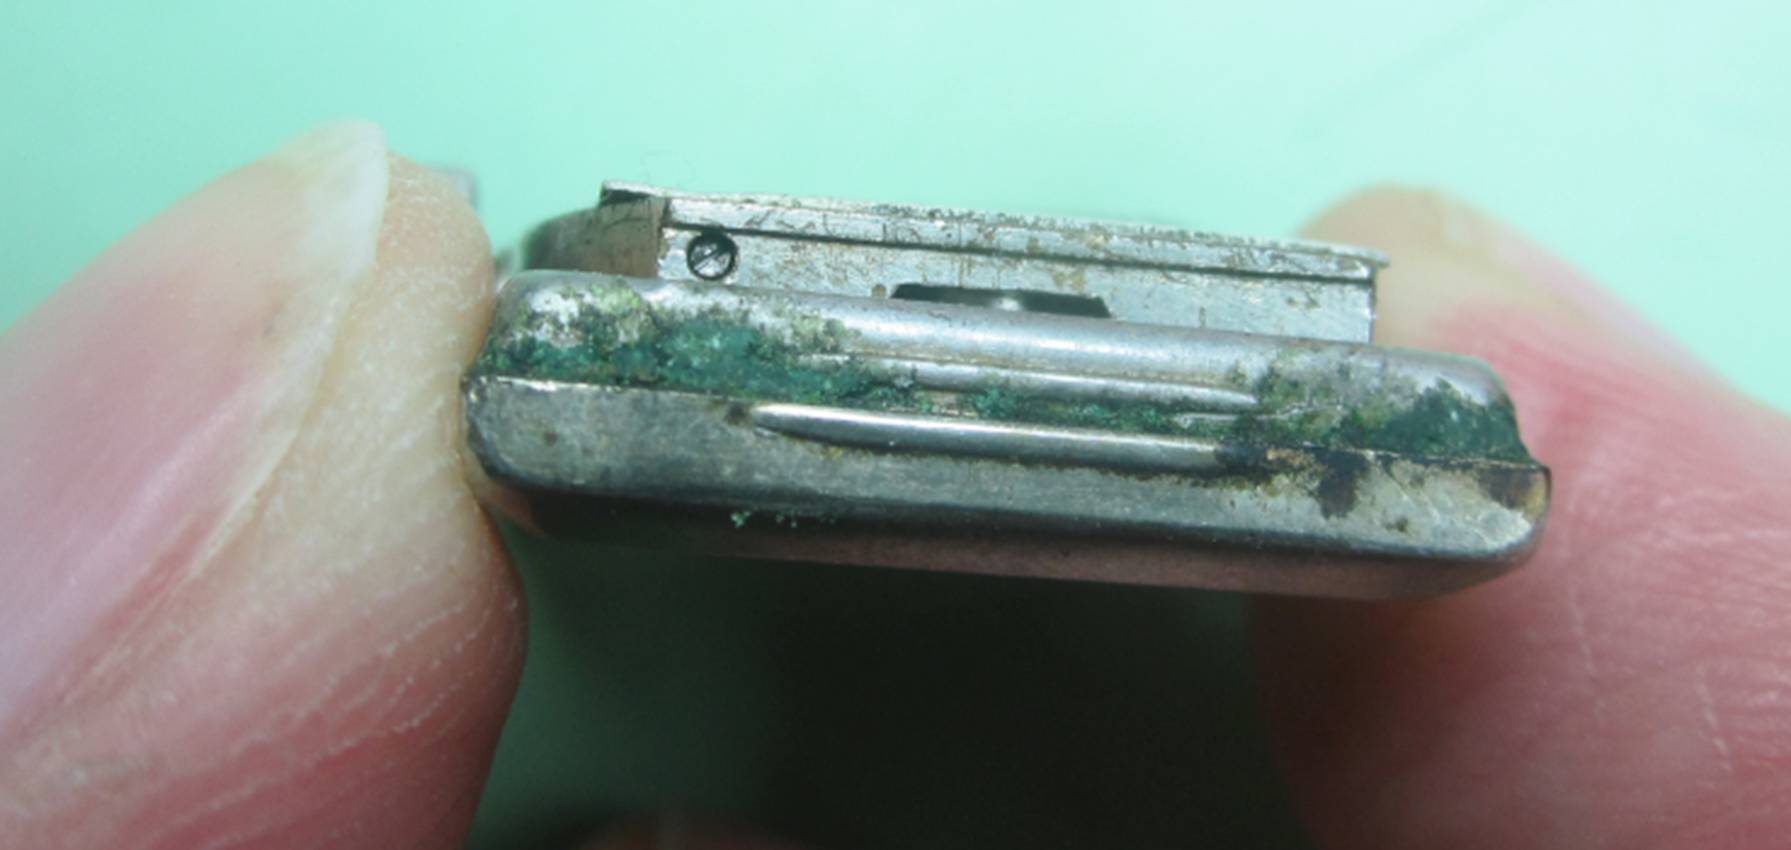
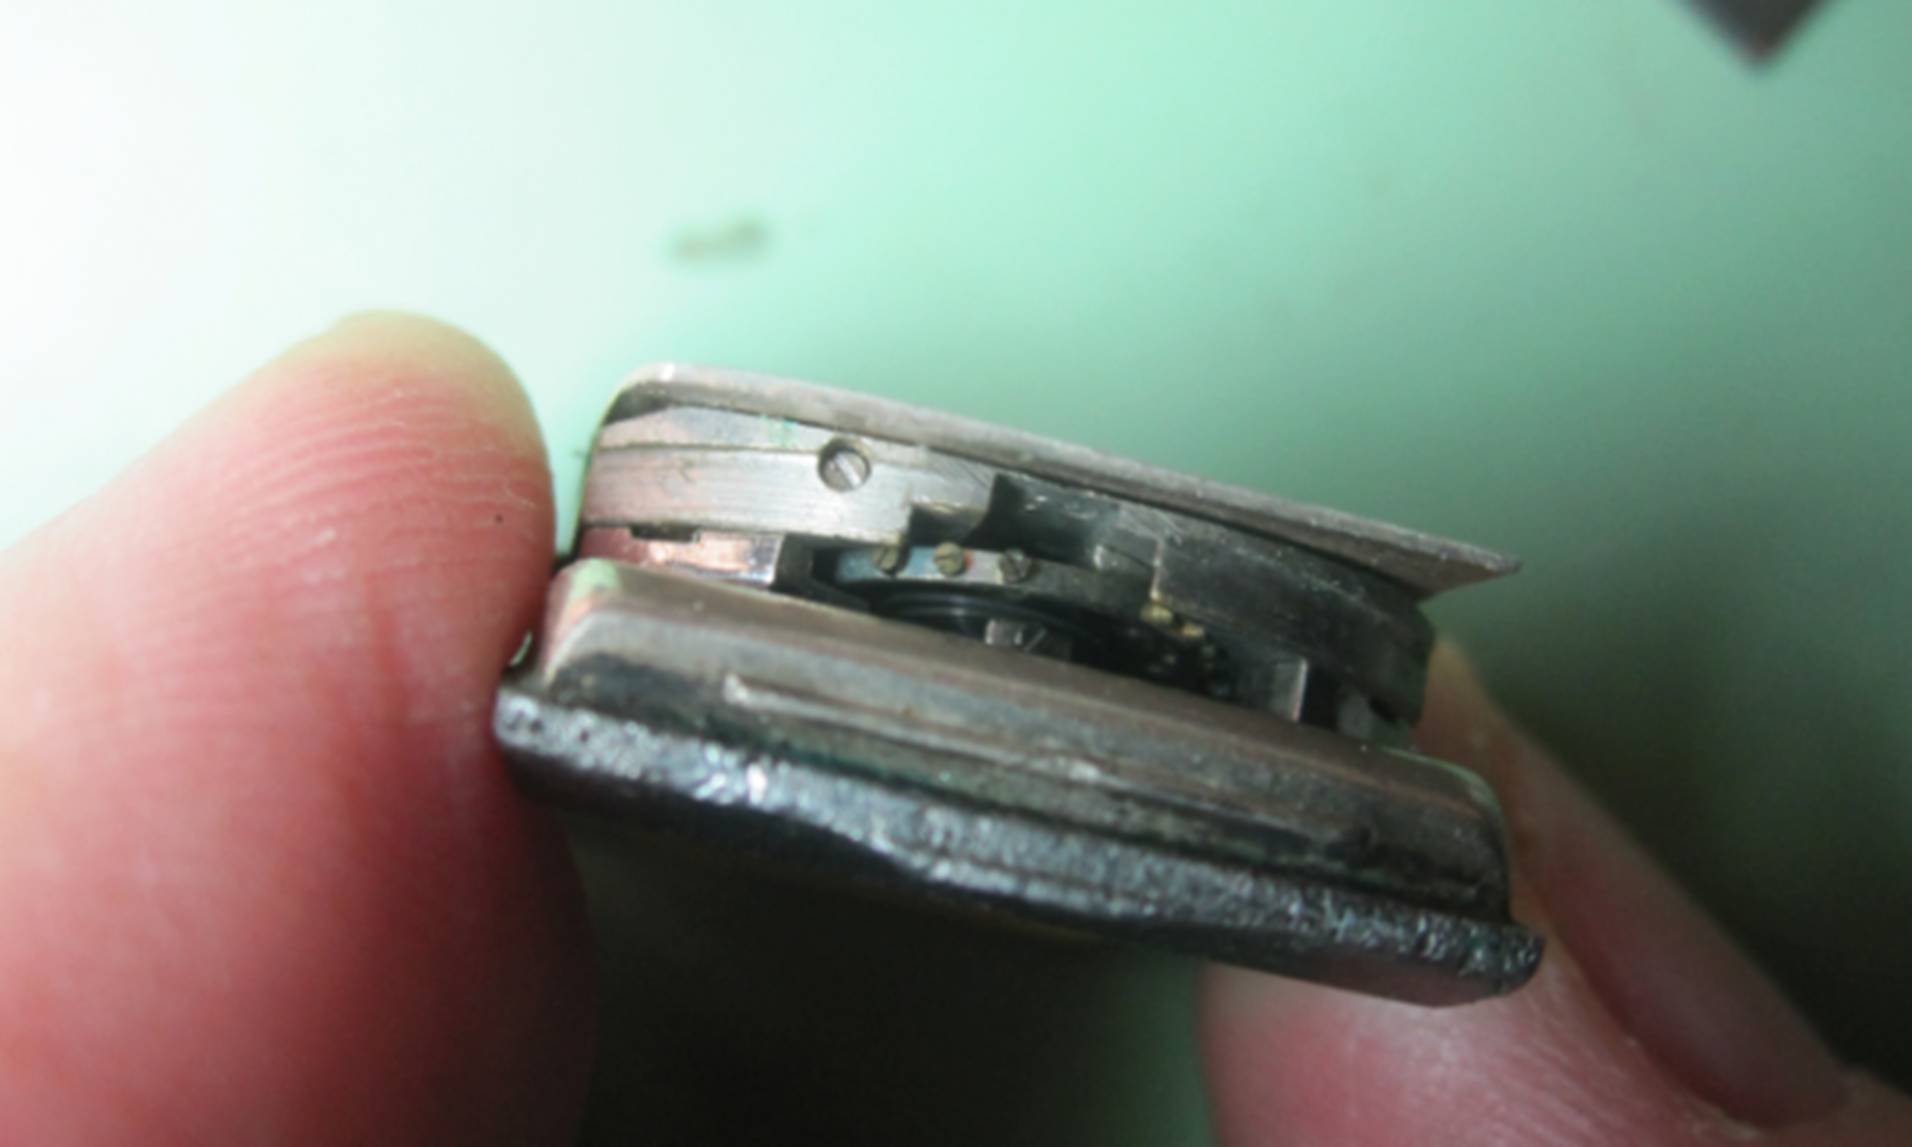
And this view is after I have pried the movement from the case. You can easily see the lip on the movement.
As I worked the movement from the case, I quickly noticed that the balance wheel is located at the end of the movement. This is why you want to make sure to use the length of the blade to pry the movement from the case, not the tip of the knife blade.
Step 8 – Goal reached! Finally able to get to the data in the case back
With
the movement removed from the case, you can finally read the data contained in
the case back that can help you date your watch and even figure out the model
name.

If you’re seeking help, you want to record the following bits of info:
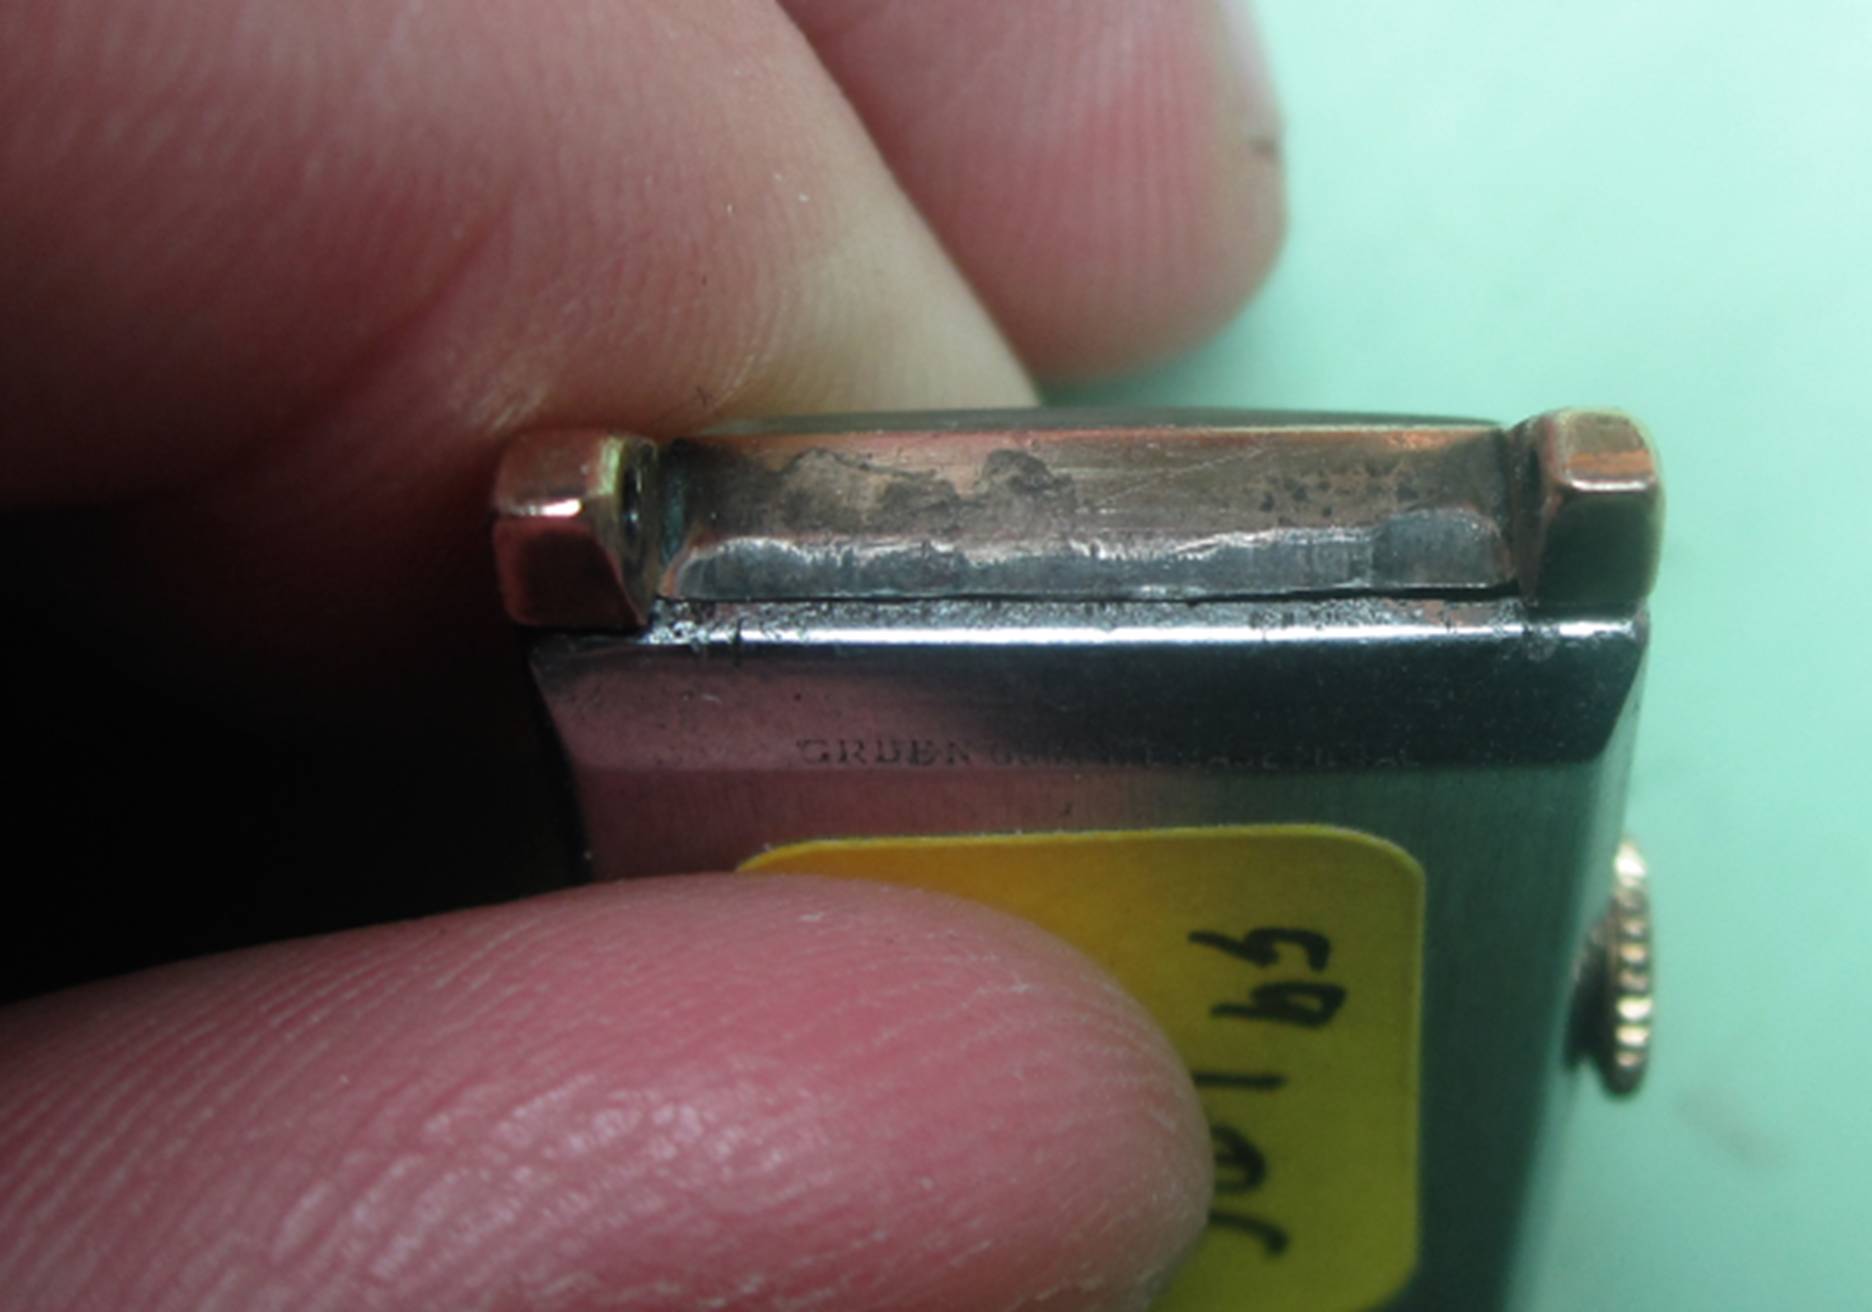
Cased and timed in U.S.A. by the Gruen Watch Co.
10KT Gold Filled Bezel
364/400
4794959
Step 9 – Do something with your data
You presumably were looking for the data in your Gruen watch for a reason and that reason was probably to find out the year your watch was made and maybe even the name of the watch. If you were getting help in finding more information about your Gruen then you should pass on all of the data you recorded to the generous person / people offering to help.
Perhaps you have started to do your own Gruen research. The Gruen Style Number Dating article located on the www.GruenWristwatches.com website will help you decipher the information you see.
Without going into great detail about Style Numbers, the numerical pair 364 / 400 is the caliber and Style Number for this watch. This watch has a caliber 400 movement in it so the Style Number is 364. A Style Number of 364 dates the watch to 1938. Looking in the Gruen Watch Identification Guide Volume 2 you can find an ID for the Princeton for the year 1939, a year off from the Style Number estimate.

Some watches have a unique Caliber / Style Number pair and can thus be used to identify the watch just using those numbers. For the Princeton, it is known to have a unique pair of 364 / 400.
You can find tutorials on identifying your Gruen watch on the GruenWristwatches.com site along with books about Gruens and lots of free reference and interesting information about the Gruen Watch Company.
I hope you’ve enjoyed tearing into your watch. I’ll leave it up to you to put it back together : - ) I sincerely hope nothing bad happened along the way. If something did, well, don’t look at me, I warned you.
Copyright © 2015 Mike Barnett – Edition 1.1 - All rights reserved. No re-use or distribution, in any format is implied nor granted.